
We will start assessing clients a finance charge on unpaid work at the end of the year. How can we configure this?
In order to apply a finance charge, you must first enable finance charges in Customization, and then configure the clients.
To enable finance charge in Customization
- In the Quick Launch, search for and select “Customization.”
- On the Rates tab, in the Finance Charge section:
- Select the Assess Finance Charge check box.
- Select the Subject to Finance Charge check box if you will also be charging a finance charge on any unpaid finance charge (compounding).
- In the Rate 1 – Rate 5 fields, enter the desired annual percentage rate(s).
- Press Ctrl+S.
To configure clients to be assessed a finance charge
- In the Quick Launch, search for and select “Change Client Options.”
- On the Client tab, enter the range of clients that you want to assess a finance charge. Alternatively, click the Multiple button to enter multiple Client IDs or multiple client ranges.
- On the Billing tab, click the Select button, select Assess Finance Charge, Finance Charge Rate, Finance Charge Days, and Apply Payment to Finance Charge, and click OK.
- Select the Assess Finance Charge check box.
- Select the appropriate Finance Charge Rate, Finance Charge Days, and Apply Payment to Finance Charge options.
- Click OK.
Note: Alternatively, you can configure clients individually on the Billing Options tab of Client Information.
For more information, check out Knowledge Base Article R10850, “All About Tabs3 Finance Charges.”
We have a client we need to bill a fixed fee amount every month, but we still need to keep track of our hours and productivity. Does Tabs3 Billing have a solution for this?
Tabs3 Billing includes a Flat Fee Billing feature, which allows you to enter your time for a matter normally throughout the billing period, and then write the amount of the fees proportionally up or down to a predetermined amount prior to running statements.
To configure a matter for flat fee billing
- In the Tabs3 Billing Quick Launch, search for and select “Client Information.”
- In the Client ID field, select the matter you want to configure.
- Click the Rates tab and select 0 – Flat Fee Amount in the Billing Rate Code field.
- Enter the amount you want to bill the client on each statement in the Flat Amount field.
- Press Ctrl+S.
Once you have configured the matter for flat fee billing, you can enter time in Tabs3 Billing normally.
To adjust flat fee clients prior to running statements
- Run any reports or draft statements that you need to include the original fee amounts for review or reference.
- In the Tabs3 Billing Quick Launch, search for and select “Adjust Flat Fee Clients.”
- On the Client tab, select the range of matters you want to adjust. (Note: Only matters configured for flat fee billing will be adjusted.)
- On the Transactions tab, select the range of fees you want to adjust. We recommend selecting the end date of the billing cycle as the Thru date of the Fee Date field.
- Click OK to adjust the fees for the selected matters.
Once the fees have been adjusted, you can run your statements normally.
We have a client with many matters that we want to mark as inactive, so that when we run reports or statements it will only include the matters we are working on. Is there a way I can make all of them inactive at once instead of going into each individual matter?
To make changes for multiple client matters all at once, you can use Change Client Options. Because Change Client Options is a powerful feature that can make changes to all of your clients at once, we recommend making a backup when prompted.
To mark multiple matters as Inactive via Change Client Options
- In the Quick Launch, search for and select “Change Client Options.”
- On the Client tab, enter the range of client matters that you want to mark inactive. Alternatively, click the Multiple button to enter multiple Client IDs or multiple client ranges.
- On the Setup tab, click the Select button, select Inactive and Archive Matter Address, and click OK.
- Select the Inactive check box.
- Optionally select the Archive Matter Address check box.
- Click OK.
Is it possible to change the order in which fees appear on a statement?
Fees are always displayed in date order on statements. However, Tabs3 Billing does include a utility to change the order in which fees that share the same date will appear.
To change the order of fees on a statement
- In the Tabs3 Quick Launch, search for and select “Reorder Fees.”
- In the Client ID field, select the matter whose fee order you want to change.
- In the Group fees by field, select the option that matches your statement grouping.
- Select each fee you want to reorder and click the Move Up or Move Down button to change the fee’s position within the date group.
- When you are finished, close the Reorder Fees window.
Note: The Reorder Fees utility works by editing the reference numbers assigned to the updated fees. Reference numbers on previously generated reports and verification lists may no longer refer to the original fees.
I created a new client a few weeks ago and have since added fees and costs. However, I was recently informed that this client should have been made as a matter to an existing client instead. I would prefer to not have to delete and recreate this activity. Is there a way to change the Client ID so that it becomes a matter for the other existing client?
You can change any existing Client ID to another by using the Renumber Client utility. When renumbering a client, any records associated to the original client will be renumbered to the new Client ID as well.
To renumber a client
- In the Quick Launch, search for and select “Renumber Client.” We recommend making the backup when prompted.
- In the Old Client ID field, select the Client ID that needs to be renumbered.
- In the New Client ID field, enter an unused Client ID that you want the matter to use.
- Click OK.
Is there a way to customize which reports are available from the Tabs3 Billing Matter Manager?
The Matter Manager allows you to customize which reports are shown in the Reports pane.
To customize the Reports pane
- In the Quick Launch, search for and select “Matter Manager.”
- In the pane on the right side of the Matter Manager, click the
 (Reports) icon.
 - Click the three vertical dots to the right of the word “Reports” to open the Customize reports window.
- Double-click each report you want to include in the Reports pane, indicated by a check mark
- Click OK when you are finished customizing the reports shown.
- Close the Matter Manager.
I’m sending out email statements to my clients, but I also need to include a cost schedule from a vendor showing their charges. How can I attach an additional file to my email statements?
When sending out email statements from Tabs3 Billing, you can edit the text and add additional files via the Email Preview window while reviewing your email statements.
To attach a file to an email statement
- In the Quick Launch, search for and select “Email Statements.”
- Select the statement to which you want to attach a file.
- Click View/Edit Email.
- Drag the file into the attachments section of the email.
Alternatively, there’s an Insert File button in the toolbar at the top of the window that allows you to browse and select files as attachments.
Note: Email attachments must comply with file size limitations in Outlook and your outgoing email server.
We have matters for which we only want to charge up to a set amount or set a limit for the total hours worked. Is there a way for Tabs3 Billing to notify us if we will exceed these limits?
Tabs3 Billing includes a Budget feature that allows you to set a maximum amount and/or hours per matter. Additionally, with matters configured for Task Based Billing, you can specify separate budgets by phase for both activity (fees) and expenses (costs). When you are entering fees or costs in Tabs3 Billing, PracticeMaster, or Tabs3 Accounts Payable, you will be notified before saving if the transaction will exceed the matter’s budget.
To configure a budget for a non-Task Based Billing matter
- In the Tabs3 Billing Quick Launch, search for and select “Client Information.”
- Select the Client ID for which you are creating a budget.
- Click the Budget tab.
- In the Hours to Bill field, specify the maximum total hours you want to bill the client for this matter.
- In the Amount field, specify the maximum amount you want to bill the client for this matter.
- Select the Warn if Budget Exceeded check box.
- Press Ctrl+S.
To configure phase-level budgets for a Task Based Billing matter
- In the Tabs3 Billing Quick Launch, search for and select “Client Information.”
- Select the Client ID for which you are creating a budget.
- Click the Budget tab and then click the Budget button.
- In the Phase/Task field, select the phase for which you are creating a budget.
- In the Activity Amount field, specify the maximum fee amount you want to bill for the selected phase.
- In the Expense Amount field, specify the maximum cost amount you want to bill for the selected phase.
- Click Save Record.
- Repeat steps a-d for each phase you want to budget.
- Click OK.
- Select the Warn if Budget Exceeded check box.
- Press Ctrl+S.
We wrote off an amount for a client that contained fees, costs, and tax amounts. How can we see how the write off applied?
You can view detailed information on a write off via the Tabs3 Billing Matter Manager. This allows you to see the original billed amount as well as the fees, expenses, and/or advances written off. Each timekeeper, cost type, tax amount, and/or finance charge that was written off is also shown, along with statement information.
To view detailed write off information
- In the Quick Launch, search for and select “Matter Manager.”
- Select the client’s matter.
- In the List Content section, click Write Offs.
- Select the write off you want to view.
We’ve been reviewing our billing categories and noticed that a few of them are redundant. Is there a way to combine these categories and their associated matters?
Tabs3 Billing includes a Renumber Category utility that allows you to renumber your billing categories. You can use this process to combine up to five existing billing categories into a new billing category.
To merge billing categories
- In the Quick Launch, search for and select “Renumber Category.”
- In the first row of the Old Number column, select the first billing category you want to merge into a new billing category.
- In the first row of the New Number column, enter the number of the new billing category you want to create.
- Repeat steps 2 and 3 in each row for each billing category you want to merge into the new category.
- Once you have configured the rows, click OK to begin the renumber process.
Note: When combining categories, the new category cannot exist prior to combining.
Can I add explanatory notes to my fees that will be shown on draft statements but not final statements?
Statement comments allow you to include additional information on transaction descriptions that will be shown on draft statements or reports, but not final statements. This makes it easy to provide information to the person reviewing pre-bills without making it visible to the client.
To enter a statement comment
- In the Description field of a fee, cost, payment, or client funds transaction, place your cursor where you want the statement comment to appear.
- Right-click in the Description field and select Statement Comment or press Ctrl+H to enable Statement Comment mode.
- Type your statement comment.
- Right-click in the Description field and select Statement Comment or press Ctrl+H again to disable Statement Comment mode.
Statement comments are identified in the entry window with red text, are shown on reports and draft statements with a strikethrough line, and are excluded from final statements.
We are starting to use the Email Statements feature but want to protect our client’s sensitive information. Is there a way to add more security to the statements that are sent?
Tabs3 Billing allows you to specify a password for the PDF statements sent via Email Statements for added security. The password can be unique for each matter and client.
To password protect PDF email statements
- In the Quick Launch, search for and select “Client Information.”
- Select the desired Client ID.
- On the Billing Preferences tab, in the Statement Delivery Options section, select the Use a password to protect PDF statements when emailed check box.
- Enter the desired password.
- Press Ctrl+S.
The next time you send an Email Statement, the client will be prompted to enter the password to open the PDF. For additional information about Email Statements and password security, see Knowledge Base Article R11913, “Emailing Tabs3 Billing Statements.”
Is there an easy way to provide a discount to a client without directly adjusting my fees or entering a credit?
The Courtesy Discount feature in the Client Information window allows you to provide individual or ongoing discounts by amount or percentage. These discounts show as a separate line item on the client’s statement.
To add a courtesy discount for a matter
- In the Quick Launch, search for and select “Client Information.”
- In the Client ID field, select the matter you want to discount.
- On the Billing Options tab, in the Courtesy Discount section:
- In the Discount Type field, select whether you want to discount by Amount or Percentage.
- Specify the Amount or Percentage of the discount.
- If this is a one-time discount, select the Change Discount Type to None after statement updated check box.
- Press Ctrl+S.
I’d like to see a list of the top 20 clients for hours worked in 2022. Is there a report for that?
Tabs3 Billing has a Top Client Report, which provides the ability to rank clients or matters based on different criteria. This report shows the top hours worked, WIP figures, billed figures, paid figures, and more.
To print the top 20 clients for billed fees
- In the Quick Launch, search for and select “Top Client Report.”
- Leave the Client ID range blank.
- On the Options tab:
- In the Print section, in the Top field, enter “20” and then select Clients.
- In the Ranked by field, select All Hours Worked.
- In the Period section, in the Date field, select Current Calendar Year.
- Click OK.
We have some clients with multiple matters that pay with a credit card. Can we apply a single electronic payment to multiple matters or statements for a client?
Both Tabs3Pay and LawPay can be used with the Apply Payments to Multiple Matters feature. This feature allows you to enter a single payment and apply it to specific matters and statements associated with the client. Apply Payment to Multiple Matters can be used when entering new payments as well as when using the Import Online Payments feature.
To apply a payment to multiple matters or statements when entering a payment
- From the Quick Launch, search for and select “Payment Entry.”
- Enter all information for the payment record, including the Tabs3Pay or LawPay payment method.
- Click the
 (Apply Payment to Multiple Matters) button or press Alt+A to open the Apply Payment to Multiple Matters window.
 - A list of matters and their statements will be displayed. Specify the amount to apply to each statement. When you are finished, click Finalize. (Note: For more information on using this window, press F1.)
To apply a payment to multiple matters or statement when importing a payment
- From the Quick Launch, search for and select “Import Online Payments.”
- Double-click the payment you want to import to open the Payment Entry window.
- Click the (Apply Payment to Multiple Matters) button or press Alt+A to open the Apply Payments to Multiple Matters window.
- A list of matters and their statements will be displayed. Specify the amount to apply to each statement. When you are finished, click Finalize. (Note: For more information on using this window, press F1.)
Note: LexCharge (formerly ProPay) integration does not support the Apply Payments to Multiple Matters feature. If you are interested in using this feature, visit Tabs3Pay.com for information on signing up for Tabs3Pay.
Is there a way to force the descriptions for all transactions on our statements to display in uppercase text?
A Display all Transaction Descriptions in Uppercase check box was added to the Statement Templates window in Tabs3 Billing Version 2022. When this check box is selected, all text in a transaction’s Description field is automatically converted to uppercase when included on a statement.
To display all transaction descriptions in uppercase for a statement template
- From the Quick Launch, search for and select “Statement Templates.”
- In the Template ID field, select the statement template you want to edit.
- Select the Display all Transaction Descriptions in Uppercase check box.
- Press Ctrl+S.
- Repeat steps 2-4 for each template you want to edit.
- Close the Statement Templates window.
To display all transaction descriptions for a single batch of statements
- From the Quick Launch, search for and select “Generate Statements.”
- On the Options tab, in the Statement Options section, click the Statement Template button.
- Click the Select Option button.
- Select Display all Transaction Descriptions in Uppercase from the list and click OK.
- Select the Display all Transaction Descriptions in Uppercase check box.
- Click OK.
- Make any additional changes to the Generate Statements window and then click OK.
We have two Statement Designer layouts that we want to combine into one layout. One is a header we used on Page 1, and one is a footer we used on Page 2. Is there a way to merge layouts?
You can include one statement designer layout in the background of another layout, allowing you to easily reuse templates. In this example, you can modify the statement designer layout with your heading to include the layout with the footer.
To add a statement designer layout to another statement designer layout
- In the Tabs3 Quick Launch, search for and select “Statement Designer.”
- In the Layout Tree, select the statement designer layout with your header.
- Click the
 button (Figure 1, below) at the top left corner of the Page Layout pane to open the Properties dialog box.
 - In the Background 1 or Background 2 field, select the layout with the footer.
- Adjust the position of the End Statement Body line to just above the footer:
- Mouse over the blue End Statement Body line until you see
 .
. - Click and drag the line up or down as needed.
- Mouse over the blue End Statement Body line until you see
- Press Ctrl+S.
The background elements will appear as dimmed on the form layout, but will print normally on the next statement.
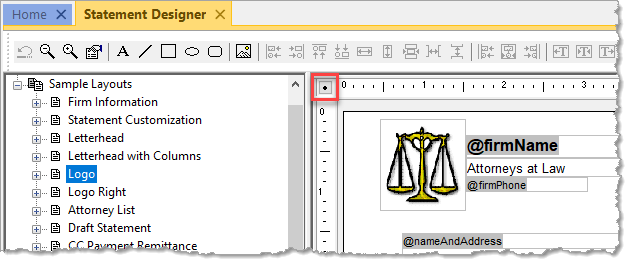
Figure 1
Is there a way to see a list of matters with Task Based Billing enabled?
You can filter clients in Tabs3 Billing to only show clients with the Task Based Billing check box selected.
To filter clients for Task Based Billing matters
- From the Quick Launch, search for and select “Clients.”
- In the Quick Clicks pane, expand the Filter section and click Manage Filters.
- Press Ctrl+N.
- In the Filter Name field, enter a name for the new filter (e.g., “Task Based Billing Matters”).
- Select the Show for all users check box if you want other Tabs3 Billing users to have access to this filter.
- Click the New Row button.
- In the Name column, select TASK_BASED_BILLING and then click the Select button.
- The Test Condition will automatically default to is TRUE, which is correct.
- Click Save.
- Close the Manage Quick Clicks window.
- Select the new filter in the Filter section of the Quick Clicks pane.
We need to find a specific statement, but the only reference we received is a statement number. How can we search by statement number?
You can easily locate statements by number using the Statement Manager.
To find the statement number in Statement Manager
- In the Quick Launch, search for and select “Statement Manager.”
- Click the Stmt # column heading to sort by number, then type the statement number to use incremental searching. The list will scroll to the statement number you specified.
…or… - In the Search List field, enter the statement number. The list will be filtered to only the statement number you specified.
- Click the Stmt # column heading to sort by number, then type the statement number to use incremental searching. The list will scroll to the statement number you specified.
When you have located the statement, you can double-click the record to see the statement information, or use the Quick Clicks actions to perform other common tasks such as reprinting, emailing, or making a payment.
One of the matters in Tabs3 Billing requires me to select the Release To Bill check box every time I want to print a statement for them. Why does this check box keep getting cleared?
The matter is most likely configured to Bill On Demand. Bill On Demand is a feature that enables you to only bill a client when needed, rather than every billing cycle. When the Bill On Demand check box is selected, each time a statement is final billed and updated for the matter, the Release to Bill check box is automatically cleared to prevent unauthorized statements from being sent in the future. When you are ready to send another statement, simply select the Release to Bill check box again.
If you want a statement to print for the matter whenever they have a balance, simply clear the Bill on Demand check box and select the Release to Bill check box. The matter will then be included in all future billing cycles.
To enable the Bill On Demand feature
- In the Quick Launch, search for and select “Client Information.”
- Select the Client ID you want to configure.
- On the Billing Preferences tab:
- Select the Bill On Demand check box.
- Select the Release To Bill check box if you want to include this matter in the next batch of statements. Clear the Release To Bill check box to prevent statements from printing until you select it again.
- Press Ctrl+S.
To disable the Bill On Demand feature
- In the Quick Launch, search for and select “Client Information.”
- In the Client ID field, select the matter you want to configure.
- On the Billing Preferences tab:
- Clear the Bill On Demand check box.
- Select the Release To Bill check box.
- Press Ctrl+S.
I would like to send my client’s statement not only to my client, but to an additional party as well. Is there a way to have two different email addresses for the same statement?
You can have up to two Bill To records for each client, allowing you to send statements to up to two parties.
To add a Bill To Record
- In the Quick Launch, search for and select “Client Information.”
- Select the desired Client ID.
- From the Billing Preferences tab, in the Statement Delivery Options section, click the Add button.
- In the Bill To Name field, select an existing contact or enter a new name to create a new contact.
- In the Statement Delivery Options section, select the Mail Statement and/or Email Statement check box.
- Click the OK button.
- Press Ctrl+S.
Is there a way to keep users from logging into the software while I run maintenance tasks?
The Lock Out All Users feature was designed for exactly this reason. This option allows a user with manager rights to lock out all other users in the Tabs3 Software applications. In addition, users will be able to finish the task they are working on when the Lock Out is initiated, but will receive a Conflicting Activities window if they try to do anything else before they exit.
To initiate Lock Out All Users
- In the Quick Launch, search for and select “Lock Out All Users.”
- Enter a Reason.
- In the Keep users locked out for field, select the desired amount of time.
- Click OK.
The lockout will automatically end at the designated time. Alternatively, you can click Unlock to unlock the software sooner or click the Reset lockout time link to extend the lockout.
We routinely use the Accounts Receivable reports to see which of our clients are past due by a given number of days. However, I need to see how much is owed to a specific working timekeeper for that period. Is there a way I can get that?
If you have the Platinum version of the Tabs3 Billing Software, the Accounts Receivable by Timekeeper Report is an additional accounts receivable report that can be run for specific working timekeepers.
To run the Accounts Receivable by Working Timekeeper Report
- From the Reports menu, point to Accounts Receivable and select A/R by Timekeeper Report.
- On the Client tab, select a Client ID range or leave it blank to include all clients.
- On the Options tab:
- Select the Working Timekeeper.
- Select the appropriate Include Clients whose Timekeeper’s fees are more than XX days past due number of days.
- Select any other options as needed.


