
When you have multiple active matters, combining matters creates a single statement file. Including a cover statement makes it easy for a client to see what they owe for each matter at a glance.
These options can be quite beneficial, but if you’ve run into a snag you may not know where to look for answers. You can always call Technical Support at (402) 419-2210, but if it’s after hours or you want to quickly look up an answer, check out Knowledge Base Article R11501, “Troubleshooting Combine Matters and Cover Statements in Tabs3.” This article not only provides troubleshooting information, but also provides a list of frequently asked questions.
Whether you have been working with combined matters and/or cover statements for a day or for years, R11501 may provide the necessary information for your current scenario.
Our Knowledge Base can be accessed 24 hours a day, 7 days a week, at support.Tabs3.com. You can also access our Knowledge Base while in the software by selecting Help | Internet Resources | Knowledge Base.

It has officially been one year since we launched the online newsletter! Over the last year we have made many improvements based on your feedback and published numerous articles that we hope have been helpful in using Tabs3 Software.
Here are some of the most notable improvements we have made:
- Printing and Sharing Individual Articles
- Since we introduced this feature in August of 2016, we have had over 3,600 individual articles printed and 320 individual articles emailed.
- View other Articles That May Interest You
- Since we introduced this feature in August of 2016, we have tweaked the algorithm so you only see articles most relevant to the article you’re currently viewing.
- Printing the Full Newsletter
- Since we introduced this feature in September of 2016, we have had almost 5,250 users print the newsletter.
- Newsletter Email Notifications
- Since we introduced this feature in October of 2016, we have had over 380 users subscribe. Want to be the 381st? Subscribe here!
- Ratings for Quick Feedback
- This is a new feature introduced in May of 2017. We’re excited to receive your feedback on each of our articles.
We have also published over 400 articles since we debuted the online newsletter, with over 140,000 page views.
Here are the top 10 articles published in the last year:
- Feature Article: Flat Fee Billing
- Quick Tip: Printing the Full Newsletter Now Available
- Announcement: 1099-MISC Deadline Change
- Feature Article: E-Mail Statements
- KB Corner: Webinars Provided By Tabs3 Software
- Quick Tip: Bypassing the User ID Prompt
- Feature Article: Version 18
- KB Corner: All About the Local Install (SETUP.EXE) and Auto Update
- KB Corner: Calendar Plan Templates vs. Recurring Dates
- Feature Article: Software Horror Stories
If you have any ideas for how we can improve the newsletter, or have an idea for a future article, leave a comment below or send us an email to newsletter@tabs3.com.

Do you want a way to streamline trust payments to Tabs3 Billing? Trust Accounting Software (TAS) provides the ability to automatically draw funds from a trust account when final statements are generated in Tabs3.
You will no longer need to enter payments to Firm from TAS; simply enter your transactions in Tabs3, and then bill like normal. As final statements are generated in Tabs3, the software will automatically create trust transactions and Tabs3 payment records based on the client’s due amounts. This feature can be enabled or disabled on a global level, at the bank account level, and at the trust account level. You can specify whether to pay work-in-process, accounts receivable, or both; whether to pay fees, expenses, or advances from these amounts; and whether to create check or EFT transactions in TAS for these amounts.
Note: We recommend consulting your local Bar Association before enabling Automatic Trust Transactions to ensure that you are complying with local trust regulations.
To implement Automatic Trust Payments, you will need to enable TAS Integration in Tabs3 and then configure TAS Customization, the desired TAS Bank account(s), and the desired Trust Account(s). For complete step-by-step instructions on setting up Automatic Trust Payments, refer to the Integration Guide or the Automatic Trust Payments Overview topic in the TAS Help.

Do you have trouble tracking how much a client owes you? Do you find it’s difficult to determine when you last followed up with them regarding their overdue balance?
Following up on overdue balances can be a time-consuming task, but with Tabs3, you can easily track how much a client owes you, how much is overdue, and document the last time you talked to them! Join our new free 30-minute webinar, How to Track Collections Within Tabs3, to learn how to track collections and how you can shift the collections risk from your firm.

Every so often we debut new features to help improve how you use this online newsletter format. We’re excited to debut our new ratings system!
Our new rating system will appear at the bottom of each article. This will allow for quick feedback on whether you think the article was helpful or not. There are five options: Extremely helpful, somewhat helpful, helpful, somewhat unhelpful, and extremely unhelpful. If you would like to explain your rating, please do so in the comments so we know what types of articles are most helpful to you!
Have any suggestions on articles or how to improve the newsletter? Submit a comment below or send us an e-mail at newsletter@tabs3.com.

One of my calendar entries in PracticeMaster was inadvertently deleted. This caused me to nearly miss the opportunity to file my witnesses. To prevent this in the future, is there a way I can find out if a calendar entry gets deleted and when?
There are a variety of options available to handle this. WorkFlows can be set up to copy any information from the originating record to another location. For example, if a calendar record is deleted, then the WorkFlow can be set up to copy the Due Date, Calendar Code, Description, Comments, Start Time, and more to the new record. The WorkFlow can even be set up to show who made the deletion.
Note: You can optionally set up access rights to only allow certain users rights to delete records. This can help alleviate issues with unauthorized deletions. Access rights can be set up in System Configuration via File | Open | Access Profile.
The following is a list of options where WorkFlows can help track deletions:
- Send eNote to a user – When a record is deleted, an eNote can be automatically sent to one or more users to notify them of the deletion. Sending an eNote will provide real-time deletion notifications and come from the user who deleted the record. Keep in mind that eNotes will be shown in the sender’s Sent eNotes list until deleted. Note: eNote is only available in the Platinum version of PracticeMaster.
- Creating private calendar entries – When a record is deleted, a calendar record can be created for a user or group of users and marked as private. Marking the record as private makes it easy to keep the information inaccessible to users for which you do not want access granted. Only those users with Calendar Rights to view private entries can access it. Set the Alarm Time field to receive a notification, or set the Type field to Task so that it shows up in your Task List.
- Creating records in a custom lookup file – You could create a custom lookup file with all of the desired fields and when a record is deleted, a new record would be added to the lookup file. The lookup file does not have to be referenced from any other file in the software, but can be maintained for deleted records only. Creating a lookup file provides the ability to store the deleted records in one place without being mixed up with other records. However, the additional setup time for the new lookup file should be taken into consideration.
Regardless of which option you choose, a new record will be added to PracticeMaster. The goal is for the WorkFlow to record all critical information that was removed by the deletion. A WorkFlow will need to be added to each file in which you want deleted records tracked.
You can find more information and additional options for using WorkFlows to track deleted records in Knowledge Base Article R11732, “Using WorkFlows to Track Deleted Records.”
For more information on WorkFlows, refer to our new PracticeMaster WorkFlows Guide at Tabs3.com/support/docs.html or Knowledge Base Article R11307, “All About WorkFlows.”

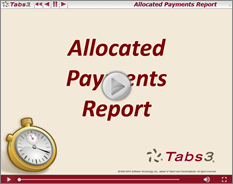
Do you know how your payments are allocated? If you have fee compensation rules set up, the Allocated Payments Report can tell you how payments allocate to timekeepers. This report can be used to view how payments are applied to fees, expenses, advances, sales tax, and finance charge in Tabs3. Including fee compensation amounts is optional.
Watch this three-and-a-half-minute video here:
Training Videos can be accessed 24 hours a day, 7 days a week, at Tabs3.com/videos. You can also access Training Videos while in the software by selecting Help | Documentation and then clicking the See also link for Tabs3 and PracticeMaster Training Videos.
Are you using groups for calendaring, or do you enter each user individually in the record? A group is composed of various users, and can be a great shortcut when adding calendar records for teams, managers, or any set of users. For example, if you have regular partner meetings, create a group that includes each of the partners. When creating the calendar record, simply select the group and all of the users in the group will automatically be added to the record.
To create a new group
- Open System Configuration.
- From the File menu, point to Open and select Group.
- Click the
 (New) button.
 - Enter the desired Group ID and Group Name.
- In the Users in Group section, select the users you want to have included in this group.
- Press Ctrl+S.
By adding users to groups, you can help streamline calendar entries and save time!
