
Did you know that you can quickly convert Journal, Calendar, and Document Management records into billable fees? Use the Convert to Fee option in PracticeMaster to convert emails, research records, timers, notes, meetings, tasks, documents, and more into fees. Converting records into fees helps make sure your clients are being billed for the time you spend on their matters.
Converting a record to a fee
When you convert a record to a fee, a Convert to Fee window is opened which shows the same fields as the Fee file. If the original record does not contain a Client ID, you will be prompted to select a client before the Convert to Fee window is opened. When applicable, the Date and Description fields are automatically populated from the original record. You can then enter any other information for the fee record such as the Timekeeper, Tcode, Hours to Bill, etc. and save.
There are multiple ways to convert a record into a fee.
- From the All Activity or Calendar list in Matter Manager:
- From the Take Action group of the Quick Clicks pane, select Convert to Fee.
- Click the
 (Convert to Fee) button to the right of the record (All Activity List only).
- From the Journal, Calendar, and Document Management Files:
- Right-click the record, point to Action and select Convert to Fee.
- From the Take Action group of the Quick Clicks pane, select Convert to Fee.
- From the Edit menu, point to Action and select Convert to Fee.
- From the Daily/Weekly/Monthly Calendar: Right-click the record and select Convert to Fee.
- Click the (Convert to Fee) button on the toolbar.
When a record is converted to a fee, a new fee is created without removing the record from the Journal, Calendar, or Document Management file.
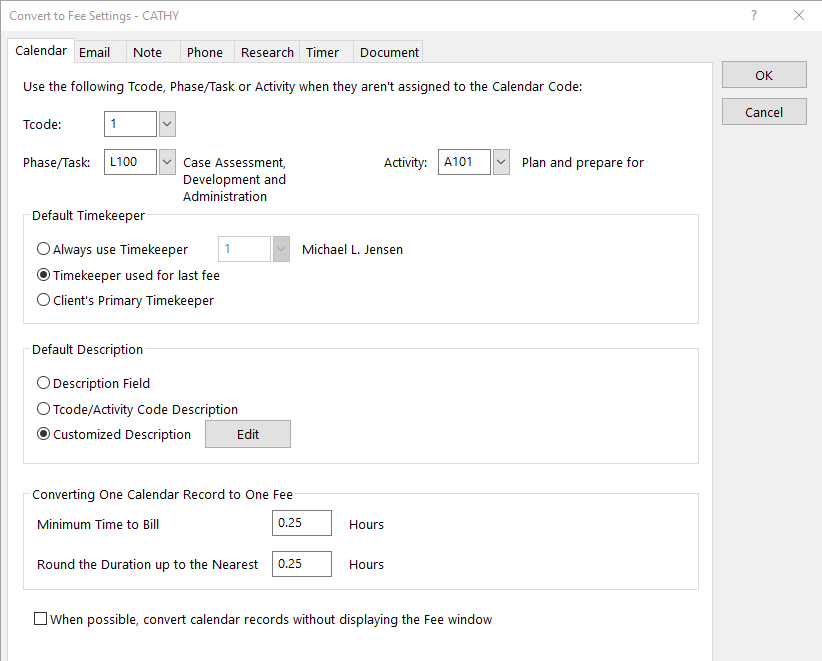
Convert to Fee Settings
Default settings can be specified for calendar, email, note, phone, research, timer, and document records via Convert to Fee Settings (In the Quick Launch, search for and select “Convert to Fee Settings”). Settings are saved per user, so each login user has their own default settings. Default settings are broken down by record type (e.g., timer, email, document, etc.) and provide defaults for tcode, timekeeper, description, time to bill, and more.
Make sure you don’t have billable time that’s slipping away. Start converting records to fees and see how much additional time you can bill for.

When the attorneys enter notes into journal records and then convert them to fees, their entire journal description goes into the fee and they have to edit it. Is there a way to only pull in a partial description when converting a journal record into a Fee?
A WorkFlow can be configured to edit a field provided there is a consistent character (or set of characters) indicating where the fee’s description begins. For our example, we will use “***” as an indicator. With a WorkFlow set up to automatically edit the description field of a new fee, the journal record will retain the original text, but only the text after “***” will be included in the fee. Additionally, if an attorney wants an entire journal record’s description included, they simply have to omit the character (or set of characters) from the description.
For example, let’s say a journal record that you will convert to a fee includes the text “could not find precedence.” You don’t want your client to see this on their bill. With this WorkFlow, you could change the description to “could not find precedence *** Research,” and when the WorkFlow runs, “Research” is all that will be included in the Fee Description.
To set up a WorkFlow that automatically trims the Description field
- From the Maintenance menu, select WorkFlows.
- Expand the Common Client Related section, select Fee, and then click New.
- Enter a Name for the WorkFlow (e.g., “Edit Description”).
- In the Event section, select the Record Added check box.
- In the Actions section, click New.
- Select Change Record, and then click Next.
- Select Source Record, and then click Define Template.
- Click on the set button next to the Description field.
- In the Template Expression Editor window, click the Function button, select FROM$, and then click Insert.
- From within the parentheses, click the Field button, select Description from the Field ID column, and then click Insert.
- Enter a comma after the field, and then enter “***”.
- The following will now be displayed: “FROM$(@SrcRec:Description,”***”)”. Click OK on the Template Expression Editor window.
- Press Ctrl+S.
- Click Finish.
- Click Save, and then close the WorkFlows window.
Note: This WorkFlow will run for any new fee entry provided that, in this example, there is *** present.
Note: In order for this WorkFlow to run properly, Description Field must be specified as the Default Description for Convert to Fee Settings (Maintenance | Preferences | Convert to Fee Settings).
Note: Before saving the Fee, the additional text will still be shown. The additional text is only removed after the save has been completed.
Alternative Methods: As an alternative, you can use the statement comments attribute in the Journal record for text you don’t want printed on a statement. Using statement comments suppresses the text from printing on a final statement, but displays in red in the Journal and Fee records. Additionally, in draft statements and reports, statement comments will be shown with a strikethrough character (e.g., could not find precedence). To use statement comments, select the desired text, right-click in the Description or Comment field of the journal record, and then select Statement Comment.
Another option to prevent text in the Journal record from being included in the fee description is to specify a different Default Description such as Tcode/Activity Code Description in the Convert to Fee Settings (Maintenance | Preferences | Convert to Fee Settings). This option uses the selected Tcode’s default description for the fee instead of the text from the Journal record.
For more information on WorkFlows, refer to our new PracticeMaster WorkFlows Guide at Tabs3.com/support/docs.html or Knowledge Base Article R11307, “All About WorkFlows.”

Did you know that you can convert calendar, e-mail, note, phone, research, timer, and document records into fees? This allows you to easily bill your client for the time spent on their matter.
The Converting Records to Billable Fees video shows you how to convert records to fees via the Matter Manager, Calendar and Journal file, and the Process Timer Records utility. Additionally, this video walks you through the Convert to Fee Settings, which allow you to specify default settings to be used (e.g., Tcode, Minimum Time to Bill, etc.) for each type of record.
Watch this eight-minute video here:
Training Videos can be accessed 24 hours a day, 7 days a week, at Tabs3.com/videos. You can also access Training Videos while in the software by selecting Help | Documentation and then clicking the See also link for Tabs3 and PracticeMaster Training Videos.

You may work with multiple matters throughout the day, so how can you ensure that you are keeping an accurate account of how much time is spent on each task? The PracticeMaster Timer window (File | Timer) can be used to track Time Tasks, Phone Tasks, and Research Tasks. Each record is saved to the Journal 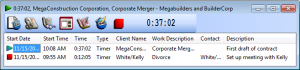 file and can include the Client, Work Description, Contact, a Description of the task, and more. Start and stop the timer for tasks throughout the day from the Timer window as needed.
Once you’re ready to bill a client for your time, you can easily turn timer records into fees using the Process Fee Records program (File | Process Timer Records). When processed, a record is created in the Fee file for the designated client, and a timer record is maintained in the Journal file. This makes it easy to keep track of your time, and to accurately bill clients for work. Using the PracticeMaster Timer means you will never again have to guess at how much time you spent on tasks.


