Feature Article: Accounts Payable Enhanced Security
June 2026 Tags: Accounts Payable, Bank Accounts, Vendors
Two new features in Tabs3 Accounts Payable give your firm greater control over who can access sensitive financial information — helping you protect critical data without disrupting day-to-day workflows.
Protect Sensitive Information with Secure Bank Accounts
The new Secure Bank Accounts feature lets you restrict access to specific bank accounts, like those used for payroll, so only authorized users can view or work with them. Transactions tied to a secured account are automatically hidden from dashboards, reports, and entry windows for users who haven’t been granted access, giving you confidence that sensitive financial details stay protected.
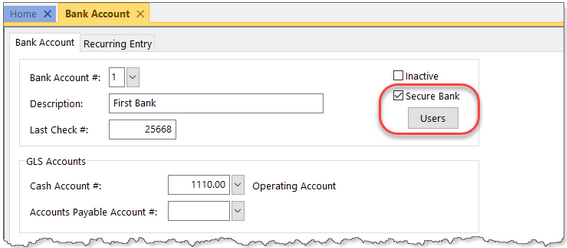
To configure a bank account as secure
- From the Quick Launch search for and select “Bank Account Entry.”
- Select the Bank Account you want to make secure.
- Select the Secure Bank check box.
- Click the Users button
- Select the users who will have access to this bank account, then click OK.
- Save your changes.
For more details on setting up secure bank accounts and managing user permissions, see the Help documentation in Tabs3 Accounts Payable.
Restrict Access to Vendor Transactions
With the new vendor restriction feature, you can limit which users are able to view or interact with a specific vendor’s transactions. This is especially useful for keeping payroll-related or other confidential vendor data visible to only those who need it.
When a vendor is marked as restricted, all associated transactions are automatically excluded from dashboards, reports, and entry windows for unauthorized users. Note that the vendor itself remains visible in lookup windows and reports — only the transaction details are restricted.
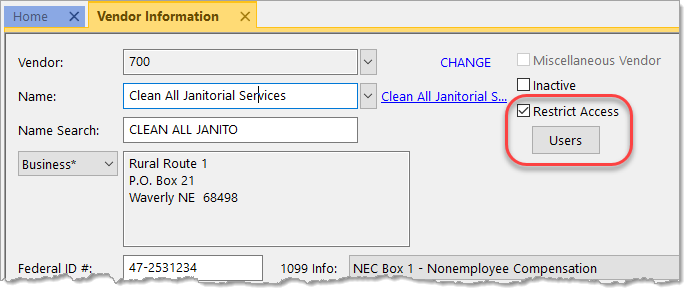
To restrict access to a vendor
- In the Quick Launch, search for and select “Vendor Information.”
- Select the Vendor you want to restrict.
- Select the Restrict Access check box.
- Click the Users button.
- Select the users who will have access to this vendor, then click OK.
- Save your changes.
For more details on configuring vendor restrictions, see the Help documentation in Tabs3 Accounts Payable.
Note: You must be logged in as a user with Manager access rights to secure bank accounts and restrict vendors.


