
Did you know that you can change your Tabs3 and PracticeMaster workspace by specifying whether toolbars are shown or not, and where they are positioned if they are shown? These options can increase the available workspace horizontally, vertically, or both.
Showing or hiding toolbars
From the View menu, a ![]() indicates that the Status Bar, Application Toolbar, and in PracticeMaster, the PracticeMaster Task Bar is shown. To change which toolbars are shown or hidden, simply click the menu option to change the status of the toolbar.
indicates that the Status Bar, Application Toolbar, and in PracticeMaster, the PracticeMaster Task Bar is shown. To change which toolbars are shown or hidden, simply click the menu option to change the status of the toolbar.
Changing the toolbar position![]()
The Menu toolbar, Application Toolbar, and in PracticeMaster, the PracticeMaster Task Bar, can all be moved to  the top, bottom, right, or left of the Tabs3 or PracticeMaster program window. Simply click the toolbar gripper, and drag it to the desired location.
Alternatively, you can drag a toolbar away from any 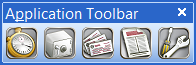 side of the program to make it a floating toolbar. When the toolbar is floating, you can optionally move it outside of the Tabs3 or PracticeMaster program window. This allows for maximum workspace, while still having access to all of the available tools.

Trying to create a document management record using the PracticeMaster toolbar and not sure what to expect? The behavior you see when using the PM Save or Capture Save functions depends on the current state of the document you are trying to save and whether PracticeMaster is configured to manage documents manually or automatically.
Knowledge Base Article R11630, “Document Management Quick Reference,” provides a quick reference table that shows you the result of saving a document for each scenario, along with definitions for all of the document states, and screenshots of the various windows listed.
Our Knowledge Base can be accessed 24 hours a day, 7 days a week, at support.Tabs3.com. You can also access our Knowledge Base while in the software by selecting Help | Internet Resources | Knowledge Base.

