When I’m journaling emails from Outlook, the Client and Contact fields sometimes populate a value and sometimes don’t. What determines when those will have a default value or not?
To determine whether an email address is associated with a client or contact, PracticeMaster utilizes a cross-reference file that is updated each time you journal an email from Outlook into PracticeMaster. The cross-reference file tracks associations between a particular email address and the Client and/or Contact to whom an email to or from that address was saved. You can control this behavior using the settings for the Outlook Plug-in in PracticeMaster. When the PracticeMaster Outlook Plug-in is installed, there are a few options designed to simplify the process of journaling emails from Outlook. Two of those options determine whether the Client ID and Contact fields are automatically populated in the new journal record.
- Prefill Client ID/Contact fields – When this check box is selected, PracticeMaster looks for an existing association between the email address and a client or contact. If one is found, then the appropriate (Client ID or Contact) field is automatically populated in the new Journal record.
- Only prefill when single match is found – This check box adds additional refinement to the Prefill Client ID/Contact fields check box. When this check box is selected, PracticeMaster will leave the Client ID and/or Contact fields blank if it finds more than one client or contact associated with the email address. When this check box is cleared, if more than one match is found for an email address, then the most recent match is used.
Note: The Client ID and Contact fields are handled separately in these scenarios (e.g., if the email address has a client but not a contact associated with it, then only the Client ID field will be prefilled).
In order to change these settings, you must uninstall the Outlook Plug-in, make your changes, and then reinstall the Outlook Plug-in for the changes to take effect.
To make changes to the prefill options for the Outlook Plug-in
- Close Outlook if it is currently running.
- From the PracticeMaster Maintenance menu, point to Integration and select Toolbar Plug-ins.
- On the Outlook tab, click the Uninstall Outlook Plug-in button. A message will be displayed indicating that the PracticeMaster toolbar has been uninstalled. Click OK to close the message.
- Select the option(s) you want to enable. (Note: These options must be configured separately for each user.)
- Click the Install Outlook Plug-in button. A message will be displayed indicating that the PracticeMaster toolbar has been installed. Click OK to close the message.
- Click OK to close the Toolbar Plug-ins window.
Whenever I make changes in Outlook to my calendar items that have synchronized from PracticeMaster, the changes never go back to PracticeMaster. Should they sync?
Synchronization of records from Outlook to PracticeMaster depends on how Outlook integration is configured. If Outlook integration has been configured for automatic synchronization from Outlook to PracticeMaster, records that you add or modify in Outlook will synchronize to PracticeMaster immediately upon being saved.
If that’s not the behavior you are seeing, the first consideration is how the integration is configured. You can access the Outlook configuration settings by clicking the Maintenance menu in PracticeMaster, then pointing to Integration and selecting Outlook Synchronization.
On the Calendar tab, verify the following settings to ensure that automatic synchronization is properly configured:
- Both the PracticeMaster to Outlook and Outlook to PracticeMaster check boxes are selected.
- Both PracticeMaster to Outlook and Outlook to PracticeMaster are set to Automatic.
If you’ve confirmed that the integration is properly configured for automatic synchronization, then verify that the status bar at the bottom of the PracticeMaster window is not displaying an “Outlook Synchronization Suspended” message. This message indicates that synchronization has been halted and user intervention is required. To resolve the suspended synchronization, click the message in the PracticeMaster status bar. You will then be prompted to perform the required action.
Most commonly, “Outlook Synchronization Suspended” messages are the result of the confirmation threshold being set too low on the Synchronization Options tab of the Outlook Synchronization window. This setting is designed to alert you when an unusually large number of records are being synchronized, and may need to be modified depending on how many records are normally added for you by other users.
If you have verified all of the above settings and the calendar items are still not synchronizing to PracticeMaster, contact Technical Support at (402) 419-2210.
My firm currently has an on-site Exchange Server that needs to be updated. Instead of replacing it, we’re considering migrating to a Hosted Exchange server and possibly purchasing an Office 365 license. Does PracticeMaster integrate with these products? If so, does our IT need to do anything special for PracticeMaster when migrating to a hosted Exchange environment?
PracticeMaster can integrate with any local installation of Microsoft Outlook. If you’re using Office 365, you can install Outlook locally. PracticeMaster’s integration with Outlook relies on the local mail profile and therefore should be unaffected by the location of the Exchange Server.
When integrating Calendar and/or Contact records between PracticeMaster and Outlook, Tabs3 recommends having a conversation with your IT Department or whoever will be performing the migration before migrating to a new Exchange Server. In order to plan the migration process, they will need to review our Knowledge Base Article R11731, “Exchange Migration Best Practices,” before migrating to ensure a smooth transition to the new Exchange server.
To assist in your conversation with IT, there are two important questions that need to be asked prior to migrating:
Will we still have Outlook installed locally on the same workstation as PracticeMaster?
Why this is important: PracticeMaster requires a local copy of Outlook installed on the same workstation in order to integrate. A web-based version of Outlook, or an installation on another instance of Windows will not integrate successfully.
Can you configure and include custom fields as part of the Exchange migration process?
Why this is important: PracticeMaster uses custom fields in Outlook to store information relating to PracticeMaster in Outlook records. Examples of this include:
- Whether a calendar or contact record has already been synchronized to PracticeMaster.
- Whether a journal, calendar, or fee (J/C/F) record has been created in PracticeMaster from an email.
- Which journal, calendar, and/or fee record in PracticeMaster is linked to an email (if linking is enabled).
If this information is not passed to the new Exchange server, the first time PracticeMaster is synchronized with Outlook using the new server, duplicate calendar and contact records will be synchronized back to PracticeMaster, and all of the journal, calendar, and fee information for each email will be lost.
Once you have confirmed that “yes” is the answer to both questions, you’ll need to prepare for the migration. There are two main steps you must take prior to migrating:
- Determine a cut-off point where you will stop entering new information in Outlook or PracticeMaster until the migration is completed. This ensures that information does not get added to the old Exchange server after the migration process has begun.
- Disable calendar and contact integration on all workstations prior to the migration process. This will sever the connection to the old Exchange server and ensure that the connection to the new server must be configured once the migration is complete.
Additionally, we recommend that you migrate all of your firm’s users to the new Exchange server at once rather than individually or a few at a time. This prevents problems caused by users on different Exchange servers entering calendar records for each other in PracticeMaster.
Note: It is important to review our Knowledge Base Article R11731, “Exchange Migration Best Practices,” prior to migration, as this article provides complete instructions for successfully migrating your Exchange server.
I normally only create PracticeMaster records for a single matter per Outlook email, but occasionally an email will apply to more than one matter. However, when I try to journal the email a second time, it opens the original journal record instead. Is there a way I can journal a single email to multiple matters?
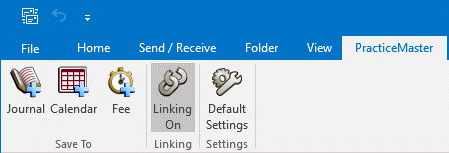
When linking is enabled on the PracticeMaster toolbar in Outlook, the email and the journal record in PracticeMaster are linked. This means that after you create a journal, calendar, or fee record from an email in Outlook, clicking the Journal, Calendar, or Fee button on the toolbar again will open the record you created in PracticeMaster instead of creating a new record. By default, linking is enabled.
When linking is disabled, clicking the Journal, Calendar, or Fee button will create a new record in PracticeMaster instead of opening an existing record. This allows you to create as many records as you need per email.
You can toggle Record Linking off and on for a single email by clicking the Linking On/Linking Off button on the PracticeMaster tab while viewing the email in Outlook.
However, keep in mind that when changing the Linking status, the default settings will determine what happens to the next email. Depending on your settings, turning Linking off may mean that the next email will also default to Linking Off, or it could automatically default back to Linking On.
To configure the default behavior for Record Linking
- In Outlook, go to the PracticeMaster tab.
- Click the Default Settings button to open the PracticeMaster Options window.
- In the Record Linking Defaults section, select your preferred Linking behavior:
- If you want Record Linking enabled by default, select Enabled.
- If you want Record Linking disabled by default, select Disabled.
- If you want to default to the last setting specified, select Last Used. When Last Used is specified, each time you toggle the Linking On/Linking Off button on the PracticeMaster tab, that setting will be retained for all future emails until you toggle it again.
- Click OK to close the PracticeMaster Options window.
For more information regarding the Outlook Toolbar Plug-in, see Knowledge Base Article R11516, “Configuring the Outlook Toolbar Plug-in.”
Sometimes I need to email several documents from the Document Store in PracticeMaster to someone. Is there an easy way to add multiple managed documents to an email?
In Version 19, we added the Attach PM Document button to the PracticeMaster toolbar in Outlook. When composing an email in Outlook, this button is available on the PracticeMaster tab if the PracticeMaster toolbar is installed.
To add multiple managed documents to an outgoing email
- Begin composing your email.
- From the PracticeMaster tab, click Attach PM Document.
- In the PracticeMaster Document Management window, select the records with the documents you want to include in your email. (Note: You can apply filters, QuickViews, or use the Search List field to narrow down the list of document management records shown.)
- To select a record, click the
 column for that record. To select multiple records at the same time, use one of the following methods to highlight multiple records, and then press the Spacebar or click the
  button. Keep in mind that you can attach up to ten records at a time.
- Press and hold the Ctrl key, and then highlight individual document management records.
- Highlight a range of records by clicking the first document management record in the range and then press the Shift key while you click the last record in the range.
- Click and drag your mouse pointer across all document management records in a range.
- Click OK to attach the selected records to your email and return to Outlook.
- Repeat steps 2-4 as necessary.
You can now finish composing your email and send it. Keep in mind that your or the recipient’s email server may have a limit on the size of attachments that can be included with an email message.
Note: If you only need to send a single managed document to someone, you can also open the document management record in PracticeMaster and click the Send Email option in the Take Action group of the Quick Clicks pane. This will create a new email message in Outlook with the document attached. However, if you need to attach a single managed document to a reply or forwarded email, use the Attach PM Document button instead.
I’ve created several custom fields in my Calendar and Contact files (e.g., Docket No.). Is there a way I can get the new fields to sync over to Outlook?
PracticeMaster has the ability to customize which fields synchronize with Outlook. You can select which PracticeMaster field values to display in Outlook’s Subject or Description fields for Calendar records. When synchronizing contacts to Outlook, you can select which PracticeMaster fields to map to their corresponding Outlook fields. These features make it easy to display custom calendar and contact information from PracticeMaster in Outlook.
To specify which fields are displayed in the Subject field of Outlook Calendar records
- From the PracticeMaster Maintenance menu, point to Integration and select Outlook Synchronization.
- On the Calendar tab, in the Synchronization Options section, select the Customize what fields display in the Outlook subject check box.
- Click the Select Fields button.
- In the Available Fields column, double-click each field you want to include in the Subject field of the Outlook calendar records. This moves the field to the Display Fields column. Likewise, double-clicking a field in the Display Fields column moves the field back to the Available Fields column.
- In the Display Fields column, optionally change the order in which fields are displayed using the
 (Move Up) and
  (Move Down) buttons. (Note: The Description field must be the first or last field in the Display Fields column.)
 - Click OK to close the Select Subject Fields window.
- Click OK.
To specify which fields are displayed in the Description field of Outlook Calendar records
- From the PracticeMaster Maintenance menu, point to Integration and select Outlook Synchronization.
- On the Calendar tab, in the Synchronization Options section, select the Customize what fields display in the Outlook description check box.
- Click the Select Fields button.
- In the Available Fields column, double-click each field you want to include in the Description field in the Outlook calendar records. This moves the field to the Display Fields column. Likewise, double-clicking a field in the Display Fields column moves the field back to the Available Fields column.
- In the Display Fields column, optionally change the order in which fields are displayed using the (Move Up) and (Move Down) buttons.
- Click OK.
- Click OK.
To specify which fields are displayed for Outlook contacts
- From the PracticeMaster Maintenance menu, point to Integration and select Outlook Synchronization.
- On the Contact tab, in the Synchronization Options section, click the Field Mapping button.
- In the Outlook fields column, select the desired field.
- In the PracticeMaster Fields column, double-click the highlighted space or field and select the PracticeMaster field you want to be shown in the selected Outlook field.
- Click OK to close the Outlook Contact Field Mapping window.
- Click OK.
Any changes to the field settings will trigger a Critical Synchronization. This process updates previously synchronized records to use the new settings.
I’m getting ready to configure contact integration with Outlook so I can sync my PracticeMaster contacts to my phone. However, I don’t want my private Outlook contacts syncing to PracticeMaster, nor do I want all of the contacts in PracticeMaster to sync to my phone, just the ones applicable to me. How can I accomplish this?
PracticeMaster’s Contact integration with Outlook provides the ability to restrict which contact records synchronize between PracticeMaster and Outlook. When configuring Contact syncing, you can optionally specify to not include Outlook private contacts as well as which contacts are synced to your Outlook folder.
Common filters are based on the User/Group or the Category fields in the Contact file. Alternatively, you can create a custom filter to further narrow which contacts you want to sync to Outlook. Our example will filter contacts based on the User/Group field.
To configure contact synchronization for your User ID to integrate with Outlook
- From the Maintenance menu, point to Integration and select Outlook Synchronization.
- On the Contacts tab, select the PracticeMaster to Outlook and Outlook to PracticeMaster check boxes. Select Automatic option for each.
Note: To prevent your private contacts from synchronizing, make sure that the Include private Outlook contacts check box is not selected. - In the Synchronization Options section, click the Select Folder button and select the appropriate Outlook Contacts folder.
- In the User Filter section:
- Select the Sync contacts assigned to these users check box, and then select your User ID.
- Select the Exclude contacts with no users defined check box.
- Click OK.
Because a critical setting was changed, you will be required to resynchronize with Outlook before continuing. If prompted to confirm changes, review the list of changes and, once satisfied with the changes, click Synchronize.
Note: If you have any questions regarding the above steps, please contact Tabs3 Technical Support at 402-419-2210 or your IT professional.
For complete information on Outlook Integration, refer to our Outlook Integration Guide at Tabs3.com/support/docs.html.
We’ve had several calendar records come up missing in both PracticeMaster and Outlook. We believe the entries were deleted sometime yesterday. Is there an easy way to find out what those records were so we can add them back into PracticeMaster if necessary?
Because the calendar entries were synchronized between PracticeMaster and Outlook, the Outlook Sync Log can be used to help determine if records were deleted. The Outlook Sync Log keeps track of every add, change, or delete that passes between Outlook and PracticeMaster.
Because the Outlook Sync Log records everything that synchronizes between PracticeMaster and Outlook, it can be quite large. Fortunately, we can create a filter to help narrow down the records we want to look at.
To filter the Outlook Sync Log for deleted records
- From the View menu, point to Log Files and select Outlook Sync Log.
- From the Quick Clicks pane, expand the Filter group and select Manage Filters.
- Press Ctrl+N.
- Enter the desired Filter Name (e.g., “Sync Items on 7/16/2018”).
- Click the New Row button.
- Select Sync_Date and then click the Select button.
- In the Test Condition column, select Greater than or Equal To.
- In the Test Value column, enter yesterday’s date (e.g., “07/16/2018”).
- Click the New Row button.
- Select Action and then click Select.
- In the Test Value column, enter “D”.
- Click Save.
Once the filter is enabled in the Quick Clicks pane, only those records that were deleted during the sync will be shown. You can then determine if records need to be added back into PracticeMaster based on record information in the Outlook Sync Log including the calendar Description, Owner (User), and Due Date/Time.
If you do not see the record(s) you are expecting, keep in mind that it’s also possible for records to appear deleted when they were actually changed (e.g., removing a User from the record, changing the Due Date field, etc.). If you want to look for changed records, instead of deleted records, simply change the filter’s Test Value from “D” to “U” in step 6b above.
For more information on PracticeMaster’s integration with Outlook, please see our Outlook Integration Guide.
I synchronize PracticeMaster with Outlook, and I occasionally see the message “Outlook Synchronization Suspended” in the status bar. Why would this message be displayed?
There are a few reasons the “Outlook Synchronization Suspended” message can be displayed in the PracticeMaster status bar.
![]()
The specified confirmation threshold has been exceeded.
The Outlook Synchronization confirmation threshold is used to specify the minimum number of records that will require confirmation before synchronization can proceed. The purpose of this setting is to ensure that you are alerted when an unusual number of records are being synchronized (as this can indicate a problem with your synchronization settings), without interrupting more typical synchronizations. Therefore, the ideal value will vary depending on the user.
To change the threshold
- From the Maintenance menu, point to Integration and select Outlook Synchronization.
- From the Synchronization Options tab, in the Synchronization Options section, change the Require confirmation when at least xx records will be synchronized number or clear the check box.
- Click OK.
A critical Outlook Synchronization setting has been changed and therefore a critical synchronization is required.
In order to ensure the accuracy of synchronized information, a critical synchronization must be performed before any synchronization can occur after changing the settings. All other synchronization for the user will be suspended until this synchronization is performed.
A synchronization exception has occurred.
A synchronization exception is a synchronization issue that PracticeMaster cannot resolve without user intervention. Exceptions are uncommon. Refer to the “Synchronization Exceptions” section of Knowledge Base Article R11368, “Troubleshooting Outlook Calendar & Contact Integration Issues,” for more information.
Resolution
To resolve the suspended synchronization, click the “Outlook Synchronization Suspended” message in the PracticeMaster status bar. You will then be prompted to perform the required action.
For more information on PracticeMaster’s Outlook integration, refer to our Outlook Integration Guide.
I entered a calendar record in Outlook for myself and another attorney. When I checked PracticeMaster, it was on my calendar but not on the other attorney’s calendar. Why would it show on one but not the other?
The way that calendar records synchronize between PracticeMaster and Outlook depends on whether you are using Microsoft Exchange, and how System Configuration is configured.
If you are not using Microsoft Exchange, or you are but do not have System Configuration set up to take advantage of Microsoft Exchange, then the following synchronization rules apply:
- If you enter a record for yourself in PracticeMaster or Outlook, it will synchronize immediately if both programs are open.
- If you enter a record for another user in PracticeMaster, the record will synchronize to the other user’s Outlook calendar when their next Periodic Sync runs. Likewise, when you enter a record for another user in Outlook, the record will synchronize to the other user’s PracticeMaster calendar when their next Periodic Sync runs.
If you have Microsoft Exchange, there are two settings in System Configuration that can be used to immediately synchronize calendar records for other users. The first option, Use Microsoft Exchange to synchronize PracticeMaster and Outlook, is available in both the Platinum and non-Platinum software. The second option, Enable the Platinum Exchange Connector, is available only in the Platinum software.
Non-Platinum
If you do not have the Platinum version of the software, and the option to Use Microsoft Exchange to synchronize PracticeMaster and Outlook is selected, the following synchronization rules apply:
- If you enter a record for yourself in PracticeMaster or Outlook, it will synchronize immediately if both programs are open.
- If you enter a record for another user in PracticeMaster, and you have permissions set up in Microsoft Exchange to add records to the other user’s Outlook calendar, the record will synchronize to the other user’s Outlook calendar.
- If you enter a record for another user in Outlook, the record will synchronize to the other user’s PracticeMaster calendar when their next Periodic Sync runs.
Platinum
If you have the Platinum version of the software, and the options to Use Microsoft Exchange to synchronize PracticeMaster and Outlook and Enable the PracticeMaster Exchange Connector are selected, the following synchronization rules apply:
- If you enter a record for yourself in PracticeMaster or Outlook, it will synchronize immediately to the other program if PracticeMaster is open on at least one workstation.
- If you enter a record for another user in PracticeMaster or Outlook, it will synchronize immediately to the other program if PracticeMaster is open on at least one workstation.
Note: In order for synchronization to occur with other users, both users must have Outlook calendar integration and automatic synchronization enabled in PracticeMaster. For example, if Mary is creating events in Susan’s PracticeMaster calendar, and Mary is not set up to automatically integrate calendar records with Outlook, the events Mary enters will not be synchronized to Susan’s Outlook calendar until the next periodic or manual synchronization occurs for Susan.
For information on setting up and troubleshooting integration with Microsoft Exchange, see Knowledge Base articles R11373, “Microsoft Exchange Server Overview,” R11596, “Configuring the PracticeMaster Platinum Exchange Connector,” and R11597, “Troubleshooting the PracticeMaster Platinum Exchange Connector.”
I want to create a journal record in PracticeMaster for every e-mail that I send. How can I accomplish this automatically?
Before you can configure the toolbar to automatically journal all outgoing e-mails, you will need to install the Outlook Plug-in.
To install the PracticeMaster Outlook Plug-in
- From the Maintenance menu, point to Integration and select Toolbar Plug-ins.
- Click the Install Outlook Plug-in button.
- Click OK on the message that is displayed.
- Close and reopen Outlook.
Once the Outlook Plug-in has been installed, you can specify whether new messages will be automatically journaled or not. Additionally, you can specify whether or not the records will be linked. When Linking is enabled, PracticeMaster will maintain a link between the e-mail and the Journal/Calendar/Fee record. When Linking is enabled and you try to create a PracticeMaster record from an e-mail a second time, the existing record will be opened instead. When Linking is disabled, multiple records for the same e-mail may be created.
To automatically journal outgoing e-mails
- From Outlook, click the PracticeMaster tab.
- Click the Default Settings button.
- In the New Message Defaults section, for the Journal option, select Enabled.
- In the Record Linking Defaults section, change the Record Linking option if desired.
- Click OK.
Keep in mind that these are the default settings. When sending an e-mail, you can click on the PracticeMaster tab in the new message window and select to turn Journaling and/or Linking off for this message. The next e-mail you send will revert back to the default settings.
For more information regarding the features available in PracticeMaster’s Outlook Plug-in, refer to Knowledge Base article R11516, “Configuring the PracticeMaster Outlook Plug-in.”


