
Is your desk cluttered with sticky notes, miscellaneous pieces of paper, and phone messages? Clear your work area, consolidate your notes, and link them to the appropriate clients and contacts by using the PracticeMaster Journal file!
The following types of records can be added to the Journal file (In the Quick Launch, search for and select “Journal File”) by clicking the ![]() (New) button:
(New) button:
- Notes: Add free-form notes to keep track of any necessary information.
- Time Tasks: Keep track of how much time you spend on the various tasks associated with your matter.
- Phone Tasks: Keep track of phone calls to and from clients and third parties, including the phone number and whether you spoke with the desired person or left a message.
- Research Tasks: Keep all of your research notes in one place, including the website address and a linked file.
- Emails: Use the Outlook Toolbar Plug-in (In the Quick Launch, search for and select “Toolbar-Plug-ins” and click the Outlook tab) to save both sent and received emails.
Alternatively, Time Tasks, Phone Tasks, and Research Tasks can be created via the Timer (In the Quick Launch, search for and select “Timer”). When integrated with Tabs3 Billing, any Client Notes from Tabs3 Billing (In the Quick Launch, search for and select “Client Information” and click the Client Notes tab) can also be viewed, but not edited, in the PracticeMaster Journal file.
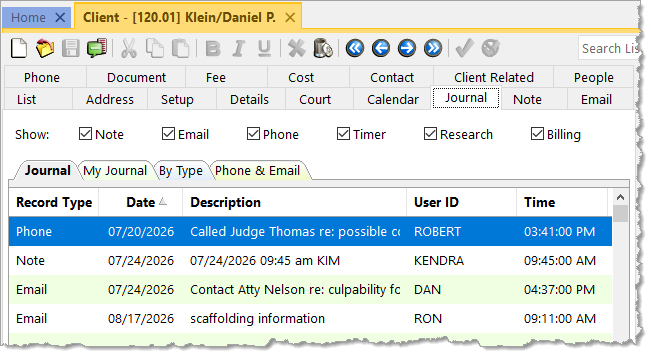
Not only can you move information from paper to PracticeMaster, but every journal record provides a Client ID and Contact field. This links the record directly to the client’s matter and/or contact for which it applies and allows others to access the same information when they need it. Simply open the Client and/or Contact file and click on the Journal tab to see all journal records pertaining to this client, or select a Journal Page tab (e.g., Email, Phone, Timer, etc.) to see specific record types. You can configure which tabs to display in the Client file by opening Configure Client Pages (Edit | Configure Client Pages) from the List tab, and in the Contact file by opening Configure Contact Pages (Edit | Configure Contact Pages).
Use PracticeMaster to help organize your notes, research, and more – declutter your workspace, and allow others access to valuable information!

PracticeMaster has the ability to integrate Calendar and Contact information with Outlook. If your firm uses Microsoft 365 with Exchange Online, the Tabs3 Platinum edition makes integration even smoother.
Knowledge Base Article R11898, “Configuring the PracticeMaster Platinum Exchange Connector for Exchange Online / Microsoft 365,” walks you through configuration and provides frequently asked questions and troubleshooting information.
Our Knowledge Base can be accessed at support.Tabs3.com. You can also access our Knowledge Base in the Quick Launch by searching for and selecting “Knowledge Base.”

In a law firm, there can be an overwhelming amount of information to keep track of and work with – case information, contact information, upcoming meetings, research, emails, and documents galore. PracticeMaster can help make you more organized than you’ve ever been before. PracticeMaster provides the tools you need to manage it all.
Calendar – View not just your calendar, but all appointments for everyone in your office. View appointments for a specific client or matter, an employee, or view appointments based on any information in the calendar record such as date, calendar code, and location.
Contacts – Don’t just search your list of contacts; see all the contacts for any matter at a glance, and every matter in which a particular contact is involved.
Document Management – Tell PracticeMaster how you want to name and sort your documents, and then let PracticeMaster do it for you! Quickly see all documents for a case, or different versions of the same kind of documents across all your cases.
Matter Manager – Tie everything for a matter together in one place: calendar records, contacts, email, meeting notes, documents, billing summary, and more!
Conflict of Interest – Determine any potential conflicts by searching files, documents, email attachments, and contacts for key words. Optionally limit results to certain files, and more.
Timers – Use timers to track your time, phone tasks, and research. Switch between timers as needed, and then process timer records into fees!
Filtering – Add filters to your files so that you can easily see only those records that you want to see.
QuickViews – QuickViews combine a filter, column layout, and sort option into a tab at the top of the List tab of any file, which allows you to quickly switch your view depending on the records you are working with. Add Smart tabs to provide an additional level of record sorting.
Integration – Integrate calendar records and contacts with Outlook. Install the PracticeMaster toolbar in Microsoft Outlook, Word, Excel, and PowerPoint; Adobe Reader or Acrobat; Corel WordPerfect; and Ricoh ScanSnap to save documents and research to PracticeMaster, or to create journal entries, calendar entries, or fees from within the other software. Integrate with Tabs3 CRM, LexShare, NetDocuments, and CalendarRules.
Areas of Practice – Areas of Practice provide a way to save separate information for different types of matters, without having the clutter of everything all in one file or set of files.
Report Writer – Create custom reports using the data stored in PracticeMaster.
WorkFlows – Help automate your workload by creating WorkFlows to automatically start tasks or notify other users based on specified events.
Document Assembly – Help automate form letters by creating document templates that pull information from any file in PracticeMaster. Once created, simply select the client and the template, and it does the rest.
For more information about PracticeMaster features or to purchase a license of PracticeMaster, contact your local consultant, or contact our Sales Department at (402) 419-2200.
Version 2023 has some great new features to check out!
Tabs3 Platinum Software Highlights
- Client Portal – We’ve added a client portal to Tabs3 Billing that allows selected clients to access their current balance and billing history with any web browser. When combined with Tab3Pay, clients can submit electronic payments that automatically apply towards their current balance due.
- Check Requests – A check request feature has been added to the software allowing you to enter, track, and review requests for reimbursements via PracticeMaster. Those check requests can then be used to create an invoice and generate a check or electronic funds transfer (EFT) in Tabs3 Accounts Payable or Trust Accounting.
- Outlook Recurring Event Synchronization – Enhanced the Microsoft 365 Exchange Connector so recurring events created in Outlook will synchronize with the PracticeMaster calendar.
PracticeMaster Highlights
- Tabs3 CRM – Easily track and manage potential client leads with Tabs3 CRM (client relationship management). Tabs3 CRM is an add-on service that will help your firm build your business with customized intake forms and marketing automation. Once your firm is ready to take on the client, you can easily create a client in PracticeMaster using an import process. Additionally, the PracticeMaster Conflict of Interest Search can optionally check leads in Tabs3 CRM for conflicts.
- Contact Categories – A new access right has been added allowing you to control who can add new Contact Categories. Contact Categories are used in the Contact file to classify contacts by type such as attorney, judge, opposing counsel, etc.
Tabs3 Software Highlights
- Simplified Update – Beginning with Version 2023, any necessary data conversions are done automatically during the installation. This means you don’t need to perform additional steps prior to using the software, greatly simplifying the update process. Furthermore, if you are currently on Version 2020 or later, updating to the latest version can be done with a single installation.
For in-depth information on all of the new Version 2023 features, including screenshots, refer to Knowledge Base Article R11925, “Version 2023 Introduction to New Features.” A list with links to all Version 2023 information can be found in R11927, “Version 2023 Information and Resources.”
To download Version 2023, visit Tabs3.com/update or contact your local consultant.
When PracticeMaster performs a conflict of interest search, contact search, or document search, it searches the applicable index files for valid matches. Search Settings (In the Quick Launch, search for and select “Search Settings”) provide the ability to specify how and if indexes are updated, to rebuild indexes, and to specify words to be excluded from a search.
When accessing Search Settings, there are three tabs: Index Properties, Rebuild Index, and Exclude List.
Index Properties
To be included in a search, a field/file must be “indexed.” On the Index Properties tab, you have the option of selecting how to handle updating the Conflict/Contact Index, Email Attachments Index, and the Linked Documents Index.
- Select Automatic to update the index whenever records are added or changed.
- Select Manual to only update the index when the Rebuild Index program is run.
- Select Disable to disable search capabilities for that index.
The accuracy of PracticeMaster’s search options is dependent on the accuracy of the index files. We recommend using the Automatic setting to help ensure you have the most accurate index files, and therefore the most accurate search results.
Note: Changes made to a linked document are not automatically incorporated into the Linked Documents Index, even if it is set to Automatic. To incorporate changes to linked documents, you can update the index by manually rebuilding the Linked Documents Index, or by using a special startup option to manually rebuild the linked documents index file after hours (recommended). Alternatively, any changes made to the document management record itself, such as a change to a field, will automatically update the index.
When selecting Manual, it is recommended that you schedule times to rebuild the indexes.
Rebuild Index
Rebuilding an index updates Manual indexes, optimizes Automatic indexes, and optionally removes deleted records from the indexes. If you want to rebuild indexes, select the desired indexes and click the Rebuild Now button.
Although rebuilding the Conflict/Contact Index requires Exclusive access to the software in order to run, the Email Attachments and Linked Documents indexes can be rebuilt while users are working. For more information on rebuilding indexes via a startup option, see Knowledge Base Article R11659, “Rebuilding the PracticeMaster Search Index Files.”
Exclude List
The Exclude List tab provides a list of words that are excluded from all searches. For example, if the words a, of, and the are in the Exclude List, running a search with those words in it will display a message that the words will be excluded from the search and the search will ignore the words as it runs. This list can be edited via the Add Word and Delete Word buttons.
Make sure to take a moment and review your Search Settings to ensure your conflict of interest, contact, and document searches are optimized for your firm.

When adding a payee, we misspelled the name. How can we change the payee’s name?
Beginning with Version 2022, Trust payees are now contacts. Therefore, in order to rename a payee, you must rename its associated contact using the Rename Contacts utility.
To rename a payee in Trust
- From the Quick Launch, search for and select “Rename Contact.”
- In the Old Contact ID field, select the contact associated with the payee you want to rename.
- In the New Contact ID field, enter the new name you want to use for that payee.
- If you want to update the individual name fields of the contact, select the Update Name fields check box and fill in the New Value fields for each name field. (Note: If you want to update the Full Name field based on these changes, select the Update Full Name based on First, Middle, and Last Name fields check box.)
- If you want to review the contact after changing it, select the Open the contact record after renaming the contact to update additional fields check box.
- Click OK.
We needed to update information for a few of our contacts. However, the person making the changes created new contacts instead of updating the existing ones. Is there an easy way for me to clean up the duplicate contacts?
You can use the Merge Contacts function to combine the contacts, selecting which information to keep from each record.
To merge two contacts
- In the Quick Launch, search for and select “Merge Contacts.”
- In the Contact 1 and Contact 2 fields, select the contacts you want to merge.
- In the Select Fields section, select the Contact 1 Value or Contact 2 Value to use for each field.
- Click Merge.
- Repeat for each set of duplicate contact records.
For more information on the Merge Contact utility refer to the Knowledge Base Article R11396, “Merge Contacts Program Simplifies Contact Cleanup.”
Our firm has recently started synchronizing contacts with Outlook. How can we prevent specific PracticeMaster contacts from synchronizing to Outlook?
There are multiple ways to prevent PracticeMaster contacts from synchronizing to Outlook. The simplest method is to select the Do Not Sync check box on the contact record.
To prevent a contact from syncing with Outlook
- In the Quick Launch, search for and select “Contacts.”
- Double-click the contact you want to change.
- Select the Do Not Sync check box.
- Press Ctrl+S.
- Repeat steps 2-4 for each contact you want to prevent from syncing.
In addition to this method, you can also filter contacts by timekeeper, category, or using a custom filter. See Knowledge Base Article R11488, “Controlling Which Contacts Synchronize Between Outlook and PracticeMaster,” for more information on these additional methods.

Time is money, and how long it takes for your firm to complete tasks affects the bottom line. So how will Platinum software speed things up for your firm?
- Report processing speed is increased by 10 to 30 times or more.
- Filtering and column sorting are done at the server, sending only records that have been pre-filtered and pre-sorted to the workstation. Because of this, QuickViews and use of the Search Box are also faster in Platinum.
- The amount of data processed on the workstation is minimized, thereby also minimizing the amount of data transferred across the network.
- Tabs3 Billing and PracticeMaster Data File Integrity Checks are processed at the server. Rather than having to read and validate all of the records from a file, the workstation only receives the results of this process.
- Tabs3 Billing and PracticeMaster Dashboard data is also processed at the server, which reduces network traffic and increases the responsiveness and refresh capabilities of the widgets.
For more information about Platinum Accelerators, see Knowledge Base Article R11182, “Tabs3 and PracticeMaster Accelerators.” For more information about Platinum features, see Knowledge Base Article R11379, “Platinum Overview.” If you have any questions regarding Platinum features, contact your local consultant, or call Technical Support at (402) 419-2210.

From taking notes about an upcoming meeting, to storing emails, to recording details about a phone conversation, PracticeMaster Journal records are essential for managing your clients and contacts on a daily basis.
The Working with the Journal File video walks you through the process of accessing and creating new records from the Journal File, Matter Manager, Client File and more! Since each type of Journal record is optimized to fit your needs, records like phone tasks or timers can easily be converted to billable time with one click. Additionally, using Tabs3 Connect, you can access your journal information on the go!
Watch this four-minute video here:
Training Videos can be accessed at Tabs3.com/videos. You can also access the videos in the Quick Launch by searching for and selecting “Training Videos.”
In Version 2022, all contact information has been consolidated for all Tabs3 Software applications.
The Contact file now includes information for Trust payees, AP vendors, and users, making it easy to update address information in one place, including clients, billing contacts, related parties, vendors, payees, and logon users.
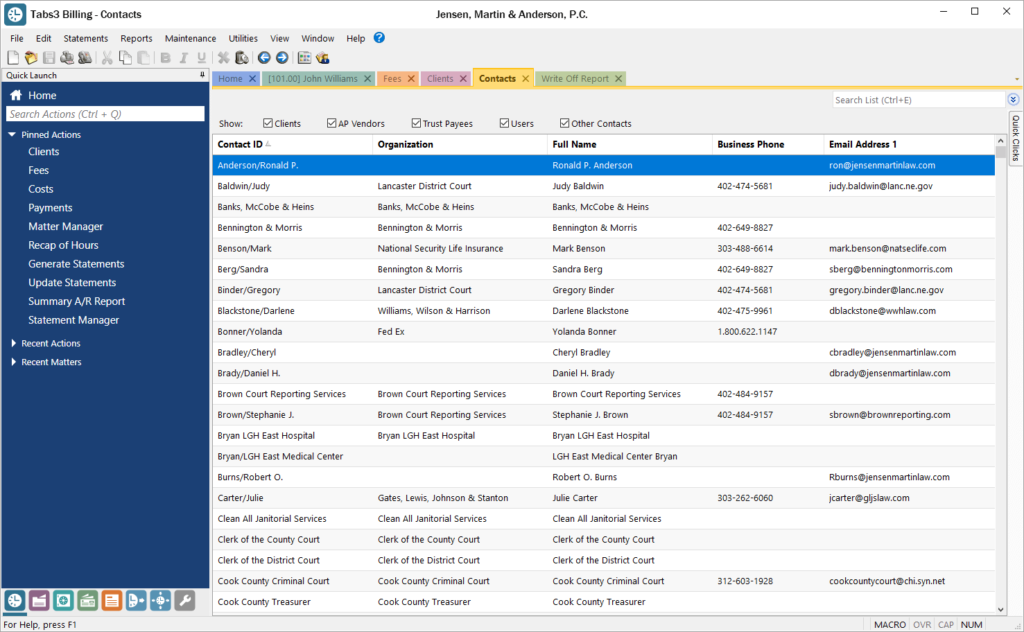
The Contact Information window is available in Tabs3 Billing, PracticeMaster, Trust Accounting, Accounts Payable, and System Configuration. This window now includes a Details button next to the Full Name field for individual contacts, which provides access to separate First Name, Middle Name, Last Name, and Initials fields. To select a contact, the Contact Lookup window has been enhanced for each of these applications, including a SnapShot pane, as well as check boxes at the top making it easy to quickly filter the list to just clients, AP vendors, Trust Payees, etc.
You can update to Version 2022 by going to Tabs3.com/update.
Version 2022 has some great new features to check out!
Unified Contacts
- Consolidated contact information throughout the Tabs3 Software into a single Contact file, including clients, billing contacts, related parties, vendors, payees, and logon users. This makes it easy to update address information in one place.
- The Contacts list in Tabs3 Billing and PracticeMaster as well as in the Contact lookup window in Tabs3 Billing, Trust Accounting, Accounts Payable, and System Configuration include check boxes at the top making it easy to quickly filter the list to just clients, AP vendors, Trust payees, etc.
- The Contact Information window is now available across Tabs3 Billing, PracticeMaster, Trust Accounting, Accounts Payable, and System Configuration. When working with an individual, a Details button next to the Full Name field allows you to access fields for First Name, Middle Name, Last Name, and Initials.
- The Rename Contact utility is now available across Tabs3 Billing, PracticeMaster, Trust Accounting, and Accounts Payable. This utility has been enhanced to update the First Name, Middle Name, Last Name, and Initials fields. Because information is now stored in the Contact file, this utility replaces the Rename Payee utility in Trust.
Enhanced Lists
- Totals can now be displayed on the Fees, Costs, Payments, Client Funds, Write Offs, and Statement Manager lists in Tabs3 Billing and the Fees and Costs lists in PracticeMaster.
- Added a setting to position data entry lists either below or to the right of the data entry fields. Entry lists are available in the Fee, Cost, Payment, and Client Funds entry windows in Tabs3 Billing, the Trust Transaction entry window in Trust, and the Invoice/Manual Check entry window in AP.
New Filters and QuickViews
- New default filters and QuickViews have been added to the Clients, Fees, Costs, Payments, Client Funds, and Statement Manager lists. These allow timekeepers to easily see records for their own matters. These new QuickViews use a new function to determine the timekeeper assigned to the currently logged in user.
- Added a “My Clients Unpaid” QuickView to the Tabs3 Billing Statement Manager.
- Added the ability to easily filter the PracticeMaster Journal file list to include just Note, Email, Phone, Timer, Research, or Billing Notes by simply selecting the corresponding check box at the top of the list. Previously these check boxes were only available on the Journal tab of the Client file.
1099-NEC Forms
- Updated printing of Form 1099-NEC to utilize the 3-forms-per-page format required by the IRS for Tax Year 2021.
Updated Calendar Code File
- Added Phase/Task and Activity code fields to the Calendar Code file so you can specify which default codes need to be used when converting calendar records to fees for task based billing clients.
Exchange Online Integration
- Updated the PracticeMaster Exchange Connector with a new synchronization option for Exchange Online / Microsoft 365.
Updated Installer
- Updated to a Microsoft Installer. This change requires the first installation to be performed at the server, but will reduce the need to directly access the file server when installing future updates.
For in-depth information on all of the new Version 2022 features, including screenshots, refer to Knowledge Base Article R11880, “Version 2022 Introduction to New Features.” A list with links to all Version 2022 information can be found in R11885, “Version 2022 Information and Resources.”
To download Version 2022, visit Tabs3.com/update or contact your local consultant.
When it comes to managing your contacts, Tabs3 Software makes it easy to compare and combine two contacts when duplicate data entry occurs.
Whether the contact records exist for a client, payee, vendor, or user, you can use the Merge Contacts Utility in PracticeMaster to combine two contact records into one. The Using the Merge Contacts Utility video walks you through the process of merging two contacts and provides additional resources for other ways to manage your contacts.
Watch this three-minute video here:
Training Videos can be accessed at Tabs3.com/videos. You can also access the videos in the Quick Launch by searching for and selecting “Training Videos.”
We added a new way to view clients, contacts, fees, costs, payments, client funds, and write offs without having to run a report! When accessing the new Tabs3 Billing lists, you can work with entries using the actions in the Quick Clicks pane, or drill down for additional details. Lists are available via the File | Open menu in Tabs3 Billing or by searching the Quick Launch for “clients,” “contacts,” “client funds,” “fees,” “costs,” “payments,” and “write offs.” The data entry windows for these record types are now available via File | Data Entry or by searching the Quick Launch for “client information,” “contact information,” “client funds entry,” “fee entry,” “cost entry,” and payment entry.”
Filtering
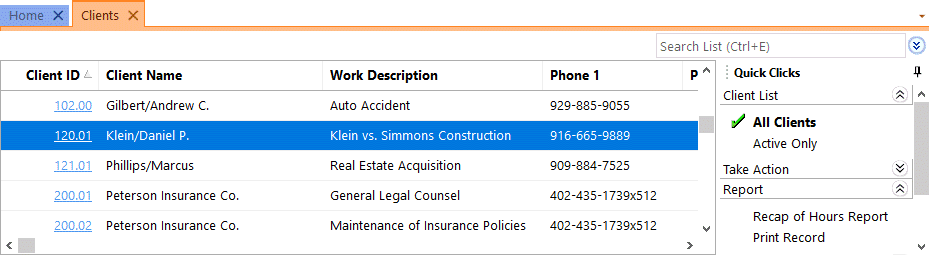
Filtering is a powerful feature. For example, you could filter the Client file to only show clients for which you’re the primary timekeeper. As another example, you could filter the Fee file to only show fees entered in the last week. There are a few ways to filter in the lists.
- The Search Box allows on-the-fly filtering capabilities and can be used to filter data based on keywords included in any column shown in the current column layout.
- The List group in the Quick Clicks pane provides different filtering options for each list. For example, the Contacts List provides the option to filter for All Contacts or Active Only.
- The Filter group in the Quick Clicks pane can be used to set up easy or complex filters that you can reuse. Filters can be added via Manage Filters.
- The QuickViews group in the Quick Clicks pane can be used to create different views of your data. Each QuickView can include a filter, column layout, and sort. QuickViews can be added via Manage QuickViews.
Quick Clicks
The Quick Clicks pane includes the following additional groups:
- The Take Action group of the Quick Clicks pane includes additional actions you can take. For example, in the Fees List, you can transfer transactions, replicate transactions, set the fee’s status to hold, set the fee’s status to print, change WIP transactions, write-up or write-down fees, generate statements, and add a new fee.
- The Report group of the Quick Clicks pane includes any reports that are relevant to the current list. For example, the Write Offs List includes the Write Off Report and the Client Ledger Report.
- The Column Layout group of the Quick Clicks pane automatically includes the Standard and (default) column layouts. Column layouts can be added via Manage Column Layouts.
- The Customize Current View group of the Quick Clicks pane includes Manage Quick Clicks, Refresh, and List Preferences. Manage Quick Clicks provides the ability to add, edit, or delete filters, QuickViews, and column layouts, as well as to organize the Quick Clicks. List Preferences include row height, row colors, and grid lines for the list.
Download the latest version of the software to get this great new feature!
If you need to find data in PracticeMaster based on just a word or phrase, we have you covered! There are several ways to search in PracticeMaster to find what you need.
Search Box
The search box, which is available on the List tab for all files, the Matter 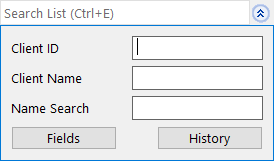 Manager, and the Graphical Calendar, can be used to quickly search for all records that contain a specific string of text in any of the fields included in the currently selected column layout. You can optionally search for different text in multiple fields at one time. You can enter text directly in the Search List field, or click the button to show a list of fields for more specific searching. If the desired field is not shown, click the Fields button for a list of all fields in the current column layout.
Conflict of Interest
PracticeMaster’s Conflict of Interest Search (Search | Conflict of Interest 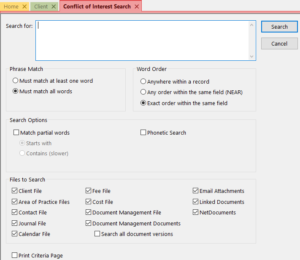 Search) provides robust searching capabilities including whole word or partial word searching and word order, phonetic searching, and record drill-down capabilities on reports.
Files searched in PracticeMaster include the Client file, Contact file, fee transactions, cost transactions, Calendar, Journal (including email records, call logs, research tasks, and phone timer records), Document Management (including linked documents), and Area of Practice files. If PracticeMaster is integrated with Tabs3, all fields in PracticeMaster that exist in both programs (such as Miscellaneous Lines in the client file), will contain information from Tabs3 in addition to existing information in PracticeMaster.
Note: A field must be marked as Include in Conflict Search in File Maintenance (Maintenance | File Maintenance) in order to be included in the Conflict of Interest Search.
Document Search
The Document Search program (Search | Document Search) is a powerful program used to search the contents of Document Management documents, email attachments, and linked documents associated with PracticeMaster records. Although the Conflict of Interest also searches documents, the Document Search provides additional options to narrow your search to specific clients, document types, and/or users.
Searching capabilities include whole word or partial word searching; phonetic, stemming, and fuzzy searching; and record drill-down capabilities on reports.
Contact Search
The Contact Search (Search | Contact Search) helps you quickly find a 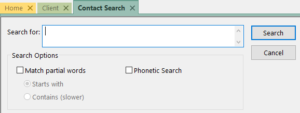 single contact so that you can drill down to a phone number or other information for the contact. This search only looks for hits in Contact fields. Searching capabilities include partial word searching, phonetic searching, and record drill-down capabilities on reports.
Note: A field must be marked as Include in Contact Search in File Maintenance (Maintenance | File Maintenance) in order to be included in the Contact Search.
Find and Replace
On any List tab, the Find and Replace program (Edit | Find and Replace) 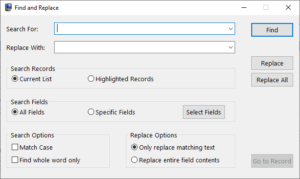 can be used to find one or more records containing specific text, and optionally replace the text with a new value. You can search the current list or just highlighted records, all fields or specific fields.
Find and Replace is a quick and easy alternative to updating multiple records with the same information one by one.
Data can always be found using the various search options in PracticeMaster. Learn more about the various PracticeMaster search features in the PracticeMaster Search Guide.
Did you know that you can add tabs to the Client, Contact, and Journal files that are specific to an Area of Practice, Contact Category, or Journal Type?
These tabs are called category pages. Category pages are a special type of page that is only shown in the Editor window when the selected client or record is associated with that category. You can use the Form Designer to customize how the pages will look.
- Client category pages are configured for individual Areas of Practice (e.g., Personal Injury, Family Law, Workers’ Compensation, etc.). These pages will only be shown when a client belonging to that Area of Practice is selected.
- Contact category pages are configured for individual contact categories (e.g., Attorney, Prospect, Insurance Adjuster, Witness, etc.). These pages will only be shown when a contact assigned to that contact category is selected.
- Journal category pages are configured for individual journal record types (e.g., Email, Phone Task, Research Task, etc.). These pages will only be shown when a journal record of that record type is selected.
Setting up a category page provides a way of showing only those fields that are relevant to the selected “category,” thus reducing the number of visible pages.
In order to create a category page, you must first add any fields specific to the category page to the associated file using File Maintenance (e.g., add the desired fields to the Contact file). Once the fields have been added, the category page and fields must be added to the data entry window using the Form Designer.
To create a category page
- From the List tab of the Client, Contact, or Journal file, select Edit | Form Designer.
- To add a category page, click the
 (Add Category Page) button.
 - Select the appropriate Area of Practice, Contact Category, or Journal Type with which the category page will be associated and click OK.
- A new page will be displayed. To rename the page, double-click the category page tab, specify a name for the page, and click OK.
- Add fields, group boxes, and labels until the category page is complete.
- Close the Form Designer and save the changes made to the form layout.
Additional information regarding category pages can be found in Knowledge Base Article R10566, “Category Pages in PracticeMaster.”

When I’m journaling emails from Outlook, the Client and Contact fields sometimes populate a value and sometimes don’t. What determines when those will have a default value or not?
To determine whether an email address is associated with a client or contact, PracticeMaster utilizes a cross-reference file that is updated each time you journal an email from Outlook into PracticeMaster. The cross-reference file tracks associations between a particular email address and the Client and/or Contact to whom an email to or from that address was saved. You can control this behavior using the settings for the Outlook Plug-in in PracticeMaster. When the PracticeMaster Outlook Plug-in is installed, there are a few options designed to simplify the process of journaling emails from Outlook. Two of those options determine whether the Client ID and Contact fields are automatically populated in the new journal record.
- Prefill Client ID/Contact fields – When this check box is selected, PracticeMaster looks for an existing association between the email address and a client or contact. If one is found, then the appropriate (Client ID or Contact) field is automatically populated in the new Journal record.
- Only prefill when single match is found – This check box adds additional refinement to the Prefill Client ID/Contact fields check box. When this check box is selected, PracticeMaster will leave the Client ID and/or Contact fields blank if it finds more than one client or contact associated with the email address. When this check box is cleared, if more than one match is found for an email address, then the most recent match is used.
Note: The Client ID and Contact fields are handled separately in these scenarios (e.g., if the email address has a client but not a contact associated with it, then only the Client ID field will be prefilled).
In order to change these settings, you must uninstall the Outlook Plug-in, make your changes, and then reinstall the Outlook Plug-in for the changes to take effect.
To make changes to the prefill options for the Outlook Plug-in
- Close Outlook if it is currently running.
- From the PracticeMaster Maintenance menu, point to Integration and select Toolbar Plug-ins.
- On the Outlook tab, click the Uninstall Outlook Plug-in button. A message will be displayed indicating that the PracticeMaster toolbar has been uninstalled. Click OK to close the message.
- Select the option(s) you want to enable. (Note: These options must be configured separately for each user.)
- Click the Install Outlook Plug-in button. A message will be displayed indicating that the PracticeMaster toolbar has been installed. Click OK to close the message.
- Click OK to close the Toolbar Plug-ins window.
I’ve created several custom fields in my Calendar and Contact files (e.g., Docket No.). Is there a way I can get the new fields to sync over to Outlook?
PracticeMaster has the ability to customize which fields synchronize with Outlook. You can select which PracticeMaster field values to display in Outlook’s Subject or Description fields for Calendar records. When synchronizing contacts to Outlook, you can select which PracticeMaster fields to map to their corresponding Outlook fields. These features make it easy to display custom calendar and contact information from PracticeMaster in Outlook.
To specify which fields are displayed in the Subject field of Outlook Calendar records
- From the PracticeMaster Maintenance menu, point to Integration and select Outlook Synchronization.
- On the Calendar tab, in the Synchronization Options section, select the Customize what fields display in the Outlook subject check box.
- Click the Select Fields button.
- In the Available Fields column, double-click each field you want to include in the Subject field of the Outlook calendar records. This moves the field to the Display Fields column. Likewise, double-clicking a field in the Display Fields column moves the field back to the Available Fields column.
- In the Display Fields column, optionally change the order in which fields are displayed using the
 (Move Up) and
  (Move Down) buttons. (Note: The Description field must be the first or last field in the Display Fields column.)
 - Click OK to close the Select Subject Fields window.
- Click OK.
To specify which fields are displayed in the Description field of Outlook Calendar records
- From the PracticeMaster Maintenance menu, point to Integration and select Outlook Synchronization.
- On the Calendar tab, in the Synchronization Options section, select the Customize what fields display in the Outlook description check box.
- Click the Select Fields button.
- In the Available Fields column, double-click each field you want to include in the Description field in the Outlook calendar records. This moves the field to the Display Fields column. Likewise, double-clicking a field in the Display Fields column moves the field back to the Available Fields column.
- In the Display Fields column, optionally change the order in which fields are displayed using the (Move Up) and (Move Down) buttons.
- Click OK.
- Click OK.
To specify which fields are displayed for Outlook contacts
- From the PracticeMaster Maintenance menu, point to Integration and select Outlook Synchronization.
- On the Contact tab, in the Synchronization Options section, click the Field Mapping button.
- In the Outlook fields column, select the desired field.
- In the PracticeMaster Fields column, double-click the highlighted space or field and select the PracticeMaster field you want to be shown in the selected Outlook field.
- Click OK to close the Outlook Contact Field Mapping window.
- Click OK.
Any changes to the field settings will trigger a Critical Synchronization. This process updates previously synchronized records to use the new settings.

I know that I can synchronize only my PracticeMaster contacts with Outlook by specifying a User Filter via the Outlook Synchronization Settings. However, is there a way I can add my User ID into the User/Group field of all the contact records for my clients all at once?
A User Activated WorkFlow can be created and then run on selected records in the Client file. By not specifying a User ID in the WorkFlow, and instead having the WorkFlow use the User ID of the currently logged in User, anyone can run the WorkFlow. You can use the Search box or create a filter to display the desired clients prior to running the WorkFlow.
To create a WorkFlow that adds a User ID to the User/Group field of the linked Contact records
- From the Maintenance menu, select WorkFlows.
- Select the Client file, and then click the New button.
- Enter a Name for the WorkFlow (e.g., “Add my User ID to Contacts”).
- In the Event section, select User Activated.
- In the Actions section:
- Click the New button.
- Select Change Record and click Next.
- Select Linked Record and in the Link field, select Name.
- Click Define Template.
- Click the set button next to the User/Group field.
- In the Template Expression Editor window, click the Field button.
- Select a Field ID of Name and click Insert.
- Enter “:GroupInfo” immediately following the field name.
- Click the Operator button, select Addition, and then click the Insert button.
- Click the Value button and enter “, ” and click OK.
- Click the Operator button, select Addition, and then click the Insert button.
- Click the Function button and select UserID$(). The following will be displayed: “@SrcRec:Name:GroupInfo + “, ” + UserId$()”.
- Click OK on the Template Expression Editor window.
- Press Ctrl+S.
- Click the set button next to the User/Group field.
- Click Finish.
- Click the New button.
- Select Change Record and click Next.
- Select Linked Record and in the Link field, select Contact.
- Click Define Template.
- Click the set button next to the User/Group field.
- In the Template Expression Editor window, click the Field button.
- Select a Field ID of Contact and click Insert.
- Enter “:GroupInfo” immediately following the field name.
- Click the Operator button, select Addition, and then click the Insert button.
- Click the Value button and enter “, ” and click OK.
- Click the Operator button, select Addition, and then click the Insert button.
- Click the Function button and select UserID$(). The following will be displayed: “@SrcRec:Contact:GroupInfo + “, ” + UserId$()”.
- Click OK on the Template Expression Editor window.
- Press Ctrl+S.
- Click the set button next to the User/Group field.
- Click Finish.
- Click Save.
This WorkFlow is now ready to be run for selected clients.
For more information on WorkFlows, refer to our PracticeMaster WorkFlows Guide at Tabs3.com/support/docs.html or Knowledge Base Article R11307, “All About WorkFlows.”
You may already be set up to synchronize your calendar and contacts between PracticeMaster and Microsoft Outlook via your Exchange server, but using the Platinum Exchange Connector has so many more great benefits!
What makes the Exchange Connector a better option?
- The Exchange Connector provides a direct link between the Platinum Server and your Microsoft Exchange server. PracticeMaster and Outlook stay synchronized, even when PracticeMaster is not open on your workstation.
- Only one “administrative” Exchange user needs access rights to other users’ calendars, thus eliminating the need to assign Editor rights to all users. Without the Exchange Connector, each user must individually be configured with the appropriate rights.
- Periodic synchronization occurs at the server, thereby reducing network traffic.
- The Exchange Connector performs a single periodic synchronization for all users, ensuring that everyone is up to date.
- Access rights to users’ Exchange folders are automatically assigned to the “administrative” user as they log into PracticeMaster.
- PracticeMaster is only required to be running on one computer in the office for synchronization to occur for all users.
To set up the Exchange Connector, you must configure the Active Directory Domain Controller, the Exchange Server, the Tabs3 and PracticeMaster Platinum Server, and the Exchange Connector settings. For complete instructions on setting up the Exchange Connector, refer to Knowledge Base Article R11596, “Configuring the PracticeMaster Platinum Exchange Connector.”
For more information about Platinum features, see Knowledge Base Article R11379, “Platinum Overview.” If you have any questions regarding Platinum features, including the Exchange Connector, contact your local consultant, or contact Technical Support at (402) 419-2210.
I’m getting ready to configure contact integration with Outlook so I can sync my PracticeMaster contacts to my phone. However, I don’t want my private Outlook contacts syncing to PracticeMaster, nor do I want all of the contacts in PracticeMaster to sync to my phone, just the ones applicable to me. How can I accomplish this?
PracticeMaster’s Contact integration with Outlook provides the ability to restrict which contact records synchronize between PracticeMaster and Outlook. When configuring Contact syncing, you can optionally specify to not include Outlook private contacts as well as which contacts are synced to your Outlook folder.
Common filters are based on the User/Group or the Category fields in the Contact file. Alternatively, you can create a custom filter to further narrow which contacts you want to sync to Outlook. Our example will filter contacts based on the User/Group field.
To configure contact synchronization for your User ID to integrate with Outlook
- From the Maintenance menu, point to Integration and select Outlook Synchronization.
- On the Contacts tab, select the PracticeMaster to Outlook and Outlook to PracticeMaster check boxes. Select Automatic option for each.
Note: To prevent your private contacts from synchronizing, make sure that the Include private Outlook contacts check box is not selected. - In the Synchronization Options section, click the Select Folder button and select the appropriate Outlook Contacts folder.
- In the User Filter section:
- Select the Sync contacts assigned to these users check box, and then select your User ID.
- Select the Exclude contacts with no users defined check box.
- Click OK.
Because a critical setting was changed, you will be required to resynchronize with Outlook before continuing. If prompted to confirm changes, review the list of changes and, once satisfied with the changes, click Synchronize.
Note: If you have any questions regarding the above steps, please contact Tabs3 Technical Support at 402-419-2210 or your IT professional.
For complete information on Outlook Integration, refer to our Outlook Integration Guide at Tabs3.com/support/docs.html.
I synchronize PracticeMaster with Outlook, and I occasionally see the message “Outlook Synchronization Suspended” in the status bar. Why would this message be displayed?
There are a few reasons the “Outlook Synchronization Suspended” message can be displayed in the PracticeMaster status bar.
![]()
The specified confirmation threshold has been exceeded.
The Outlook Synchronization confirmation threshold is used to specify the minimum number of records that will require confirmation before synchronization can proceed. The purpose of this setting is to ensure that you are alerted when an unusual number of records are being synchronized (as this can indicate a problem with your synchronization settings), without interrupting more typical synchronizations. Therefore, the ideal value will vary depending on the user.
To change the threshold
- From the Maintenance menu, point to Integration and select Outlook Synchronization.
- From the Synchronization Options tab, in the Synchronization Options section, change the Require confirmation when at least xx records will be synchronized number or clear the check box.
- Click OK.
A critical Outlook Synchronization setting has been changed and therefore a critical synchronization is required.
In order to ensure the accuracy of synchronized information, a critical synchronization must be performed before any synchronization can occur after changing the settings. All other synchronization for the user will be suspended until this synchronization is performed.
A synchronization exception has occurred.
A synchronization exception is a synchronization issue that PracticeMaster cannot resolve without user intervention. Exceptions are uncommon. Refer to the “Synchronization Exceptions” section of Knowledge Base Article R11368, “Troubleshooting Outlook Calendar & Contact Integration Issues,” for more information.
Resolution
To resolve the suspended synchronization, click the “Outlook Synchronization Suspended” message in the PracticeMaster status bar. You will then be prompted to perform the required action.
For more information on PracticeMaster’s Outlook integration, refer to our Outlook Integration Guide.
Whenever we add new clients, we always add the contact record first, during their consult. Is there a way to assign the “Client” Contact Category to a contact record every time a client is added?
You can set up a WorkFlow so that every time a client record is added, the contact record is updated with “Client” as a Contact Category in addition to any other contact categories already assigned. If the contact already has a contact category of Client assigned, it will not be added again.
To create a WorkFlow to add “Client” as a Contact Category when a client is added
- From the Maintenance menu, select WorkFlows.
- Select Client, and then click the New button.
- Enter a Name for the WorkFlow (e.g., “Add Client Contact Category”).
- In the Source section, select All Records.
- In the Events section, select Record Added.
- In the Actions section:
- Click the New button.
- Select Change Record and click Next.
- Select Linked Record.
- From the Link field, select Name.
- Click the Define Template button.
- Click the set button next to the Category field.
- In the Template Expression Editor window, click the Field button.
- In the Available Records field, select Target Record.
- Select a Field ID of RP_Cat and click Insert. “@Target:RP_Cat” will be shown in the Expression field.
- Click Operator, select Addition, and then click Insert.
- Click Value and enter “; Client” and click OK.
- Click OK on the Template Expression Editor window.
- Press Ctrl+S.
- Click Finish.
- Click Save.
For more information on WorkFlows, refer to our new PracticeMaster WorkFlows Guide at Tabs3.com/support/docs.html or Knowledge Base Article R11307, “All About WorkFlows.”
Matter mode is a special status for the address on the Address tab of the Client file that allows the address to be used for that matter only and not be shared by other matters for the same client. But what does this mean, and when should you use Matter Mode?
The Understanding Matter Mode video explains when Matter Mode is used, what the drawbacks of using Matter Mode are, and how to determine which clients are currently in Matter Mode.
Watch this one-and-a-half-minute video here:
Training Videos can be accessed 24 hours a day, 7 days a week, at Tabs3.com/videos. You can also access Training Videos while in the software by selecting Help | Documentation and then clicking the See also link for Tabs3 and PracticeMaster Training Videos.
Keeping clients secure in a law firm is part of maintaining ethical walls. Some clients may require that only certain users have access to reports and statements for the client. The Working with Secure Clients video walks you through setting up a secure client and explains how to also keep contact information secure by storing it in the client file only.
Watch this 2-minute video here:
Training Videos can be accessed 24 hours a day, 7 days a week, at Tabs3.com/videos. You can also access Training Videos while in the software by selecting Help | Documentation and then clicking the See also link for Tabs3 and PracticeMaster Training Videos.

You may work with multiple matters throughout the day, so how can you ensure that you are keeping an accurate account of how much time is spent on each task? The PracticeMaster Timer window (File | Timer) can be used to track Time Tasks, Phone Tasks, and Research Tasks. Each record is saved to the Journal 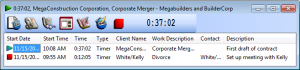 file and can include the Client, Work Description, Contact, a Description of the task, and more. Start and stop the timer for tasks throughout the day from the Timer window as needed.
Once you’re ready to bill a client for your time, you can easily turn timer records into fees using the Process Fee Records program (File | Process Timer Records). When processed, a record is created in the Fee file for the designated client, and a timer record is maintained in the Journal file. This makes it easy to keep track of your time, and to accurately bill clients for work. Using the PracticeMaster Timer means you will never again have to guess at how much time you spent on tasks.
Did you know that you can add tabs to the Client file, Contact file, and Journal file that are specific to an Area of Practice, Contact Category, or Journal Type? These tabs are called Category Pages. Category Pages are a special type of page that is only shown in the Editor window when the selected client or record is associated with that category. You can use the Form Designer to design how the pages will look.
- Client category pages are configured for individual Areas of Practice (e.g., Personal Injury, Family Law, Workers’ Compensation, etc.). These pages will only appear when a client belonging to that Area of Practice is selected.
- Contact category pages are configured for individual contact categories (e.g., Attorney, Insurance Adjuster, Witness, etc.). These pages will only appear when a contact assigned to that contact category is selected.
- Journal category pages are configured for individual journal record types (e.g., E-mail, Phone Task, Research Task, etc.). These pages will only appear when a journal record of that record type is selected.
Setting up a Category Page provides a way of showing only those fields that are relevant to the selected “category,” thus reducing the number of visible pages.
In order to create a Category page, you must first add the fields for the Category page to the associated file using File Maintenance (e.g., add the desired fields to the Contact file). Once the fields have been added, the Category page and fields must be added to the data entry window using the Form Designer.
To create a Category Page
- From the List tab of the Client, Contact, or Journal file, select Edit | Form Designer.
- To add a Category page, click the
 (Add Category Page) button.
 - Select the appropriate Area of Practice, Contact Category, or Journal Type that the Category page will be associated with and click OK.
- A new page will be displayed. To rename the page, right-click the Category page and select Rename Page. Specify a name for the page and click OK. You are now ready to add fields to the Category page.
- Click the
 (Add Field) button.
 - Select the field you want to add and click OK.
- Continue adding fields, group boxes, and labels until the Category page is complete.
- Close the Form Designer and save the changes made to the form layout.
Additional information regarding Category Pages can be found in Knowledge Base Article R10566, “Category Pages in PracticeMaster.”
