
Is your desk cluttered with sticky notes, miscellaneous pieces of paper, and phone messages? Clear your work area, consolidate your notes, and link them to the appropriate clients and contacts by using the PracticeMaster Journal file!
The following types of records can be added to the Journal file (In the Quick Launch, search for and select “Journal File”) by clicking the ![]() (New) button:
(New) button:
- Notes: Add free-form notes to keep track of any necessary information.
- Time Tasks: Keep track of how much time you spend on the various tasks associated with your matter.
- Phone Tasks: Keep track of phone calls to and from clients and third parties, including the phone number and whether you spoke with the desired person or left a message.
- Research Tasks: Keep all of your research notes in one place, including the website address and a linked file.
- Emails: Use the Outlook Toolbar Plug-in (In the Quick Launch, search for and select “Toolbar-Plug-ins” and click the Outlook tab) to save both sent and received emails.
Alternatively, Time Tasks, Phone Tasks, and Research Tasks can be created via the Timer (In the Quick Launch, search for and select “Timer”). When integrated with Tabs3 Billing, any Client Notes from Tabs3 Billing (In the Quick Launch, search for and select “Client Information” and click the Client Notes tab) can also be viewed, but not edited, in the PracticeMaster Journal file.
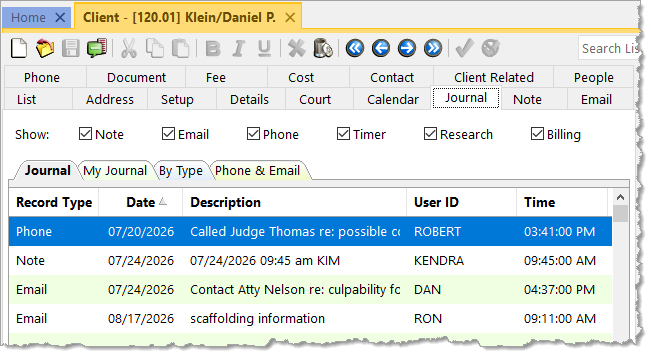
Not only can you move information from paper to PracticeMaster, but every journal record provides a Client ID and Contact field. This links the record directly to the client’s matter and/or contact for which it applies and allows others to access the same information when they need it. Simply open the Client and/or Contact file and click on the Journal tab to see all journal records pertaining to this client, or select a Journal Page tab (e.g., Email, Phone, Timer, etc.) to see specific record types. You can configure which tabs to display in the Client file by opening Configure Client Pages (Edit | Configure Client Pages) from the List tab, and in the Contact file by opening Configure Contact Pages (Edit | Configure Contact Pages).
Use PracticeMaster to help organize your notes, research, and more – declutter your workspace, and allow others access to valuable information!
More convenience for your clients. More flexibility for your firm.
Tabs3Pay just got even better. We’re excited to announce the addition of new digital wallet options: PayPal, Venmo, and PayPal Pay Later, now available when using Tabs3Pay Payment Links. These new payment methods make it easier than ever for clients to pay, and for firms to get paid.
New Digital Wallet Options
- PayPal: A trusted name in digital payments, PayPal allows clients to pay securely using their PayPal balance, bank account, or credit/debit cards.
- Venmo: Ideal for fast, informal transactions, Venmo offers a mobile-friendly solution that’s especially popular with individual clients. Venmo is a PayPal-owned service.
- PayPal Pay Later: This option gives clients the ability to split eligible payments over time. The firm receives the full payment upfront, while PayPal handles the installment plan with the client – making it easier for clients to move forward with legal services without delay.
How to Use These Payment Methods
To take advantage of these new digital wallet options:
- Version Requirement: You must be using Version 2025 (Build 25.1.22) or later. Earlier versions do not support importing these payments into Tabs3 Billing or managing digital wallet settings.
- Default Settings: All new Tabs3Pay accounts will have PayPal, Venmo, and Pay Later enabled by default.
- Managing Wallet Options: If you’re on Version 2025, you can view or adjust these settings in Tabs3 Customization on the Tabs3Pay tab.
Additional information about using Payment Links and Trust Deposit Links can be found in KB Article R11905, “Requesting and Importing Tabs3Pay Online Payments and Trust Deposits.”
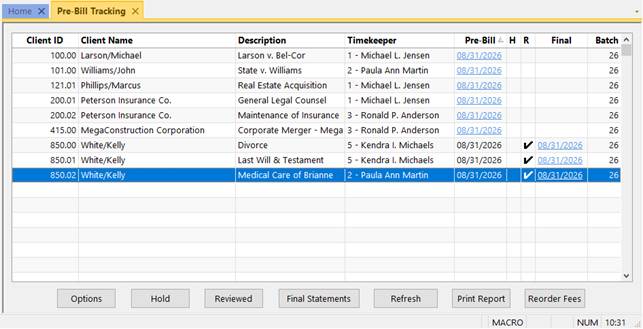
Tabs3 Billing now includes functionality to generate and maintain a pre-bill, which can be reviewed without leaving the software. A new Pre-Bill option is available when Generating Statements. This new option works in conjunction with the Pre-Bill Tracking feature. Transactions on a pre-bill are protected to ensure that unauthorized users cannot edit them during the review process.
From the Pre-Bill Tracking window, you can drill-down to a new Pre-Bill Information window allowing you to see the contents of a pre-bill. Within this window, you can easily make changes to the pre-bill by drilling down to the records or by using the Take Action pane to perform various tasks such as adding fees, costs, reorder fees, as well as finalizing the statement.
Pre-Bill Information Window
Clicking on a pre-bill from the Pre-Bill Tracking window displays a Pre-Bill Information window for that pre-bill. The Pre-Bill Information window includes matter information, pre-bill totals, a preview of the pre-bill, and the ability to perform common tasks.
The Pre-Bill Information section shows matter information, the Statement Date and Statement #, the total Billed on the statement, and the total amount Due.
The Statement Preview displays a preview of the pre-bill, using the same functionality as the Generate Statements utility. Like any preview window, you can search, zoom, and print directly from this preview. Additionally, you can drill down to transactions included on the pre-bill and make required changes, which are then immediately reflected on the pre-bill. This allows the review process for pre-bills to be done within the Tabs3 Billing application, rather than needing to print and route statements for review.
The Take Action pane allows you to perform tasks related to the pre-bill. From here you can mark the pre-bill as reviewed, add new transactions, select or edit existing transactions, write-up or write-down the total, reorder fees, or turn the pre-bill into a final statement that matches the current record.
The Comments pane lets you view and add comments during the review process. If new comments are available, a notification badge appears on the pane’s icon. Comments remain accessible throughout the pre-bill and final statement process.

Access to the Pre-Bill Information window requires both the View Statements and Print Draft Statements rights.
Transactions on Pre-Bills
In the Fee Entry, Cost Entry, Payment Entry, and Client Funds Entry windows, transactions included on a pre-bill are protected when editing outside of the Pre-Bill Tracking window. This prevents users who do not have access rights to Pre-Bill Tracking from changing transactions that are in review. The text “Pre-Bill” is also displayed in the top right of the entry window. Clicking on this text opens the Pre-Bill Information window for the pre-bill that includes the transaction.
To edit these transactions, open the Pre-Bill Information window and click on the transaction to drill down to the specific entry window. From here, you can make changes that will automatically be reflected on the pre-bill. Alternatively, a new access right has been added that allows users to make changes to transactions included on a pre-bill outside of Pre-Bill Tracking. For additional information, see KB Article R11818, “Access Rights.”
Starting in Version 2025, your firm’s default statement type will be set to Pre-Bill. You can change this at any time in Statement Customization. If your firm does not use Pre-Bill Tracking, select the Draft with “Update Pre-Bill Tracking” selected option and continue leaving “Draft” selected when generating statements to maintain your current workflow. This ensures that transactions remain editable as they were before, and won’t be locked using the new Pre-Bill protections.
For additional information on Pre-Bill Tracking, see KB Article R11972, “All About Pre-Bills.”
This feature is available in Version 2025 and later.
Version 2025 has some great new features to check out!
Tabs3 Billing Highlights
- Pre-Bill Tracking – Made multiple improvements to pre-bill tracking and the statement review process.
- Generate Statements – Added a new Pre-Bill option in Generate Statements to improve the paperless review process in the Pre-Bill Tracking window. Pre-bills streamline the review process and prevent unintended transaction changes.
- Statement Information – Added the ability to preview pre-bills and final statements in the Pre-Bill Tracking window using drill-down via the date columns to enhance accessibility. The Pre-Bill or Final Statement Information window also includes the Take Action pane, providing quick links to common actions.
- Transaction Protection – Transactions in pre-bills are protected, allowing users to make changes during the review process by drilling down to the transaction in the Pre-Bill tracking window. For changes to be made outside of Pre-Bill tracking, users must be assigned a new access right “Modify Pre-Bill Transactions Outside of Pre-Bills.”
- Statement Comments – Added a Comments pane in the Pre-Bill Information and Final Statement Information windows, allowing users to view and add comments during the review process. The pane’s icon displays a notification badge when there are unread comments, ensuring important notes are easily noticed.
- Transactions on Statements – Added “Pre-Bill” and “Final Statement” hyperlinks to the upper-right corner of entry windows to identify transactions included on a pre-bill or final statement. Users with rights to View Statements will be able to open the pre-bill or final statement using this link.
- Task Based Budgets – Added an Edit Task Based Billing Budget link to the Take Action pane in Matter Manager. Also added a new access right to control who has the ability to use this link.
- Fee Recap – Added column sorting to the Fee Recap Lookup window making it easy to group records when verifying hours.
PracticeMaster Highlights
- Document Preview – Added the ability to preview documents in the SnapShot pane when viewing Document Management lists.
- Archived Fees and Costs – Added the option to limit the range of archived fees and costs synchronized from Tabs3 Billing by date. This is particularly useful when adding PracticeMaster to an existing Tabs3 Billing system.
- Fee and Cost History – Fee and cost custom field and history tracking information is now retained when fee and cost transactions are archived (final billed and updated).
- Meeting Attendees – Updated the Dashboard to display the attendees for Outlook meetings in the tooltip.
- Fee Recap – Added column sorting to the Fee Recap Lookup window making it easy to group records when verifying hours.
Accounts Payable Highlights
- Costs on Statements – Added “Pre-Bill” and “Final Statement” indicators to the upper-right corner of the Cost Transactions window to identify transactions that cannot be edited in AP because they are included on a pre-bill or a final statement.
Tabs3 Taskbill Highlights
- Contact Initials – Added the ability to override a timekeeper’s initials using a custom field in the PracticeMaster Contact file.
Tabs3 Platinum Software Highlights
- Multi-Factor Authentication – Added the option to enable and configure multi-factor authentication (MFA) for individual Tabs3 Connect users.
All Tabs3 Software
- Access Right – Added a new access right “Modify Pre-Bill Transactions Outside of Pre-Bills.” Users, including Managers, will need assigned this new access right in order to edit transactions included on pre-bills from outside the Pre-Bill Information window.
For in-depth information on all of the new Version 2025 features, including screenshots, refer to Knowledge Base Article R11975, “Version 2025 Introduction to New Features.” A list with links to all Version 2025 information can be found in R11977, “Version 2025 Information and Resources.”
To download Version 2025, check for updates via the Quick Launch by searching for and selecting “Check for Updates” or via the Help | Check for Updates menu option, or contact your local consultant.
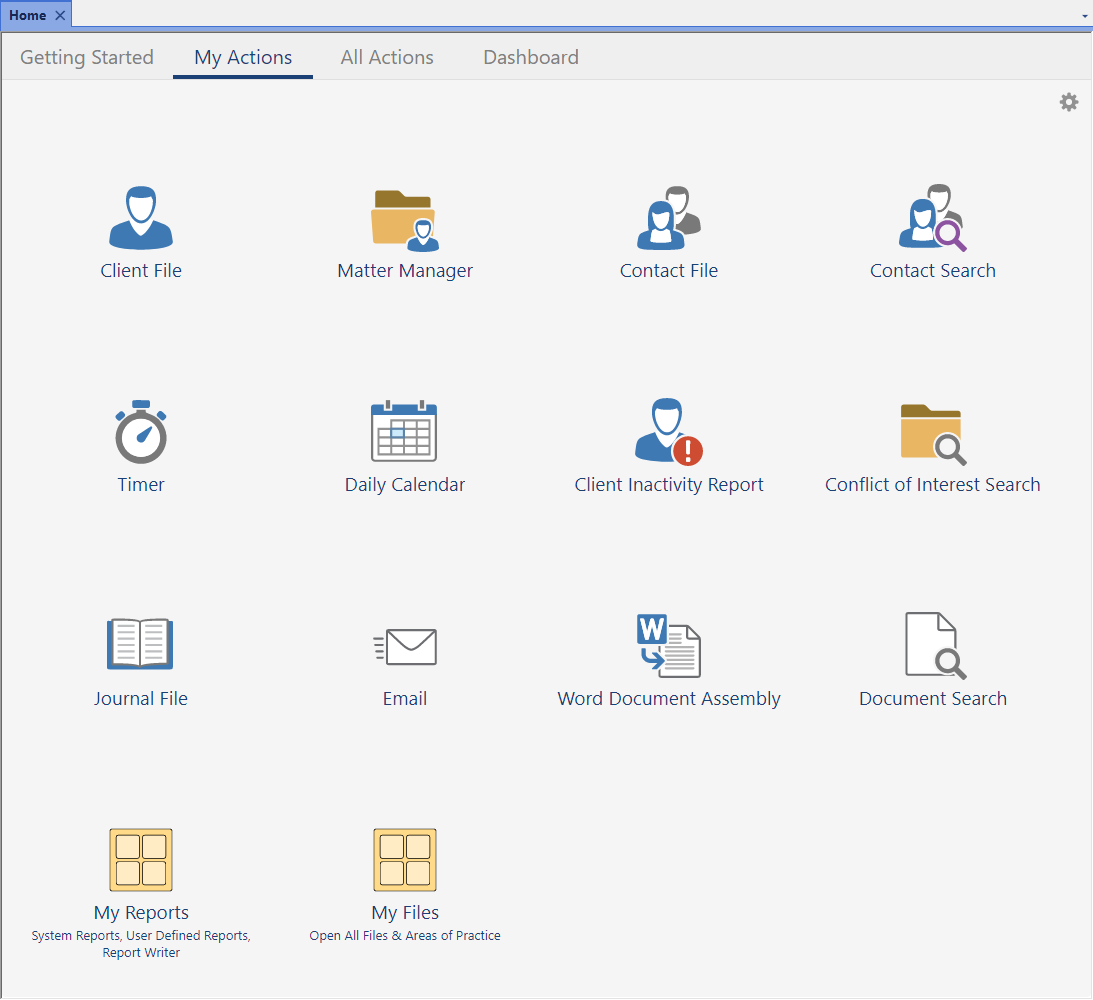
What if you could create a personalized workspace in each Tabs3 Software application, giving you quick access to your most frequently used features? With My Actions, you can!
The My Actions page view of the Home Page can be customized to display the features you use most, including reports. You can even create groups of features for easy categorization! My Actions can be customized in Tabs3 Billing, PracticeMaster, Trust Accounting (Trust), Accounts Payable (AP), and General Ledger (GL).
Customizing Actions
Add your favorite features for quick access.
To add an action
- Click the
 (Customize My Actions) icon.
 - Click the Add Actions button.
- Select the desired features in the Available Actions column.
- Click the Add button to move them to the Actions to Add column.
- Click Finish on the Add Actions window.
- Click Finish on the My Actions tab.
You can also add actions by right-clicking an item in Quick Launch and selecting Add to My Actions, or by hovering over an action on the All Actions tab and clicking the ![]() star.
star.
To remove an action, click the ![]() (Customize My Actions) icon and then click the
(Customize My Actions) icon and then click the ![]() minus sign on the action you want to remove.
minus sign on the action you want to remove.
Groups
Groups can be created to help categorize your favorite programs. For example, you could create groups for Daily Tasks, Monthly Reports, or Year-End just to name a few! Assign a color to the folder to make identification easier.
To create a group
- Click the (Customize My Actions) icon.
- Click the Add Group button.
- Enter the desired group Name.
- Optionally enter a Description.
- Select the desired Color.
- Click Next.
- Select the desired features in the Available Actions column, click the Add button to move them to the Actions to Add column, and then click Finish.
You can add actions to an existing group by dragging and dropping an action onto the group icon, or by clicking the group and then clicking the Add Actions button.
To remove a group, click the ![]() (Edit Group Properties) icon and click the Delete button.
(Edit Group Properties) icon and click the Delete button.
Want to see it in action? Check out the four minute Using and Customizing My Actions video:
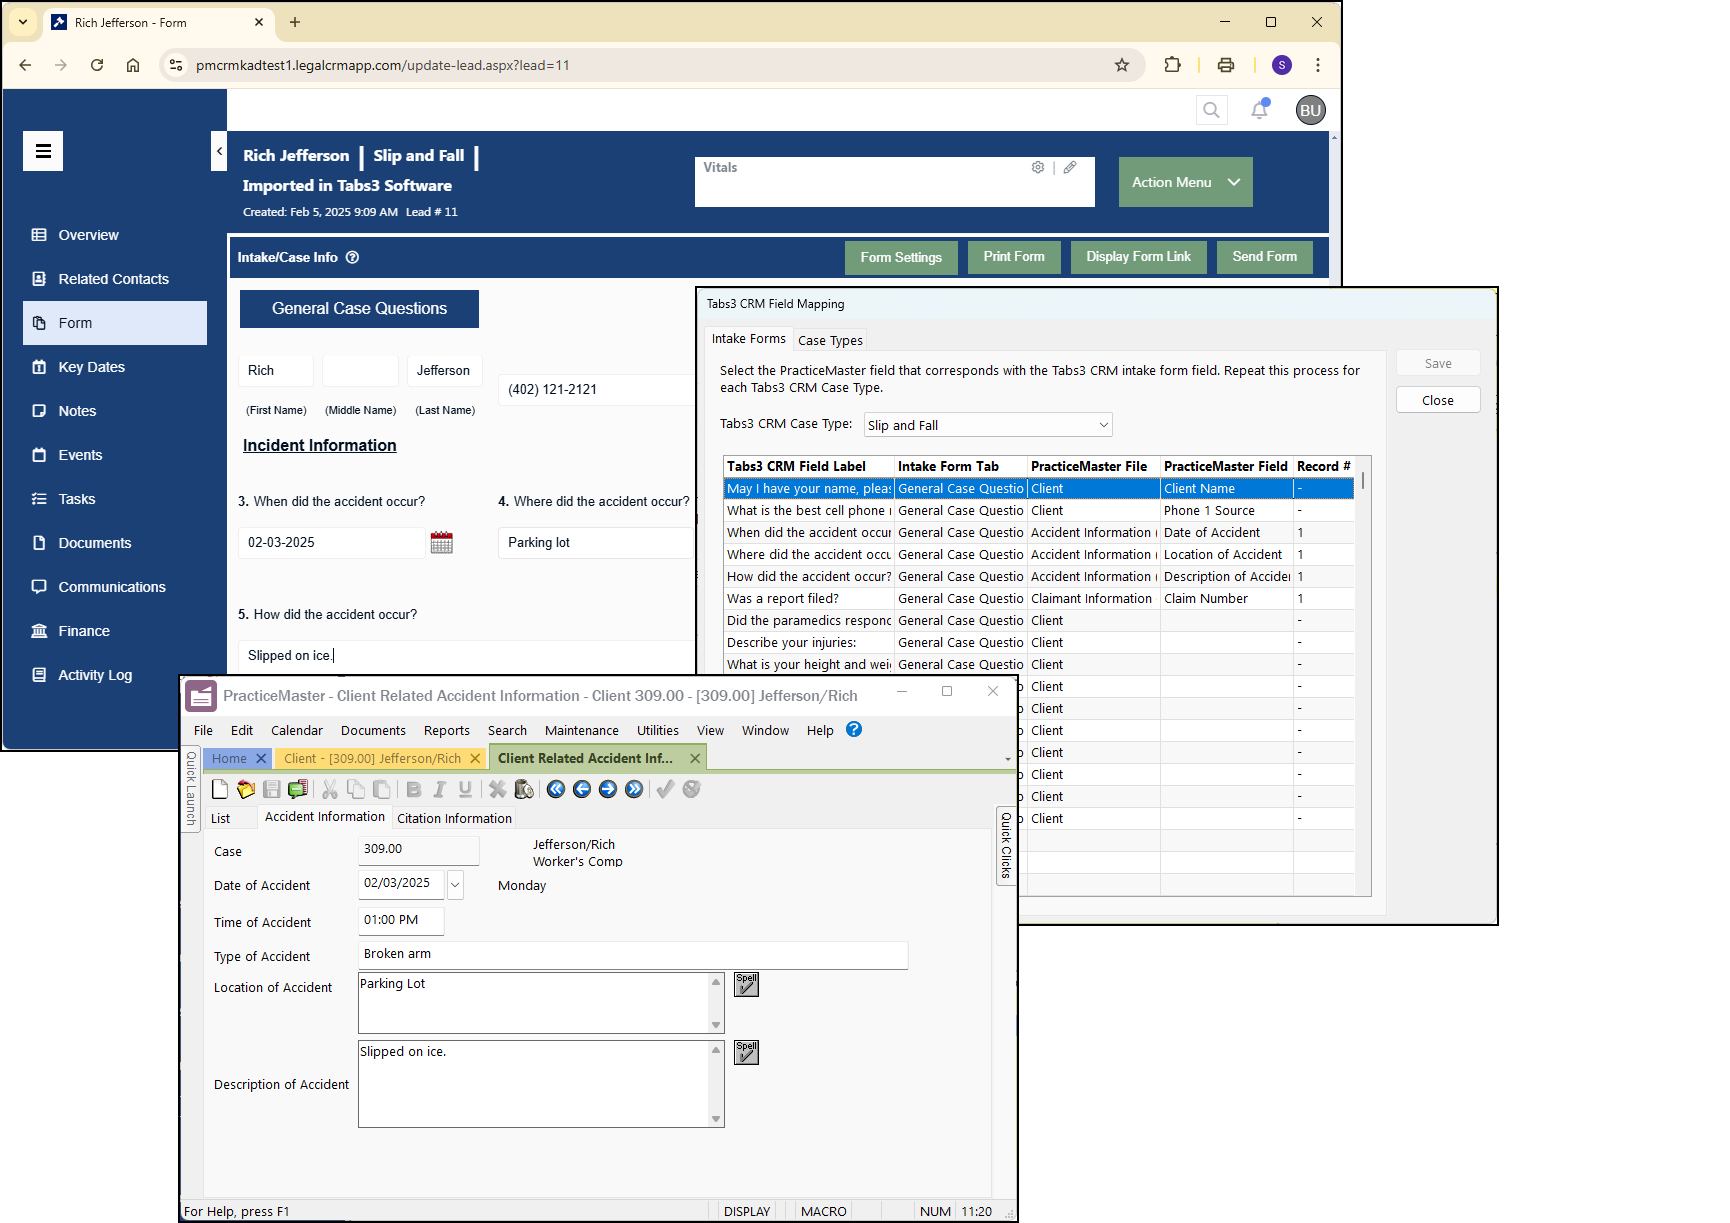
You can now map fields in Tabs3 CRM intake forms to fields in PracticeMaster Area of Practice (AOP) files. This allows you to create multiple AOP records from a single intake form for information such as witnesses to an accident or beneficiaries on a will.
New PracticeMaster File and Record # columns are now included in the Tabs3 CRM Field mapping window. To create an Area of Practice record from a field, simply select that Area of Practice file in the PracticeMaster File column. If your intake form has fields for multiple records (e.g., a form containing names of multiple witnesses), you can create multiple AOP records by assigning a number to each field in the Record # column. Fields assigned to Record #1 will be included in the first record, Record #2 in the second record, etc.
This feature is available in Version 2024, Build 24.2.26 and later.
It’s officially a new year! While tackling your usual year-end tasks, don’t forget to review these sometimes overlooked items: Timekeeper Rates, Timekeeper Profitability Figures, Client and Task Based Billing Budgets, and General Ledger Budgets!
Timekeeper Rates
It’s a new year and you want to increase your timekeeper rates, but how can you make the change happen for all applicable timekeepers on a specific date?
Tabs3 Billing makes it easy to seamlessly update timekeeper rates. You can specify the new rates and the effective date for the change, and the software will then automatically use the new rates for any applicable fees saved for that date or later. Transactions entered for a prior date will use the old rates.
To easily determine current timekeeper rates, run the Timekeeper List (From the Quick Launch, search for and select “Timekeeper List”).
To update rates and set an effective date for the new rates
- In the Quick Launch, search for and select “Timekeeper Information.”
- Select the desired Timekeeper.
- In the Effective Date of New Rates field, enter the date when you want the new rates to take effect.
- In the New Rate 1-6 fields, enter the new rate(s).
- Press Ctrl+S.
Tip: Once you are certain fees will not be entered for dates prior to the new rates, use the Move Rates button in the Timekeeper file to easily move rates from the New Rate 1-6 fields to the Hourly Rate 1-6 fields.
If any time was entered with old timekeeper rates prior to updating the Effective Date of New Rates and New Rate fields, and the transactions are still in work-in-process, you can use Change WIP Transactions (In the Quick Launch, search for and select “Change WIP Transactions”) to change transactions all at once. (Note: Because Change WIP Transactions can make changes to a large number of transactions in the software at one time, we strongly recommend making a backup prior to using this feature.)
Timekeeper Overhead
If you run the Timekeeper Profitability Report, or you plan to start, you may want to review and update the profitability figures (overhead) set up for each timekeeper. Firms typically update a timekeeper’s overhead when their salary or benefits, such as insurance, change. Accurate overhead ensures the Timekeeper Profitability Report reflects true realized profit for each timekeeper.
To easily determine current timekeeper overhead, run the Timekeeper List (From the Quick Launch, search for and select “Timekeeper List”), making sure to select the Overhead Amounts check box.
To update a timekeeper’s overhead
- In the Quick Launch, search for and select “Timekeeper Information.”
- Select the desired Timekeeper.
- Click the Profitability button.
- From here, you can manually enter each month’s Overhead figures, or click the Allocate button to open the Overhead Allocation Window and allocate the timekeeper’s overhead amounts to all 12 months at once.
- Click OK.
- Press Ctrl+S.
Tabs3 Budgets
Now that your firm’s timekeepers are squared away, consider reevaluating any budgets you currently have set up for your clients and adjust as necessary.
Client Budgets
Setting up client budgets, and keeping them updated, helps ensure you are not spending more time than desired on a client’s matter. You can optionally select to display a warning when a fee or cost transaction is added if the budgeted hours or amount for the client has been exceeded.
To easily determine current budgets set up for each client, run the Client Budget Report (In the Quick Launch, search for and select “Client Budget Report”).
To update a client’s budget
- In the Quick Launch, search for and select “Client Information.”
- Select the desired client.
- On the Budget tab, make any desired changes to the Budget section.
- Press Ctrl+S.
Task Based Billing Budgets
Like client budgets, it is a good idea to review how much you have budgeted for task based billing clients’ activities and expenses. You can optionally display a budget exceeded warning when more than the amount entered for the phase or task is saved.
To easily determine current task based billing budgets for each client, run the Task Code Budget Report (From the Quick Launch, search for and select “Task Code Budget Report”).
To update a client’s task based billing budget
- In the Quick Launch, search for and select “Client Information.”
- Select the desired client.
- On the Budget tab, in the Task Based Billing section, click the Budget button.
- Make any desired changes and click OK.
- Press Ctrl+S.
General Ledger Budgets
Budgets for your general ledger expense accounts are a must, and Tabs3 General Ledger (GL) makes it easy to set up budgets for a new year!
To easily determine current budgets for each account, run the Budget Report (In the Quick Launch, search for and select “Budget Report”).
To update budgets in GL
- In the Quick Launch, search for and select “Account Information.”
- From the Budgets tab, select the desired Account #.
- Click the Set Budgets button.
- Enter or select the desired Year.
- From here, you can manually enter each month’s budget figures, or click the Allocate button to open the Create New Budget window (for a new year) or the Budget Allocation window (for previously set up years), and allocate budget amounts to all 12 months at once.
- Click Save.
It’s easy to overlook these periodic maintenance items. Be sure to schedule some time to make sure rates, overhead figures, and budgets are all current!
With 2024 coming to a close, year-end tasks are also swiftly approaching. Get a jump on 2025 by reviewing the recommended year-end procedures! As always, look no further than our Knowledge Base and Help topics to guide you through the process.
Knowledge Base Article R10429, “Year-End Overviews for Tabs3 Software Products,” includes links to KB articles that provide checklists and frequently asked questions. The types of questions found in each year-end article are outlined below:
Tabs3 Billing – R11693
- Retaining Previous Year’s Information
- Next Year’s Entries
- GL Integration
Tabs3 Trust Accounting – R10433
- Bank Account Reconciliation
- Reports
- 1099s, including E-file
- GL Integration
Tabs3 Accounts Payable – R11278
- Checks
- Void Posted Checks
- Reports
- 1099s, including E-file
- Deleting Vendors
- GL Integration
Tabs3 General Ledger – R11600
- Advancing the Year
- Reports
Lists of basic year-end procedures are also available in Help for each Tabs3 Software application. Simply enter the keyword “year-end” on the Index tab to display the year-end procedures Help topic.
Did you know that you can split fees and costs between multiple matters in Tabs3 Billing? Split Billing provides the ability to enter fees and costs once, but split the charges between multiple matters. You must first determine which client you will be entering fees and costs for; this is your “main client.” Next, determine which clients/matters will be splitting the bill, and for what percentage each party will be responsible.

To configure clients for split billing
- In the Quick Launch, search for and select “Client Information.”
- From the Split Billing tab, in the Client ID field, select the desired main client.
- Click the Add button to open the Split Billing Matter window.
- Select the desired Split Matter ID.
- Enter the desired Split Billing Percentages for the split matter.
- Enter the desired Statement Options settings for the split matter.
- Click OK.
- Repeat step 3 for each additional split matter. (Note: This may include the main client.)
- Select the desired Split Fee Options and Split Cost Options.
- Press Ctrl+S.
Fees and costs may be entered before and/or after configuring split billing, but keep in mind that when it comes time to perform the split, only those fees and costs entered for the main client will be split amongst all parties.
When you are ready, you can Perform Split Billing (In the Quick Launch, search for and select “Perform Split Billing”). Transactions that have already been split cannot be split again so this can be run as often as needed. Perform Split Billing should be run prior to generating statements every time in order to make sure that all transactions are billed appropriately.
If, after performing the split, you need to change the way in which transactions should be split, simply Undo Split Billing (In the Quick Launch, search for and select “Undo Split Billing”). This will revert all split transactions for the selected Main Client ID and Split Billing Ref # that are still work-in-process to their pre-split values. This provides a way to make adjustments as needed.
If you have even one client who splits amounts due with other matters, and you’ve been splitting the fees and costs manually, make your billing easier by using the Split Billing feature in Tabs3.
For more information on split billing features, see Knowledge Base Article R11616, “All About Tabs3 Split Billing,” the Billing Adjustments Guide, and the Split Billing Training Video.
Tabs3 Cloud is a cloud-based legal billing and financial software solution designed specifically for the way today’s fast-paced, multifaceted law firms operate, and PracticeMaster is now available to provide a complete suite of Tabs3 Software applications!
With this new release, users have more ways to access the powerful features and tools that have transformed the way legal professionals work, in addition to the cloud-based billing and financial tools already accessible in Tabs3 Cloud.
Features include:
- Matter management tools
- Legal calendaring
- Document management
- Document assembly
- And more
Contact Sales at (402) 419-2200 for more information, or sign up for a demo at Tabs3.com/cloud.
Note: Tabs3 Software is available in Tabs3 Cloud or on-premises.
Tabs3 Websites is an affordable and professional “done for you” solution to your law firm’s website. No need to use billable time attending to the regular tasks of maintaining a website. Tabs3 Websites offers a modern, turnkey, mobile-friendly website that won’t cost you thousands of dollars and won’t take months to build.
The following features are included with Tabs3 Websites:
- Secure mobile friendly design (pick one of four design options)
- 3 stock photos
- 10 pages
- Up to 3 practice areas
- Starter content with 50+ blog posts
- Contact form
- Online Payments with Tabs3Pay
- Link to the Tabs3 Client Portal (Platinum edition only)
- Language translator (English, French, Spanish)
- Accessibility widget – access options for visitors with disabilities
- Optimized for Local SEO
- SOC 2 secure web hosting
- Quarterly content updates
- 24/7 security & tech updates
Exclusive integration with Tabs3 Software means that client conveniences, such as a link to the Tabs3 Client Portal and a “Pay My Invoice” button for use with Tabs3Pay are included.
For additional information regarding Tabs3 Websites and to schedule a demo with a product expert, visit Tabs3.com/Websites.
Tabs3 Billing and PracticeMaster directly integrate with NetDocuments cloud-based document management service! Clients added or modified in Tabs3 Billing, PracticeMaster, or Tabs3 Trust Accounting (Trust) are automatically synchronized to NetDocuments.
The following features are available with NetDocuments:
- Configure integration at the firm level from Tabs3 Billing or PracticeMaster. Once firm-level integration is set up, client and matter information added or changed in Tabs3 Billing, PracticeMaster, or Trust is sent to NetDocuments.
- Configure integration at the user level from PracticeMaster. User-level integration allows access to NetDocuments files from within PracticeMaster.
- Tabs3 Software integrates with NetDocuments at the repository level, so documents from all of your repository’s cabinets are accessible from PracticeMaster.
- You can optionally include your NetDocuments repository when performing a conflict of interest search in PracticeMaster.
- Documents assigned to a client in NetDocuments can be accessed from the PracticeMaster Matter Manager and Client windows.
- Optionally use the View NetDocuments Workspace command from the PracticeMaster Quick Clicks pane to open any NetDocuments workspaces that contain records for the selected client.
- When a NetDocuments record is selected in the PracticeMaster Matter Manager or Client file, clicking Send Email from the Quick Clicks pane will include a link to the selected document in the email message.
NetDocuments integration with Tabs3 Billing is available in Version 2024 and later. Configuring firm level integration in Tabs3 Billing requires a PracticeMaster license or PracticeMaster Try Before You Buy license.
For more information on how NetDocuments integrates with Tabs3 Software, see KB Article R11786, “NetDocuments Integration.”
When using Tabs3Pay, you can now include a QR code on a statement with Version 2024 (Build 24.2). This allows a client to scan the QR code with a smartphone to pay their bills directly via a credit/debit card or electronic check. Those payments can then be imported into Tabs3 Billing from the Import Online Payments window.
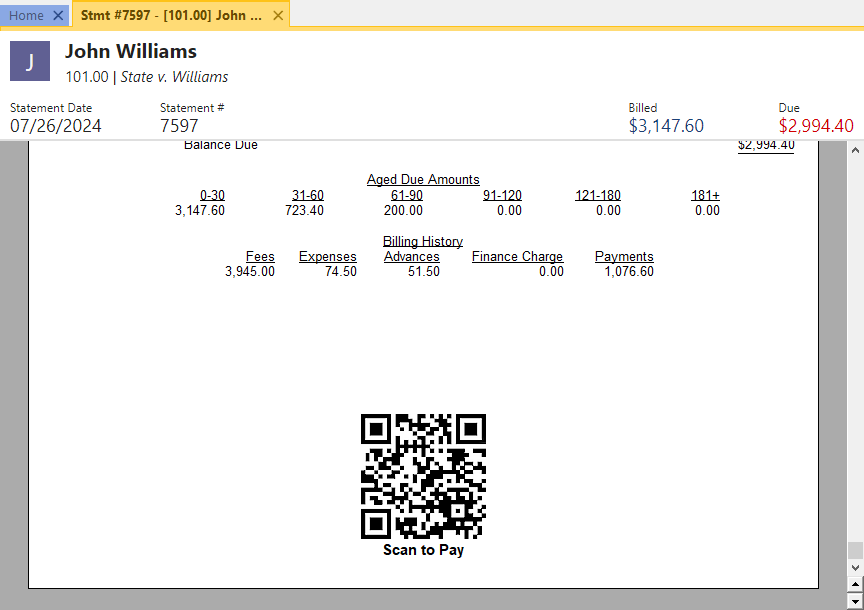
QR codes can also be included when reprinting a single updated statement. This makes it easy to re-send a statement to a client and allow them to make a payment online.
To include the QR code, modify the page layout used as the first page of your statement or cover statement.
- From the Quick Launch, search for and select “Statement Designer.”
- Select the page layout where you want to add the QR code. (Note: When sending a combined statement for a client with multiple matters, the QR code should be added to the cover statement to allow a payment for the total amount due for all matters.)
- In the System Fields group, double-click the Payment QR Code field.
- Position the QR code as desired.
- Save the page layout.
Note: See KB Article R11905, “Requesting and Importing Tabs3Pay Online Payments and Trust Deposits,” for more information about configuring payment links, including Payment QR Codes.
In the Platinum edition of PracticeMaster, users can now schedule a rebuild of the Conflict/Contact index, and/or a refresh or rebuild of the Email Attachments and Linked Documents indexes. This allows the search indexes to be rebuilt as a one-time or recurring event, regardless of whether users are currently in any Tabs3 Software application.
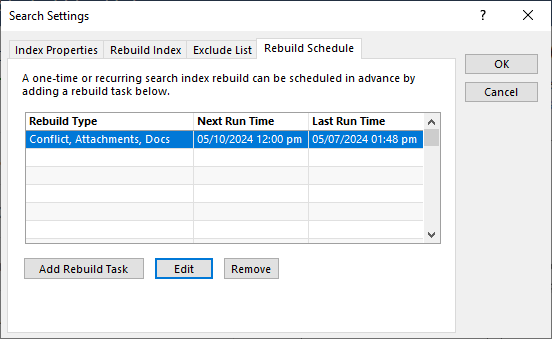
To schedule a search rebuild
- In the Quick Launch, search for and select “Search Settings.”
- From the Rebuild Schedule tab, click the Add Rebuild Task button.
- Select the desired Rebuild Type and Schedule options, and click Save.
- A message regarding your rebuild will be displayed. Click OK.
- Click OK.
In the Platinum SQL edition, users can now be linked to their Windows account. Using Windows Authentication instead of passwords allows an easier, more secure, logon experience.
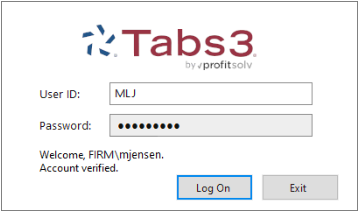
For additional information about using a Windows account, see KB Article R11935, “Using Windows Authentication to Log in to Tabs3 Software.”
Tip: Now that User IDs can be associated with a Windows account, you can use the Windows Task Scheduler to automatically log into Tabs3 Software and perform tasks (such as Data File Integrity Checks) while maintaining security for all users. Additional information about using a Startup Option can be found in KB Article R11034, “Automating Tabs3 Software Maintenance Tasks” or the Help included with Tabs3 Software.
Version 2024 has some great new features to check out!
Tabs3 Platinum Software Highlights
- Added the ability to link your Tabs3 User ID to your Windows user account. Once you log into Windows, you can launch Tabs3 Software without having to enter another password. This allows you to use the Windows login security to ensure that only the associated user can access Tabs3 Software. (Requires Platinum SQL and an Active Directory Domain Server)
- Improved performance when refreshing or rebuilding PracticeMaster search indexes.
- Added the ability to schedule PracticeMaster search index rebuilds.
- Added the option to send an email notification when a search index rebuild fails or succeeds.
- Added the ability in PracticeMaster to rebuild the Conflict/Contact index file (used for Conflict of Interest Searching) while other users are in the software.
- Simplified the process of managing SQL ODBC access rights for users.
Tabs3 Billing Highlights
- Added new configuration options for Tabs3Pay payment links and request trust deposit links:
- Added the ability to specify if overpayments are allowed.
- Added the ability to specify if payments can be made by Credit Cards and/or eChecks/ACH.
- Made multiple improvements to the Tabs3 Billing Matter Manager:
- A final statement can now be updated by clicking the “1” badge in the Work-in-Process tile.
- Added a Perform Split Billing link to the Take Action pane. This link is only displayed when viewing the main Split Billing client.
- Added an Adjust Flat Fee Amount link to the Take Action pane. This link is only displayed when viewing a Flat Fee client.
- Added NetDocuments integration, allowing client information to be pushed to NetDocuments. This feature requires PracticeMaster Basic.
PracticeMaster Highlights
- Added the ability to synchronize event attendees from Outlook to PracticeMaster (when using the Microsoft 365 Exchange Connector).
- The Document Search index no longer needs to be rebuilt when a Renumber Client or Change Key Type is performed.
- Added the ability to select specific Journal record types when running a Conflict of Interest Search.
Tabs3 Trust Accounting Highlights
- Added new Positive Pay configuration options to support Wells Fargo Bank.
- Added new configuration options for Tabs3Pay payment links and request trust deposit links:
- Added the ability to specify if overpayments are allowed.
- Added the ability to specify if payments can be made by Credit Cards and/or eChecks/ACH.
Tabs3 Accounts Payable Highlights
- Added new Positive Pay configuration options to support Wells Fargo Bank.
Tabs3 Taskbill
- Added an option to export invoice attachments from Tabs3 Accounts Payable (AP) for costs included on a statement.
For in-depth information on all of the new Version 2024 features, including screenshots, refer to Knowledge Base Article R11947, “Version 2024 Introduction to New Features.” A list with links to all Version 2024 information can be found in R11949, “Version 2024 Information and Resources.”
To download Version 2024, check for updates via the Quick Launch by searching for and selecting “Check for Updates” or via the Help | Check for Updates menu option, or contact your local consultant.
Filtering is a powerful feature that lets you see only certain records, allowing you to trim your lists down to find information more easily. There are multiple ways to filter lists in Tabs3 Billing and PracticeMaster.
Search Box
The Search Box allows you to search all fields in the current column layout of the following windows: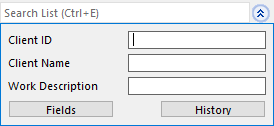
- Tabs3 Billing and PracticeMaster Lists
- Statement Manager in Tabs3 Billing
- Matter Manager in PracticeMaster
- Graphical Calendar in PracticeMaster
You can optionally narrow your search to specific fields by clicking the ![]() to the right of the Search box.
to the right of the Search box.
Filters Automatically Included in Quick Clicks
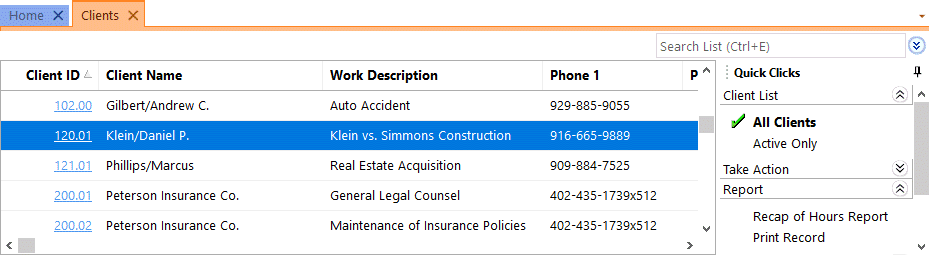
In Tabs3 Billing, the Quick Clicks pane in the Client List and Contact List automatically includes the options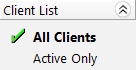 to show all records for the file or only records that have not been marked Inactive. For example, in the Client List, you have the option to show All Clients or Active Only. Additionally, the Fees, Costs, Payments, and Client Funds Lists include the options to show either Work-in-Process or Archived records.
In PracticeMaster, the Quick Clicks pane in the Client List, Contact List, and Timekeeper List automatically includes the options to show all records for the file or only records that have not been marked Inactive. For example, in the Client List, you have the option to show All Clients or Active Only.
In addition, many Lists include some common filters in the Manage Filters group of the Quick Clicks pane.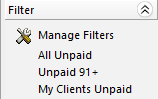 These filters vary based on the List you have open. For example, in the Tabs3 Billing Statement Manager, there are filters for All Unpaid, Unpaid 91+, and My Clients Unpaid.
Building Custom Filters
The Filter Builder can be used to create custom filters. For example, you can create a simple filter to show clients opened within a certain date range, or statements ran for a specific matter within a certain date range.
To filter clients opened in the last month
- In the Tabs3 Billing Quick Launch, search for and select “Clients.”
…or…
In the PracticeMaster Quick Launch, search for and select “Client File.” - In the Filter group of the Quick Clicks pane, click Manage Filters.
- Press Ctrl+N.
- Enter a Filter Name.
- In the Filter Builder section, click New Row.
- In the Select Field from the Client window, in the Name column, select Date_Open and then click Select.
- Select a Test Condition of in the last.
- Select a Test Value of 1 months and click OK.
- Click Save and close the Manage Quick Clicks window.
Your filter is now available to select in the Filters group of the Quick Clicks pane.
To filter the Statement Manager for statements older than 30 days on a specific matter
- In the Quick Launch, search for and select “Statement Manager.”
- In the Filter group of the Quick Clicks pane, click Manage Filters.
- Press Ctrl+N.
- Enter a Filter Name.
- In the Filter Builder section, click New Row.
- In the Select Field from the Ledger window, in the Name column, select Client_ID and then click Select.
- Select a Test Condition of equal to.
- In the Test Value column, select the Client ID.
- Click New Row.
- In the Select Field from the Ledger window, in the Name column, select Date and then click Select.
- Select a Test Condition of older than.
- In the Test Value column, select 30 days.
- Click Save and close the Manage Quick Clicks window.
Your filter is now available to select in the Filters group of the Quick Clicks pane.
Custom filters can also be more complex, using expressions. For examples of expressions used in filters, see Knowledge Base Article R11515, “Filter Expression Examples.”
Did you know that you can apply payments to multiple matters for the same client? Payments can be allocated by statement date, proportionally, or manually.
Note: The split payments will make individual journal entries in Tabs3 General Ledger that will be linked together and shown as one item on the Reconciliation and Deposit Slip Report.
To apply a payment to multiple matters
- In the Quick Launch, search for and select “Payment Entry.”
- Select the desired Client ID.
- Enter the payment as you would normally. The information entered in each field will be automatically replicated for each matter’s payment.
- Click the
 (Apply Payment to Multiple Matters) button or press Alt+A.
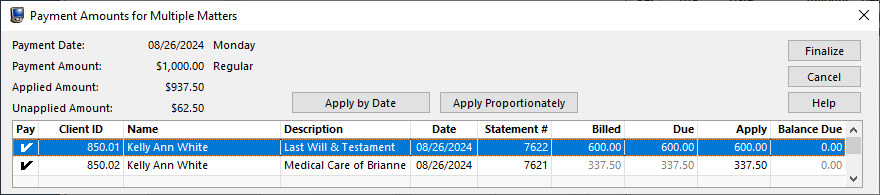
 - In the Payment Amount for Multiple Matters window:
- Click the Apply by Date button.
–or–
Click the Apply Proportionately button.
–or–
In the Apply column, enter the amount you want to apply to each matter. - Click Finalize.
- Click the Apply by Date button.
The Apply Payments to Multiple Matters option is also available when entering or importing Tabs3Pay payments. (Note: To use the Apply Payments to Multiple Matters option when importing Tabs3Pay payments, you must select the View each Payment record before creating option in the Import Online Payments window.)
The Tabs3 Billing Matter Manager acts as a central hub for matter-related information and activities in Tabs3 Billing. The Matter Manager allows you to view relevant information for each matter at a glance, perform common tasks, and run reports.
The following sections are available in the Tabs3 Billing Matter Manager:
Matter Information – Quickly view and edit matter information and notes. You can change the amount of information displayed in this section by using the arrow at the bottom.
Accounts Receivable tile – Displays the matter’s current accounts receivable balance and the last payment received.
Work-in-Process tile – Displays the total unbilled fees and costs and the last statement sent.
Client Funds/Trust Balance tile – Displays either the current client funds or trust account balance and the last activity for the account. You can toggle between these views by clicking the (Display Options) icon in the upper-right corner of the tile and selecting your preferred view.
List Content – Transactions and statements can be viewed in a combined Recent Activity list or by type with additional detail. Click a work-in-process transaction from the list to open it in the appropriate editor. Click a statement from the list to view it in the Statement Information window.
Take Action pane – Click the ![]() (Take Action) icon to perform matter related tasks such as adding transactions (including payments), generating and managing statements, and opening the matter in PracticeMaster or the trust account in Tabs3 Trust Accounting (Trust).
(Take Action) icon to perform matter related tasks such as adding transactions (including payments), generating and managing statements, and opening the matter in PracticeMaster or the trust account in Tabs3 Trust Accounting (Trust).
Reports pane – Click the ![]() (Reports) icon to run reports for the current matter from a customizable list. Click the (Customize Reports) icon in the upper-right corner of the pane to open the Customize Reports window. From this window, you can add or remove reports from the reports pane and update the report definition assigned to each report for use with the Matter Manager.
(Reports) icon to run reports for the current matter from a customizable list. Click the (Customize Reports) icon in the upper-right corner of the pane to open the Customize Reports window. From this window, you can add or remove reports from the reports pane and update the report definition assigned to each report for use with the Matter Manager.
The Microsoft 365 Exchange Connector has been enhanced in PracticeMaster Version 2023 so recurring events created in Outlook will synchronize with the PracticeMaster calendar. This makes it easy to add recurring meetings or events in either Outlook or PracticeMaster.
These events will synchronize as a series of individual calendar events in PracticeMaster. Edits to individual events can be made in PracticeMaster. However, modifying or deleting the entire series must be done in Outlook.
Important: Syncing recurring events created in Outlook with PracticeMaster is only supported when configured to use the Microsoft 365 Exchange Connector. See KB article R11898, “Configuring Platinum Exchange Connector for Exchange Online/Microsoft 365,” for more information.
A Check Requests feature is now available in PracticeMaster, which allows users to add a check request for payment on behalf of a client or a work expense. Once the request is approved, users in Tabs3 Accounts Payable or Trust Accounting can create an invoice and generate a check or electronic funds transfer (EFT).
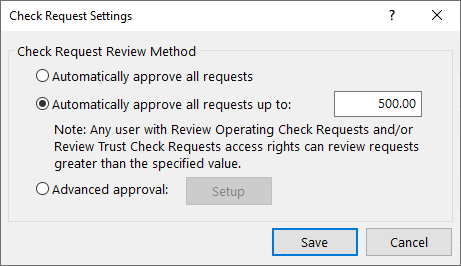
The Check Requests Settings window in PracticeMaster allows you to optionally configure a threshold at which a check request must be reviewed. An advanced option is available to set additional thresholds for which users can review requests, based on the amount. To access the Check Request Settings window, in the PracticeMaster Quick Launch search for and select “Check Request Settings.”
The Check Requests window in PracticeMaster allows users to enter their requests, as well as allows those who can review check requests to approve or deny them. To access the Check Requests window, in the PracticeMaster Quick Launch, search for and select “Check Requests.”

The Check Requests window in Trust and AP shows approved requests and allows users to create Trust Transactions or Invoice/Manual Check entries based on the check request. To access the Check Requests window, in the Trust or AP Quick Launch, search for and select “Check Requests.”
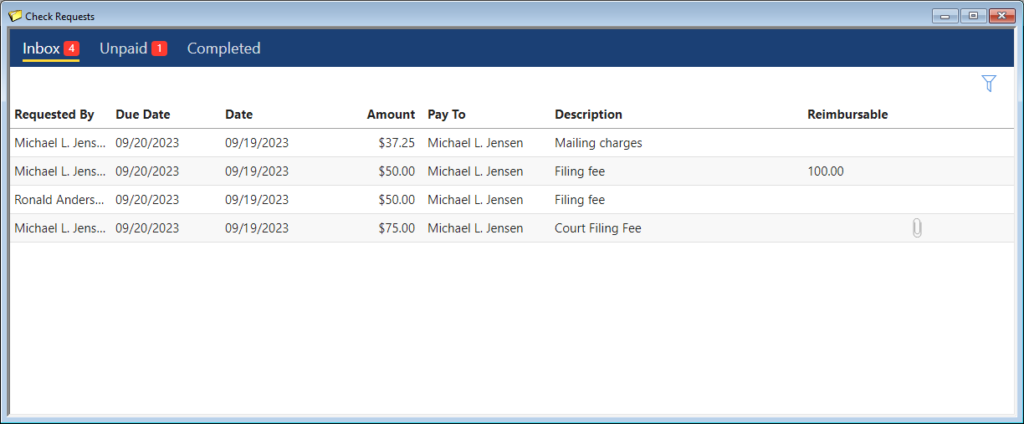
New access rights to Add Operating Check Requests, Add Trust Check Requests, Delete Other Users’ Check Requests, Review Operating Check Requests, Review Trust Check Requests, and Allow Self-Approval of Check Requests have been added. For additional information, see KB Article R11818, “Access Rights.”
This feature is available in Version 2023. For more information about check requests, see KB Article R11923, “Tracking Check Requests.”
We have added a Client Portal to Tabs3 Billing Version 2023 that allows you to invite clients and contacts you select to access an online client portal! This allows those customers to view their current balance and billing history. When combined with Tabs3Pay, clients can submit electronic payments that automatically apply towards their current balance due.
Setting up a client portal for the firm is performed in the Tabs3 Connect Administration window of System Configuration. Once a manager enables the portal and configures the web address, invitations can be sent to the firm’s clients. (Note: Tabs3 Connect must show “Connected” to enable the client portal; see KB Article R11480, “All About Tabs3 Connect,” for more information on configuring and using Tabs3 Connect.)
Configuring access to the client portal is done in the Client Portal Settings window, which can be accessed from the Tabs3 Billing Matter Manager, Client Information window, Contacts list, or Contact Information window. When starting from a client, you can select contacts to access that specific matter; when starting from a contact, you can select which matters the contact has access to.
A new access right for Client Portal Settings has been added. For additional information, see KB Article R11818, “Access Rights.”
For more information about the Client Portal, see KB Articles R11919, “Configuring the Tabs3 Client Portal,” and R11920, “Using the Tabs3 Client Portal.”
We’ve added Tabs3 CRM! Tabs3 CRM (client relationship management) is a new add-on service that will help law firms build their business by tracking and managing potential client leads, and bringing them into PracticeMaster once they are a client. It is used to gather and manage prospective clients from multiple marketing sources. Tabs3 CRM simplifies the process of qualifying leads through customized intake forms and automated communication (via phone, email, and text messages). Once a firm is ready to take on the client, they can easily create a client in PracticeMaster using an import process. Additionally, when integrated with Tabs3 CRM, PracticeMaster Conflict of Interest can optionally check leads in Tabs3 CRM for conflicts.
You can sign up for Tabs3 CRM directly in PracticeMaster. Visit Tabs3.com/Tabs3CRM to learn more and to schedule a demo with a product expert to see how Tabs3 CRM works and help get you started. Additional information about Tabs3 CRM can be found in the following KB Articles:
Version 2023 has some great new features to check out!
Tabs3 Platinum Software Highlights
- Client Portal – We’ve added a client portal to Tabs3 Billing that allows selected clients to access their current balance and billing history with any web browser. When combined with Tab3Pay, clients can submit electronic payments that automatically apply towards their current balance due.
- Check Requests – A check request feature has been added to the software allowing you to enter, track, and review requests for reimbursements via PracticeMaster. Those check requests can then be used to create an invoice and generate a check or electronic funds transfer (EFT) in Tabs3 Accounts Payable or Trust Accounting.
- Outlook Recurring Event Synchronization – Enhanced the Microsoft 365 Exchange Connector so recurring events created in Outlook will synchronize with the PracticeMaster calendar.
PracticeMaster Highlights
- Tabs3 CRM – Easily track and manage potential client leads with Tabs3 CRM (client relationship management). Tabs3 CRM is an add-on service that will help your firm build your business with customized intake forms and marketing automation. Once your firm is ready to take on the client, you can easily create a client in PracticeMaster using an import process. Additionally, the PracticeMaster Conflict of Interest Search can optionally check leads in Tabs3 CRM for conflicts.
- Contact Categories – A new access right has been added allowing you to control who can add new Contact Categories. Contact Categories are used in the Contact file to classify contacts by type such as attorney, judge, opposing counsel, etc.
Tabs3 Software Highlights
- Simplified Update – Beginning with Version 2023, any necessary data conversions are done automatically during the installation. This means you don’t need to perform additional steps prior to using the software, greatly simplifying the update process. Furthermore, if you are currently on Version 2020 or later, updating to the latest version can be done with a single installation.
For in-depth information on all of the new Version 2023 features, including screenshots, refer to Knowledge Base Article R11925, “Version 2023 Introduction to New Features.” A list with links to all Version 2023 information can be found in R11927, “Version 2023 Information and Resources.”
To download Version 2023, visit Tabs3.com/update or contact your local consultant.
Do you have a new pro bono client, or need to enter a fee or cost at no charge for a regular client? Clients and transactions can be marked as non-billable so that you can still track your time without charging your client.
Non-billable Clients
If you have a client for which there will be no billable time, you may want to mark the client as non-billable. Marking the client as non-billable prevents the accidental entering of billable transactions for the client. Transactions can still be entered, but they will default to a non-billable Bill Code.
To mark a client as non-billable
- From Tabs3 Billing Quick Launch, search for and select “Client Information.”
- From the Setup tab, in the Status section, select the Non-billable check box.
- Press Ctrl+S.
Non-billable Transactions
When fees (or costs) are entered, the transaction’s Bill Code can be specified as 1 – Non-Billable / Non-Printable if you do not want the transaction to be printed on a statement or 2 – Non-Billable / Printable if you want the transaction to be printed on a statement.
When using a Bill Code of 2 – Non-Billable / Printable, transactions will be printed on the statement, but the amount will display “n/c” to indicate that there is no charge for the transaction. If desired, this text can be changed via Statement Customization.
To change the “n/c” terminology
- From the Quick Launch, search for and select “Statement Customization.”
- On the Terminology tab, select Line 8 from the list.
- In the Line 8 field, change the text as desired up to 60 characters.
- Press Ctrl+S.
You can optionally configure transaction codes (tcodes) to default to a non-billable Bill Code. This means that when you select the tcode on a transaction, the Bill Code will already be set as non-billable.
To specify a Bill Code for a tcode
- In the Quick Launch, search for and select “Transaction Code Information.”
- On the Tcode tab, select the desired Tcode.
- Select the desired Bill Code.
- Press Ctrl+S.
In summary, there are three different ways to track non-billable transactions: mark the client as non-billable, specify a non-billable Bill Code when entering individual transactions, and/or configure tcodes to be non-billable. Take a look at these options and see which option is right for you the next time you need transactions to be non-billable.
There are several ways you might handle billing for a contingency case, but in the end you must adjust the amount owed based on the outcome. So what options does Tabs3 Billing provide?
Contingency billing occurs when a firm performs work for a client and gets paid contingent upon a settlement. There are many variations for this type of arrangement, such as whether or not costs will be billed, percentage amounts of the settlement, etc. When billing contingency clients using Tabs3 Billing, you typically bill them after the matter is settled; however, you may also want to bill them during the course of the matter. When billing during the course of the matter, you may want to bill only expenses or advances. You may also want the client to see the services rendered for a particular period without actually billing the fees. Then, once the matter is settled, you can write the fees/costs up or down and send the client a final bill.
For example, let’s say that you have a contingency client and you want to bill them monthly for all costs incurred, but not include fees on the statement. You must first create a statement template that includes the desired information on the statement, and then assign it to the contingency client.
To create a statement template for costs only
- In the Quick Launch, search for and select “Statement Templates.”
- In the Template ID field, enter a name for your template.
- On the Fee Format tab, select a Fee Format of No Fees.
- On the Cost/Payment Format tab, select the desired Expense Format and Advance Format.
- Select any other settings as desired.
- Press Ctrl+S.
To assign a statement template to a client>
- In the Quick Launch, search for and select “Client Information.”
- Select the desired Client ID.
- On the Statement Options tab, select the desired Draft Template and Final Template (e.g., the template we created in the previous set of steps).
- Press Ctrl+S.
Using our example, let’s say that the matter has been resolved with a particularly good outcome. You determine that you need to write-up the client’s fees by $5,000 in order to meet the agreed upon percentage of the settlement that your firm will receive.
To write-up fees by an amount
- In the Quick Launch, search for and select “Write-Up/Write-Down Fees & Costs.”
- Select the desired Client ID.
- In the Transaction Type section, select Fees.
- Click the Calculate Client Total button.
- In the Amount Adjustment Type section
- Select Amount.
- In the New Total field, enter the total amount in fees you want to bill the client.
- Click OK.
You can now change the matter’s Final Template to a statement template that has a Fee Format of Standard and generate a final statement for your client. (As an alternative, you can select the statement template via Generate Statements.)
How do you handle overpayments, checks that don’t clear the bank, or checks entered for the wrong account? Make a payment adjustment! Payment adjustments can be used to refund or reverse payments.
When a client pays more than is due, you may want to refund part of the payment. In order to refund a payment, the payment must have been final billed and updated. Additionally, only the unapplied portion of a payment can be refunded.
In some situations, you may need to reverse the entire payment. Typically, this is because either a check didn’t clear the bank or a payment was entered to the wrong account. Like refunds, a payment can only be reversed if it has already been final billed and updated. However, payments can be reversed regardless of whether a portion is currently unapplied or not.
When refunding or reversing payments, the following integration options are available, when applicable:
- When you are set up to process credit cards, and the payment was originally processed via credit card, you will be prompted whether or not to process the adjustment through the processor.
- You will have the option to write a check for the amount (when integrating with AP), create a payment to another client, deposit the amount into client funds, or just record the adjustment.
- When integrating with GL, you will have the option of specifying a date for automatic journal entries.
To reverse or refund a payment
- In the Quick Launch, search for and select “Payment Adjustment.”
- Select the Client ID.
- In the Reference field, select the payment you are adjusting.
- In the Adjustment Information section, select Reversal or Refund.
- Enter the desired Adjustment Date. This date will be used for reports.
- If you selected Refund, enter the desired Adjustment Amount.
- Click OK.
- Click Yes to continue.
- In the Payment Adjustment Options window, select whether you will be writing a check for the adjustment, just recording the adjustment, creating a payment for another client, or depositing the adjustment into Client Funds.
- Click OK.
- If you are integrating with GL, and did not select the option to write a check, an Adjusting Journal Entries window will be displayed. Select the date to use for adjusting GL journal entries.
- Click OK.
- In the Payment Adjustment Description window:
- If you want a transaction to be saved to the Fee file, enter a Description and click OK.
- If you do not want a transaction saved to the Fee file, click Cancel.
Payment adjustments provide an easy way to refund an amount back to your clients, or to reverse payments when a mistake was made.
The difference between Timekeepers and Users is often confused. So what exactly is the distinction between how timekeepers and users are used in the software?
Users represent anyone who uses the software, or a resource that needs to be scheduled, such as a conference room. Timekeepers represent any person whose time is entered or billed, such as attorneys and paralegals.
You work with timekeepers and users every day, possibly in ways you don’t even realize. Let’s take a look at some different ways timekeepers and users are used in the software below.
Timekeepers can be used to:
- Track time
- Assign billing rates
- Specify which timekeeper is primary, secondary, and originating for a matter
- Track billing and productivity
- Specify reporting ranges
- Specify fee compensation rules (Tabs3 Billing only)
- …and more
Users can be used to:
- Log in to the software
- Specify access rights
- Track who enters data in Tabs3 Billing, PracticeMaster, Trust Accounting (Trust), Accounts Payable (AP), and General Ledger (GL)
- Add to groups to make entering calendar records easier
- …and more
Because there are such different uses for timekeepers and users, when, how, and why you should add or delete them vary. When adding or deleting timekeepers and users, keep the following in mind:
- You can only add as many timekeepers as your license allows. Because of this, it may be necessary to renumber or delete timekeepers or add timekeepers to your license.
- There is no limit to the number of users you can add; you are instead limited by how many users can be logged in to the software at the same time. Because of this, there is never a need to delete users. In fact, deleting users can cause Data File Integrity Check Errors.
It is important to note that Tabs3 Billing and Trust are licensed by Timekeeper whereas PracticeMaster, AP, and GL are licensed by User. For more information on timekeeper and user limits, refer to Knowledge Base Article R10788, “Active User Limits.”
Not sure what your timekeeper or user login limits are? These can be found in the About window (in the Quick Launch, search for and select “About”). The About window displays the Active User Limit in each of the applications. In Tabs3 Billing, you can also see the Maximum Timekeeper Limit, and in Trust you can see the Maximum Attorney Limit. For more information about what is contained in the About window, refer to Knowledge Base Article R11865, “Information in the About Window.”
For more information on deleting timekeepers and users, refer to Knowledge Base Articles R10969, “Renumbering vs. Deleting Inactive Timekeepers,” and R10840, “Deleting User IDs.”
Knowing the difference between timekeepers and users can help you know which settings may need to be changed when necessary, as well as when you should add or delete them, or update your license. For more information on timekeeper and users, refer to the Help by pressing F1 from any window.
The IRS changed the layout of Form 1099-MISC and Form 1099-NEC for tax year 2022. Tabs3 Trust Accounting (Trust) and Accounts Payable (AP) have been updated to print using the new form layouts. To ensure compatibility, order your forms from Nelco®. These forms are guaranteed to be 100% compatible with Tabs3 Software. You can order forms by calling 1-800-266-4669 or visiting NelcoSolutions.com/Tabs3.
Additionally, the Tabs3 E-file feature has been updated to support the state of Alabama’s requirement for the State income amount to be filled in. See KB Article R11922, “Form 1099-MISC and Form 1099-NEC Changes for Tax Year 2022” for additional information.
Update to Version 22.2.15 or later for changes to 1099s.
Note: Due to the form changes, you will not be able to print 1099 forms for tax year 2021 or prior after updating. The 1099 Report can still be used to gather information for prior year.
You can now schedule a future-dated payment or series of payments from within Tabs3 Billing and a future-dated trust deposit or series of trust deposits from within Trust Accounting that will automatically process via Tabs3Pay. This allows you to get paid on a specific date, even when you’re not in the office. Additionally, recurring payments are a convenient way of providing a simple payment plan for your clients. Once the payment is processed, it will be displayed in the Tabs3 Billing Import Online Payments window for import.
In Tabs3 Billing, the Schedule Payments window can be accessed via the Quick Clicks pane in Matter Manager or Statement Manager, a toolbar button in Payment Entry, or in the Quick Launch pane by searching for and selecting “Schedule Payment.”
In Trust, the Schedule Payments window can be accessed via a toolbar button in Trust Transaction Entry, 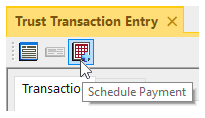 or in the Quick Launch pane by searching for and selecting “Schedule Payment.”
Note: Managing scheduled payments is performed in the Tabs3Pay Web Portal.
Integration with LexShare, a secure file sharing and electronic document signing service, has been enhanced in the most recent version of PracticeMaster. LexShare integration allows your clients to easily upload files that you request, or add their electronic signature to a document that you send. The document can then be imported to the PracticeMaster Document Management file.
The Request eSignature, Request File, and Send File actions are available in the Take Action group of the Quick Clicks pane in the Matter Manager, Client file, and Document Management file. These links open a new window where you can send an email to a client or other recipient, allowing them to access, sign, and return documents to your office.
Previously, LexShare integration required the LexShare Add-in for Outlook to perform secure file transfers and electronic signature requests. Beginning with Version 2022 (Build 22.2.10), Outlook is no longer required.
Additional information about using PracticeMaster with LexShare can be found in KB Article R11901, “LexShare Integration.”
Did you know that you can have certain software features automatically run as soon as a Tabs3 Software application is opened? You can use startup options to help automate tasks by entering command line options in the Target field of the desktop shortcut icon.
For example, in Tabs3 Billing you can have the Fee Entry window automatically open, and in PracticeMaster you can have the Matter Manager window automatically open. Other popular startup options include opening the Calendar and the Timer window. Some startup options, such as the Data File Integrity Check, can be automatically started in every application. You can even use a startup option to automatically enter your User ID. If you do not use a password, the Logon window will be bypassed and you will automatically be logged into the software. However, if a password has been set up for the user, the User ID will be filled in and a password will be required.
To add a startup option to PracticeMaster
- Right-click the desktop icon used to start PracticeMaster and select Properties.
- From the Properties window, click the Shortcut tab. The startup option can be entered following the program file name in the Target field. An example of the Target field when using the User ID startup option is:”C:\Program Files\Tabs3\CM.EXE” ALICEAn example of the Target field when using the option to start the Data File Integrity Check at a specified time is:”C:\Program Files\Tabs3\CM.EXE” /DFIC /T 11:30p
Multiple startup options can be specified in the Target field if desired. Options must be separated by a space. An example of multiple startup options is:
“C:\Program Files\Tabs3\CM.EXE” /TIMER /CALENDAR /WEEKLY
- Click OK.
You can find a complete list of startup options applicable to the application you are working in by searching for “Help Topics” in the Quick Launch. On the Index tab, simply type “Startup Options”. For more information on automating tasks, including startup options, refer to Knowledge Base Article R11034, “Automating Tabs3 Software Maintenance Tasks.”
Integration has been added with LexShare, a secure file sharing and electronic document signing service, which allows your clients to easily upload files that you request, or add their electronic signature to a document that you send. The document can then be imported to the PracticeMaster Document Management file.
The Request eSignature, Request File, and Send File actions are available in the Take Actions group of the Quick Clicks pane throughout PracticeMaster. These links open a new email message in Outlook where the LexShare Outlook Add-in can be used to send a request to the client.
A new Import LexShare Files window is used to import documents that have been uploaded to LexShare as Document Management records in PracticeMaster. The number of documents available for import is displayed on the Import LexShare Files action.
Additional information about using PracticeMaster with the LexShare service can be found in KB Article R11901, “LexShare Integration,” and information on using the LexShare Add-in for Outlook can be found in KB Article R11906, “Using the LexShare Outlook Add-in.” The LexShare Add-in requires Outlook 2019 or later using a hosted version of Exchange.
The LexShare integration is available in Version 2022 (Build 22.2.7) and later.
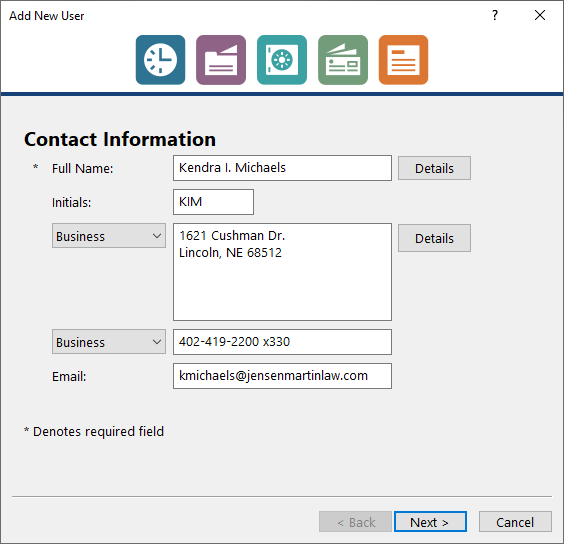
Creating a new user is now performed via a wizard. Managers can create users in the User Configuration window of System Configuration, or in the Timekeeper Information window of Tabs3 Billing or PracticeMaster.
The Add New User wizard allows you to specify the User ID and optionally enter contact information, specify login credentials, create a timekeeper, configure Tabs3 Connect access, and set additional user rights.
To add a new user in System Configuration
- From the File menu, select Open, and then click Users.
- Press Ctrl+N.
- Enter the user’s name and other information on the Contact Information panel, and then click Next.
- Enter the User ID, Password, and assign the appropriate access profiles on the Login Credentials panel, and then click Next.
- Optionally specify timekeeper information on the Billing Information panel, and then click Next.
- If using Tabs3 Connect, optionally allow access on the Tabs3 Connect Access panel, and then click Next.
- If integrating with PracticeMaster, optionally add the user to groups, assign calendar rights, and assign Tabs3/PracticeMaster timekeepers on the Additional Setup panel.
- Click Finish to save the new user record.
The Add New User wizard is available in Version 2022 (Build 22.2.7) or later.
When it is time for a client to replenish a trust account, use the new Request Trust Deposit feature! Enter the amount requested and select the corresponding IOLTA account. Tabs3 Billing then creates an email message with an embedded payment button. Review the message and send it to your client.
Your client receives the message, clicks the Make Trust Payment button, and funds the trust account by ACH bank transfer or credit/debit card.
Request Trust Deposit is powered by Tabs3Pay, the secure online payments platform built into Tabs3 Billing and Trust Accounting.
Note: The Trust Request feature requires Tabs3 Billing and Trust Accounting Version 2022 (Build 22.2.3) and later. Including a Make a Trust Payment button in a trust request requires a Tabs3Pay merchant account configured in Tabs3 Billing and Trust Accounting. For additional information, see KB Articles R11869, “Configuring Tabs3Pay,” and R11905, “Requesting and Importing Tabs3Pay Online Payments and Trust Deposits.”
Tabs3Pay now offers surcharging! Help your firm save on expenses while still providing clients the option to pay by credit card. While processing fees are normally paid by the firm, with surcharging, credit card fees are passed on to the cardholder instead. Only credit card transactions (Visa, Mastercard, American Express, Discover, etc.) are subject to surcharging. Processing fees for debit card and ACH (eCheck) transactions continue to be paid by the firm.
Tabs3Pay surcharging has the following requirements:
- Your firm must have Version 2022 (Build 22.1.8 or later) installed.
- You must verify your state allows surcharging.
- You must notify your clients and credit card company 30 days prior to surcharging.
- You must enable surcharging for all clients.
If you have not yet signed up for Tabs3Pay, simply update to Version 2022 (Build 22.1.8 or later) and sign up (in the Quick Launch, search for and select Tabs3Pay Web Portal). The option of enabling surcharging will be included in the signup process. If you are already using Tabs3Pay, contact Tabs3 Support at 402-419-2210 for assistance with enabling surcharging on your existing account.
For more information on Surcharging, see the Surcharging section of Knowledge Base Article R11871, “Tabs3Pay Frequently Asked Questions.”
In Version 2022, all contact information has been consolidated for all Tabs3 Software applications.
The Contact file now includes information for Trust payees, AP vendors, and users, making it easy to update address information in one place, including clients, billing contacts, related parties, vendors, payees, and logon users.
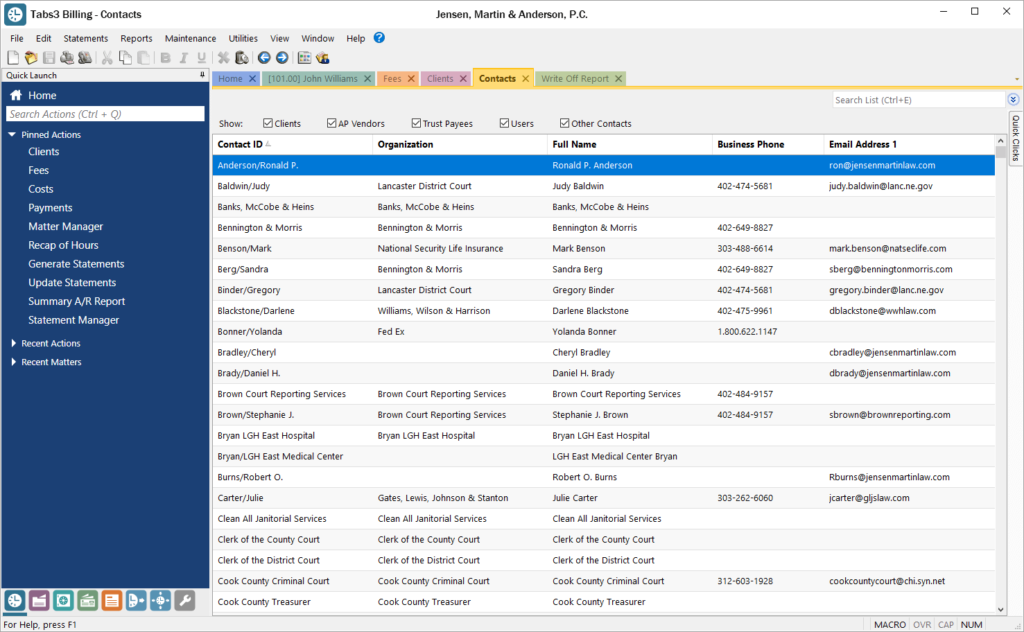
The Contact Information window is available in Tabs3 Billing, PracticeMaster, Trust Accounting, Accounts Payable, and System Configuration. This window now includes a Details button next to the Full Name field for individual contacts, which provides access to separate First Name, Middle Name, Last Name, and Initials fields. To select a contact, the Contact Lookup window has been enhanced for each of these applications, including a SnapShot pane, as well as check boxes at the top making it easy to quickly filter the list to just clients, AP vendors, Trust Payees, etc.
You can update to Version 2022 by going to Tabs3.com/update.
Version 2022 has some great new features to check out!
Unified Contacts
- Consolidated contact information throughout the Tabs3 Software into a single Contact file, including clients, billing contacts, related parties, vendors, payees, and logon users. This makes it easy to update address information in one place.
- The Contacts list in Tabs3 Billing and PracticeMaster as well as in the Contact lookup window in Tabs3 Billing, Trust Accounting, Accounts Payable, and System Configuration include check boxes at the top making it easy to quickly filter the list to just clients, AP vendors, Trust payees, etc.
- The Contact Information window is now available across Tabs3 Billing, PracticeMaster, Trust Accounting, Accounts Payable, and System Configuration. When working with an individual, a Details button next to the Full Name field allows you to access fields for First Name, Middle Name, Last Name, and Initials.
- The Rename Contact utility is now available across Tabs3 Billing, PracticeMaster, Trust Accounting, and Accounts Payable. This utility has been enhanced to update the First Name, Middle Name, Last Name, and Initials fields. Because information is now stored in the Contact file, this utility replaces the Rename Payee utility in Trust.
Enhanced Lists
- Totals can now be displayed on the Fees, Costs, Payments, Client Funds, Write Offs, and Statement Manager lists in Tabs3 Billing and the Fees and Costs lists in PracticeMaster.
- Added a setting to position data entry lists either below or to the right of the data entry fields. Entry lists are available in the Fee, Cost, Payment, and Client Funds entry windows in Tabs3 Billing, the Trust Transaction entry window in Trust, and the Invoice/Manual Check entry window in AP.
New Filters and QuickViews
- New default filters and QuickViews have been added to the Clients, Fees, Costs, Payments, Client Funds, and Statement Manager lists. These allow timekeepers to easily see records for their own matters. These new QuickViews use a new function to determine the timekeeper assigned to the currently logged in user.
- Added a “My Clients Unpaid” QuickView to the Tabs3 Billing Statement Manager.
- Added the ability to easily filter the PracticeMaster Journal file list to include just Note, Email, Phone, Timer, Research, or Billing Notes by simply selecting the corresponding check box at the top of the list. Previously these check boxes were only available on the Journal tab of the Client file.
1099-NEC Forms
- Updated printing of Form 1099-NEC to utilize the 3-forms-per-page format required by the IRS for Tax Year 2021.
Updated Calendar Code File
- Added Phase/Task and Activity code fields to the Calendar Code file so you can specify which default codes need to be used when converting calendar records to fees for task based billing clients.
Exchange Online Integration
- Updated the PracticeMaster Exchange Connector with a new synchronization option for Exchange Online / Microsoft 365.
Updated Installer
- Updated to a Microsoft Installer. This change requires the first installation to be performed at the server, but will reduce the need to directly access the file server when installing future updates.
For in-depth information on all of the new Version 2022 features, including screenshots, refer to Knowledge Base Article R11880, “Version 2022 Introduction to New Features.” A list with links to all Version 2022 information can be found in R11885, “Version 2022 Information and Resources.”
To download Version 2022, visit Tabs3.com/update or contact your local consultant.
The Write Off Report is here! View all write off information in a single, dedicated report. The Write Off Report can include the following options:
- Date Range
- All timekeepers or select timekeepers
- All transaction codes or select transaction codes
- Detail information for each write off
- Allocation breakdown
- Statement information
- Reversed write offs
Additionally, this report can be sorted by working timekeeper.

To run a Write Off Report
- In the Quick Launch, search for and select “Write Off Report.”
- Optionally select a Client ID
- Select any other settings as desired.
- Click OK.
This report is available in Version 2021 (Build 20.6.2) and later.
We added a new way to view clients, contacts, fees, costs, payments, client funds, and write offs without having to run a report! When accessing the new Tabs3 Billing lists, you can work with entries using the actions in the Quick Clicks pane, or drill down for additional details. Lists are available via the File | Open menu in Tabs3 Billing or by searching the Quick Launch for “clients,” “contacts,” “client funds,” “fees,” “costs,” “payments,” and “write offs.” The data entry windows for these record types are now available via File | Data Entry or by searching the Quick Launch for “client information,” “contact information,” “client funds entry,” “fee entry,” “cost entry,” and payment entry.”
Filtering
Filtering is a powerful feature. For example, you could filter the Client file to only show clients for which you’re the primary timekeeper. As another example, you could filter the Fee file to only show fees entered in the last week. There are a few ways to filter in the lists.
- The Search Box allows on-the-fly filtering capabilities and can be used to filter data based on keywords included in any column shown in the current column layout.
- The List group in the Quick Clicks pane provides different filtering options for each list. For example, the Contacts List provides the option to filter for All Contacts or Active Only.
- The Filter group in the Quick Clicks pane can be used to set up easy or complex filters that you can reuse. Filters can be added via Manage Filters.
- The QuickViews group in the Quick Clicks pane can be used to create different views of your data. Each QuickView can include a filter, column layout, and sort. QuickViews can be added via Manage QuickViews.
Quick Clicks
The Quick Clicks pane includes the following additional groups:
- The Take Action group of the Quick Clicks pane includes additional actions you can take. For example, in the Fees List, you can transfer transactions, replicate transactions, set the fee’s status to hold, set the fee’s status to print, change WIP transactions, write-up or write-down fees, generate statements, and add a new fee.
- The Report group of the Quick Clicks pane includes any reports that are relevant to the current list. For example, the Write Offs List includes the Write Off Report and the Client Ledger Report.
- The Column Layout group of the Quick Clicks pane automatically includes the Standard and (default) column layouts. Column layouts can be added via Manage Column Layouts.
- The Customize Current View group of the Quick Clicks pane includes Manage Quick Clicks, Refresh, and List Preferences. Manage Quick Clicks provides the ability to add, edit, or delete filters, QuickViews, and column layouts, as well as to organize the Quick Clicks. List Preferences include row height, row colors, and grid lines for the list.
Download the latest version of the software to get this great new feature!
Beginning with Version 2021, there is a Guided Tour and Getting Started Checklist to help new users navigate the Tabs3 Software.
The Guided Tour shows new users how to navigate the software by providing a quick overview of:
- Quick Launch
- Application Toolbar
- All Actions
- My Actions
- Dashboard
- Help
You can access the Guided Tour from the Help menu by selecting Navigational Tour.
The Getting Started Checklist spotlights key features in each application. For example, in Tabs3 Billing, the Getting Started Checklist has actions for the following:
- Data Entry – Add a contact, client, fee, and cost; view the matter manager; and receive a payment.
- Bill Clients – Generate a draft statement and final statement, update a statement, and email a client.
- Run Reports – View the Recap of Hours, Accounts Receivable Report, and the Client Ledger Report.

Once you have completed an action (e.g., added a contact, generated a statement, etc.), the action is considered 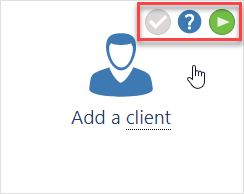 completed and will display a green check mark. Once all items have been marked complete, the Getting Started Checklist is no longer shown. Hovering over an underlined term displays a definition of the term. Hovering over an action displays a check mark that can mark the item complete or incomplete, a link to a Help topic on the subject, and, in some cases, a link to a training video.
The Getting Started Checklist also provides Help and training resources, including links to the Administrator Guide, training videos, Help, the online newsletter and a support overview. A progress bar is provided to help track your progress. Additionally, you can hide the Getting Started Checklist by clicking Hide Getting Started in the upper right-hand corner. If hidden, you can bring back the Getting Started Checklist by clicking Getting Started.
Note: These new features are only displayed when a newly created user logs into any of the applications; existing users will not see them.
Are you ready to get paid faster? Using Tabs3Pay, accepting credit card payments has never been easier for your law practice!
With Tabs3Pay, you can:
- Manage separate trust and operating accounts.
- Securely store payment information for future use.
- Accept credit cards and electronic checks, all from within Tabs3 Software.
- Include a payment link in email statements, allowing your clients to easily enter payment information through the secure Tabs3Pay portal.
Best of all, Tabs3Pay provides simple pricing for all credit card types, which means that no matter what type of card is used, the same low fixed rate will be applied. There are no monthly fees or other charges.
Ready to take the next step? Tabs3Pay’s hassle-free setup means that you can begin accepting payments on the same day that you sign up. You can sign up and enable Tabs3Pay right from Tabs3 Billing or Tabs3 Trust Accounting (Trust)! Just have your law firm’s EIN number (Tax ID), the account and routing numbers for your bank accounts, and an estimate of your processing amounts ready.
To sign up for Tabs3Pay
- From the Reports tab, point to Credit Card and select Tabs3 Web Portal.
- Click the Let’s Get Started button.
Note: This feature is available in Version 2021 (Build 20.5) and later.
For more information on signing up for and configuring Tabs3Pay, see Knowledge Base Article R11869, “Configuring Tabs3Pay.”
PracticeMaster’s Document Management feature is easily configured to automatically name and store linked documents in a centralized location. Document management can play a major role in your everyday workflow by streamlining the process of storing new documents and making it easy to access those documents via Tabs3 Connect, the Client File, Matter Manager, Conflict of Interest Search, and Document Search.
In Customization (Utilities | Customization | Documents tab), you can define how you want your documents to be managed and where the documents are stored. You can create a folder structure up to five folders deep to classify and store your documents. Then you can define how the documents are to be named based on fields in the Client and Document Management files.
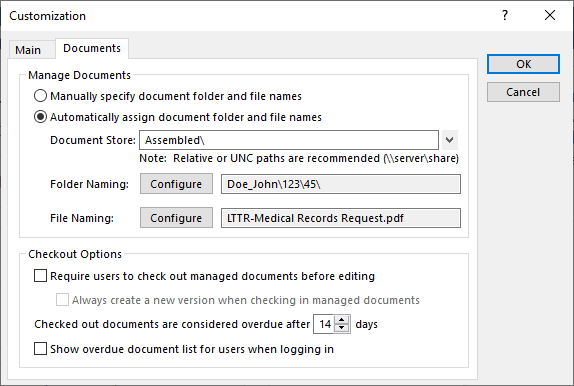
When adding Document Management records, they will automatically be named and saved as specified in Customization settings, saving you time and ensuring all documents are saved to the correct location. Document Management records can be created several ways:
- Using Ctrl+N, the New Record right-click menu, or the button on the toolbar of the Document Management Editor window.
- Via the Quick Clicks Create Document Record menu option for email record attachments in the Journal file.
- Via the Send To PracticeMaster option of the Windows Explorer toolbar plug-in.
- Via the PM Save option of the toolbar plug-ins for Microsoft® Word, Excel®, PowerPoint®, Adobe® Acrobat®, Adobe Reader®, Corel® WordPerfect®, and more.
- Via the PracticeMaster icon in the ScanSnap Quick Menu software for Fujitsu® ScanSnap™ scanners.
- Following the Word Document Assembly process by using the Create Document Record option.
Help take your document storage to the next level by using PracticeMaster’s built-in Document Management!
Did you know that you can easily see a list of write offs for any client, as well as how each write off is applied?
Beginning with Version 2021, you can access write off information via the Tabs3 Billing Matter Manager. When selecting a write off, you can see the date and amount of the write off, statement information, how it was applied, and more.
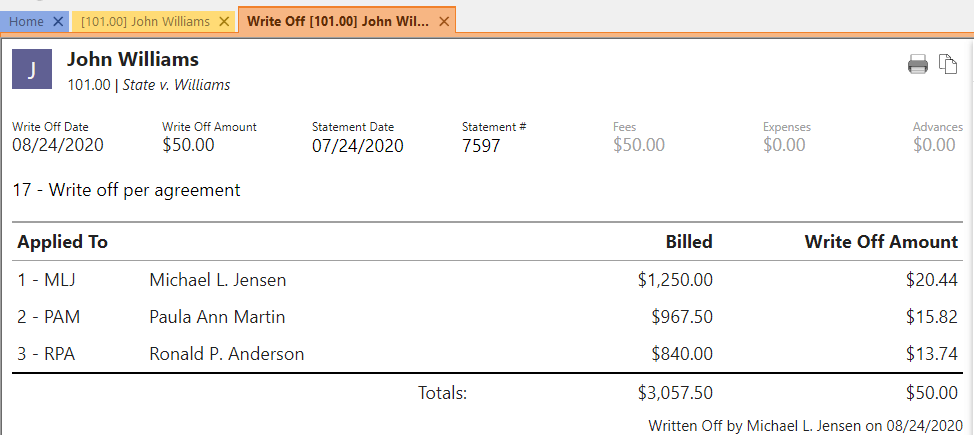
To access write off information via Tabs3 Billing Matter Manager
- Open Matter Manager from the Quick Launch.
- Select the desired Client.
- Click the Write Offs list.

- Click the write off for which you want more information.
Version 2021 has some great new features we know you’ll want right away!
All Applications
- Simplified Update – Updating from Version 2020 to Version 2021 does not require a conversion. If updating from Version 19 to Version 2021, only a single conversion is required.
- New Look – We’ve updated the icons for all of the actions on the Home page in each Tabs3 Software application to provide a fresh look.
Tabs3 Billing Highlights
- Payment Information – Provides detailed payment allocation information for both archived and work-in-process payments. In addition to payment allocation, this page shows associated Tabs3 General Ledger transactions and payment adjustments (refunds or reversals).
- Write Off Information – Provides detailed information about the selected write off, including a breakdown of how the write off was applied (each timekeeper, cost type, tax amount, or finance charge) across each statement that was written off, and who performed the write off.
- Matter Manager:
- Write Off List – This list provides an easy way to see any write off performed on the matter. Clicking an entry in the list displays the Write Off Information page.
- Statement Status Indicators – The statement list in the Matter Manager now includes color-coded indicators to help you see at a glance which statements are unpaid and for how long.
- Email an Individual Statement – In the Statement Manager or Statement Information window, a new Send Email action is available. This reprints the selected statement, just like using the Reprint Updated Statements feature, and then starts a new email with the statement attached.
- Report Drilldown – We’ve updated numerous Tabs3 Billing reports to support drilling down to statements, payments, and write offs in the Report Preview window.
Tabs3 Trust Accounting and Accounts Payable Highlights
- IRS 1099-MISC and 1099-NEC Changes for Tax Year 2020 – We’ve updated the software to support new requirements from the IRS for tax year 2020.
Updating to Version 2021 is as easy as using Check for Updates (Help | Check for Updates)!
In Version 2020, multiple improvements have been made to the Lock Out All Users feature (File | Lockout All Users). This feature can be useful when you want to keep others from logging in while you perform maintenance.
- When initiating a lockout, you can now exit the software to perform server maintenance tasks, such as external backups, server moves, etc., without worrying about users opening the software. The user performing the lockout will continue to have full access to the Tabs3 Software, including applications that were closed prior to the lockout.
- Lockouts can now be assigned an optional duration. Once the assigned duration has expired, the lockout is automatically lifted and users can begin using the software again. If you need additional time to complete your tasks, the lockout can be extended. In the event a lockout must be ended early and the user who initiated it is unavailable, another user with manager rights can override the lockout.
- If other users are currently in the Tabs3 Software, initiating a lockout now opens a Conflicting Activities window, indicating which users need to exit the software before the lockout can begin. Additionally, with Tabs3 Platinum Software you can use the Request Log Off feature to request that users exit the software and, if necessary, force them to exit the software after a specified time period.
- The Active User List (View | Active User List) now includes two new features:
- A Start Time column to determine when users began their activities.
- A Lock Out All Users button so you can initiate a lockout directly from the Active User List.
Note: These feature enhancements are included in Version 20.3.4.
If you need to find data in PracticeMaster based on just a word or phrase, we have you covered! There are several ways to search in PracticeMaster to find what you need.
Search Box
The search box, which is available on the List tab for all files, the Matter 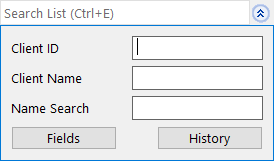 Manager, and the Graphical Calendar, can be used to quickly search for all records that contain a specific string of text in any of the fields included in the currently selected column layout. You can optionally search for different text in multiple fields at one time. You can enter text directly in the Search List field, or click the button to show a list of fields for more specific searching. If the desired field is not shown, click the Fields button for a list of all fields in the current column layout.
Conflict of Interest
PracticeMaster’s Conflict of Interest Search (Search | Conflict of Interest 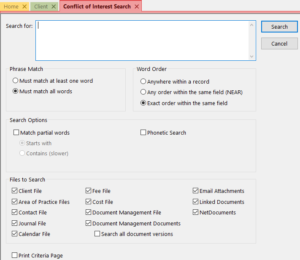 Search) provides robust searching capabilities including whole word or partial word searching and word order, phonetic searching, and record drill-down capabilities on reports.
Files searched in PracticeMaster include the Client file, Contact file, fee transactions, cost transactions, Calendar, Journal (including email records, call logs, research tasks, and phone timer records), Document Management (including linked documents), and Area of Practice files. If PracticeMaster is integrated with Tabs3, all fields in PracticeMaster that exist in both programs (such as Miscellaneous Lines in the client file), will contain information from Tabs3 in addition to existing information in PracticeMaster.
Note: A field must be marked as Include in Conflict Search in File Maintenance (Maintenance | File Maintenance) in order to be included in the Conflict of Interest Search.
Document Search
The Document Search program (Search | Document Search) is a powerful program used to search the contents of Document Management documents, email attachments, and linked documents associated with PracticeMaster records. Although the Conflict of Interest also searches documents, the Document Search provides additional options to narrow your search to specific clients, document types, and/or users.
Searching capabilities include whole word or partial word searching; phonetic, stemming, and fuzzy searching; and record drill-down capabilities on reports.
Contact Search
The Contact Search (Search | Contact Search) helps you quickly find a 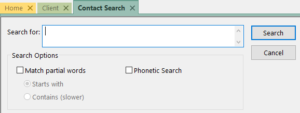 single contact so that you can drill down to a phone number or other information for the contact. This search only looks for hits in Contact fields. Searching capabilities include partial word searching, phonetic searching, and record drill-down capabilities on reports.
Note: A field must be marked as Include in Contact Search in File Maintenance (Maintenance | File Maintenance) in order to be included in the Contact Search.
Find and Replace
On any List tab, the Find and Replace program (Edit | Find and Replace) 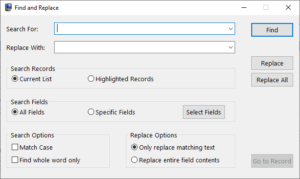 can be used to find one or more records containing specific text, and optionally replace the text with a new value. You can search the current list or just highlighted records, all fields or specific fields.
Find and Replace is a quick and easy alternative to updating multiple records with the same information one by one.
Data can always be found using the various search options in PracticeMaster. Learn more about the various PracticeMaster search features in the PracticeMaster Search Guide.
We have just added several new features! Use the Check for Updates feature (Help | Check for Updates) to make sure you are running the most recent release of Version 2020.
Update to Version 20.2.6 to access the following:
- Tabs3 Billing Matter Manager – The Client Manager has been revamped and renamed to the Matter Manager. Like the PracticeMaster Matter Manager, the Tabs3 Matter Manager acts as a central hub for matter-related information and activities in Tabs3 Billing. The Matter Manager allows you to view relevant information for each matter at a glance, perform common tasks, and run reports.
- Statement Information Window – Clicking on a Statement from the Matter Manager in Tabs3 Billing displays a Statement Information window for that statement. The Statement Information window includes matter information, statement totals, a preview of the statement, and the ability to perform common tasks.
- Time Zones – PracticeMaster now allows you to specify a time zone for calendar events and tasks. If you opt to enable the time zone feature, new calendar records will be shown relative to the local time for each user. The PracticeMaster Calendar, PracticeMaster Dashboard, and Tabs3 Connect Calendar will all utilize the time zone setting on the device where records are being accessed. This also provides a more seamless integration of calendar records with Microsoft Outlook.
- Field Length Changes – Increased the field length for several fields in the software, such as the Work Description in the Client file and the Amount field in the Payment file.
For more information on these great new features, as well as a detailed list of all new features in Version 2020, check out Knowledge Base Article R11812, “Version 2020 Introduction to New Features.”
When was the last time you backed up your Tabs3 and PracticeMaster data and tested the viability of your backup? If your firm had to restore from a backup right now, would any data be lost? Regular backups are critical for your firm to make and maintain properly.
Internal Backups
Tabs3 Software ensures you are provided the opportunity to backup when needed.
- You will be prompted to make a backup in the software when the function cannot be easily reversed or when interruption of the process can cause errors in the data.
- When presented with a prompt to make a backup, ask yourself when the last backup was made and how much data will need to be reentered if a restore is required. If you are not comfortable with the amount of work required after restoring, then you should back up your data before going any further.
- If you regularly opt to not make a backup because it’s difficult to get every user to exit the software, consider the Platinum version. Platinum includes a HotBackup feature that allows you to make backups while other users are still working in the software and doesn’t require backups be made for as many functions, including Update Statements.
- If you are using the standard version of the software, you can keep up to three internal backups with a size limit of 2 GB each.
- If you are using the Platinum version of the software, backups are practically unlimited! You can keep up to 198 user-defined HotBackups, each limited in size only by the available hard drive space.
Third Party Backups
We also recommend making regular backups of the entire Tabs3 program directory via a third-party backup program.
- Third-party backups can help you recover from a catastrophic failure, such as flood, theft, server hard drive failure, etc.
- Backups made via the Tabs3 Software only back up your data files and do not include executable files to run the programs, nor is every file in the Tabs3 Current Working Directory included.
- If you already have a third-party backup in place, make sure that it is periodically tested to verify it is working correctly. For more information on testing your backup, see KB Article R10456, “Testing Your Backup System.”
Now may be the perfect time to take a closer look at your current backup strategy and to verify the procedures you have in place. If you cannot take the time to review procedures now, add a reminder to your calendar to review them as soon as possible. Don’t be lulled into a false sense of security; backups that don’t restore correctly, or not having a backup, can cost you a great deal in both time and data loss.
For a list of resources on backing your data up and restoring, visit Knowledge Base Article R11524, “Backup/Restore Information Resources.”
Beginning with Version 2020, Tabs3 Billing and Trust Accounting Software (TAS) supports integration with LawPay for electronic processing of payments, client funds deposits, and trust deposits. LawPay supports both credit and debit cards in Tabs3 Billing and TAS, as well as electronic fund transfers (eChecks) from checking or savings accounts in Tabs3 Billing.
Tabs3 Billing allows you to manage the client’s payment methods from either the LawPay tab of the Client file or from the Payment/Client Funds Entry windows. TAS allows you to manage your LawPay payment methods from the Trust Transaction Entry window. You can add or remove payment methods as well as update the email address for each payment method. When an email address is present, the client will automatically be emailed a receipt each time that payment method is used.
Once you have enabled LawPay in Tabs3 Billing, you can include a LawPay payment link in the statements you email to your clients. This allows clients to pay their statement with a credit card or eCheck without anyone at the firm handling sensitive payment information. Once a client has paid their bill via LawPay, you can import the payment into Tabs3 via the Import Online Payments program (Maintenance | Integration | Import Online Payments). See Knowledge Base Article R11767, “Using the Tabs3 Payment Link,” for more information regarding setting up payment links and importing payments. For more information on LawPay integration, see Knowledge Base Articles R11828, “LawPay Integration Frequently Asked Questions,” and R11826, “Configuring LawPay Integration with Tabs3 Software.”
You access sensitive client information on a daily basis, and may even have access to information that others in the firm do not. You know that maintaining client confidentiality is crucial, but who might have access to all of that data? The following features are built into the software, helping maintain client security and confidentiality.
- Assign users to Access Profiles. Access Profiles (System Configuration | File | Open | Access Profile) are used to control which users have access to which features in the software. For example, you can set up an Access Profile to allow for browsing clients, but not changing or deleting clients. You can also specify that an Access Profile not allow access to reports, certain utilities, or an entire system, such as General Ledger Software (GLS). Once Access Profiles have been set up, they can be assigned to users via the Users file (System Configuration | File | Open | Users). Each user can be assigned up to five Access Profiles.
- Assign Timekeepers to User IDs. Users who only need to see information for specific timekeepers can be restricted to accessing only those timekeepers. The Assign Tabs3/PracticeMaster Timekeeper option in the Users file (System Configuration | File | Open | Users) provides the ability to specify which timekeepers’ information a user can access. Users can add, change, and delete fee and cost transactions that are work-in-process; access archived transactions; and access productivity figures only for the selected timekeeper(s).
- Use Secure Clients. Access to client information can be specified at the client level. By selecting the Secure Client check box (File | Open | Client | Address tab), you can then select which users in the software have access to the specified client’s information including transactions, reports, and statements. Additionally, when you select the Secure Client check box, you will be prompted to either keep or remove related contacts from the Contact file. This is because only clients can be marked as secure, not contacts.
- Delete the (BLANK) user or assign it a password. The (BLANK) user is meant for initial access to the software when it is first installed. After users are set up in the software, we recommend deleting or assigning a password to this user in order for access to the software to be password protected.
- Platinum SQL Data Encryption. The Platinum SQL Data Encryption utility is used to encrypt Tabs3 and PracticeMaster data files that may contain sensitive information. Once data files are encrypted, they can only be read by the Tabs3 and PracticeMaster Platinum SQL software. Software can be encrypted via the Platinum | Data Encryption menu option in System Configuration.
- Platinum Data Security. Firms running a Platinum system can limit each user’s network access to the data files to the “read only” level, providing protection against the accidental moving or deleting of data files via Windows Explorer. In order to secure the Database folder, your system administrator will need to manually configure the Windows file sharing settings for that folder to ensure that only authorized users have Full Access rights.
For more information on these features, as well as more security features, see Knowledge Base Article R11717, “Security Resources.”
Not all software companies are the same. There are many companies that release new versions of their software with minimal testing. Some companies may not even have a department that does formal testing of software enhancements, and instead rely on their customers to report any problems. Tabs3 and PracticeMaster software is different. So different in fact, that our motto is “Reliable Software. Trusted Service.” This means that when we release a new version of the software, or introduce new features mid-version, you don’t have to wait a few months for the bugs to be worked out before downloading and installing it. You can rest assured that you’ll be installing software that’s ready to use. But this is only one of the reasons why you should always be on the latest release.
Here are the top reasons to be on the latest release of the software:
- You always have the newest features! Our current version, Version 19, has many great features that may save your firm time and money. Take a look at the Version 19 Release Notes, or check out R11744, “Introduction to Version 19 Features,” to see what you are missing out on.
- If we find an issue, we fix it, test it thoroughly, and release it as soon as possible.
- Due to the nature of troubleshooting, support issues may require using the most current version of the software. Additionally, when we add or update integration with third-party programs, we only do so on the current version of the software.
- When deciding on software enhancements for the upcoming versions, we take into account feedback we’ve received. If you’ve suggested a feature enhancement in the past, it may already be in the software! We receive suggestions for enhancements a number of ways, including user surveys, suggestions made during support phone calls, consultant feedback, and emails to wishlist@tabs3.com. Although not all suggestions for enhancements can be incorporated, we carefully consider each request.
- Every new feature is thoroughly tested by our Quality Assurance Department.
- Before releasing a full version of Tabs3 and PracticeMaster, both consultants and users perform additional pre-release testing of the software, helping us further refine new features before releasing them to all users.
- Versions 16 and prior are no longer supported. We can only assist with questions or troubleshooting if you are on a supported version. Additionally, we regularly remove articles and information from our Knowledge Base regarding versions that are no longer supported.
Tabs3 and PracticeMaster software allows you to quickly determine if you are running the latest release. To check for updates, open any Tabs3 product or PracticeMaster and select Help | Check for Updates. If an update is available, the Update Notification window will be displayed.
With a paid maintenance plan, there is never an additional cost for updating to the latest version of the software. If you are not on the latest release, now is the time!
Did you know that software updates are included with maintenance at no additional charge? Our maintenance plan is best known for its first class technical support; however, there are more benefits to having maintenance!
The following benefits are included for firms on maintenance:
- You are assured of having access to the most up-to-date software available, including new reports and features, at no additional cost. The cost to receive each major update to the software for those without maintenance will be more than the annual cost of maintenance.
- You have access to free technical support from our trained representatives during business hours. Without maintenance, technical support charges are currently $50 for each 15-minute interval or fraction thereof.
- Maintenance preserves the value of the software license so you may apply the full purchase price toward an upgrade (traditional license).
If you’re considering not renewing your maintenance, consider how losing access to new versions, new features, and technical updates may affect your firm. Staying on maintenance not only ensures that you have someone to call for help, but that you have access to the most up-to-date software.
If you haven’t tried out QuickViews yet, you haven’t unlocked PracticeMaster’s full potential! PracticeMaster QuickViews provide a 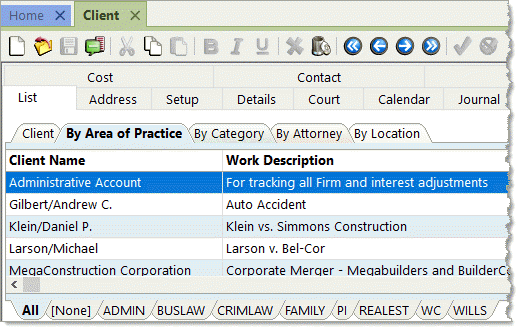 powerful way of organizing and finding information in PracticeMaster using the List tab. QuickViews combine a filter, column layout, and an index (default sort) into a tab at the top of the List tab. When you change from one QuickView to another, you quickly change which records you see, the columns that are displayed, and the order in which records appear. QuickViews can also include Smart tabs at the bottom of the List tab to further sort records into groups based on the selected indexed field. For example, when using Smart tabs in the Client file, you can quickly get a list of all clients with tabs for each area of practice, timekeeper, location, and much more!
You can customize the colors used for QuickViews and Smart tabs. You can share QuickViews for all users as needed, or define them for yourself. Once created, you can select a QuickView at the top of the List tab, or via the Quick Clicks pane.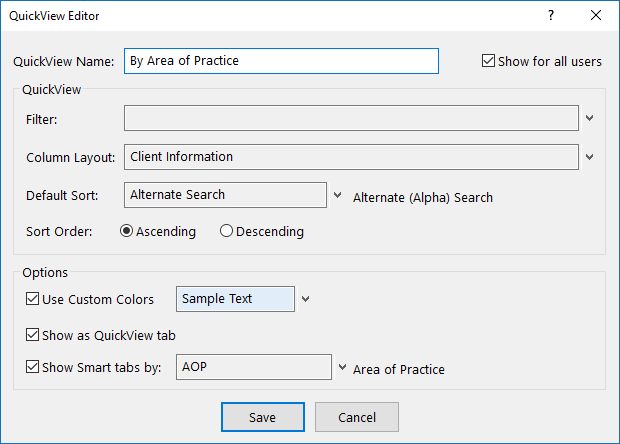
To add a QuickView
- Open the file for which you want to add a QuickView.
- From the Edit menu, select Manage QuickViews.
- Click
 to add a new QuickView.
- Enter the desired QuickView Name.
- If you want the QuickView to be available for everyone, select the Show for all users check box.
- Select a Filter, Column Layout, Default Sort, and any other desired options.
- Click the Save button.
- Close the Manage Quick Clicks window.
Unlimited QuickViews can be created for every file in PracticeMaster, providing the ability to easily view and manage your data in many different ways. The options to organize your data are nearly limitless. For information on QuickViews that are included when PracticeMaster is installed, see Knowledge Base Article R11607, “QuickViews Included in PracticeMaster.” Try out the QuickViews already included, or create your own and see how quickly you find that you can’t work without them!
QuickViews are available for both Platinum and multi-user versions of the software. QuickViews run faster in the Platinum version of PracticeMaster due to the acceleration of filtering and column sorting.
Did you know that PracticeMaster has a new dashboard in Version 19? The dashboard makes it easy to see your calendar for the day, your upcoming tasks, and a quick recap of the time you entered.
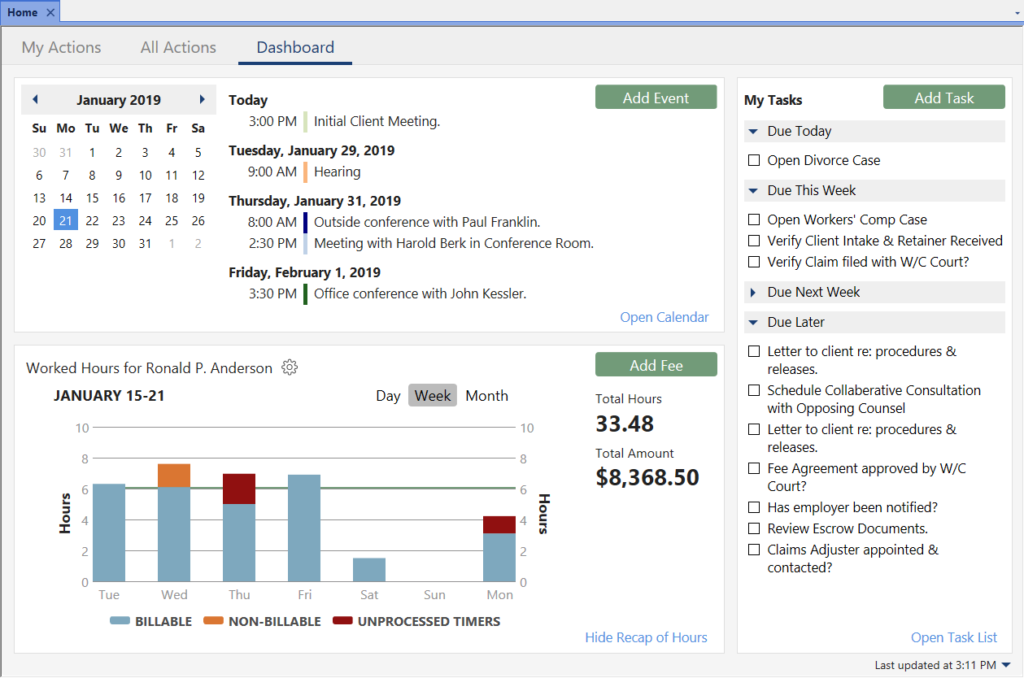
My Calendar
The Calendar widget shows a list of your upcoming events, along with a calendar that can be used to pick a different date. Mouse over an upcoming event to see more details, or click it to open the calendar record for editing. You can quickly add an item and open the full calendar.
- Click Add Event to add an event on the fly.
- Use the Date Selector to view calendar events on future days.
- Click the event’s description to open the record.
- Hover over an event’s description to view the event’s Description, Date, Time, Alarm, Location, Users, Client, and Comments.
- Click Open Calendar to open the Daily, Weekly, or Monthly Calendar depending on the view last used.
My Tasks
The My Tasks widget shows all of your incomplete tasks broken up into sections by due date. This makes it easy to see what needs to be done first.
- Click the Add Task button to add a task on the fly.
- Click the task’s description to open the record.
- Hover over a task’s description to view the task’s Description, Date, Alarm, Client, and Comments.
- Click the check box to the left of the task to mark it complete.
- Click Open Task List to open and view your Task List.
Recap of Hours
The Recap of Hours widget shows your hours worked compared to your daily target hours. This makes it easy to see the status of your worked hours, including any unprocessed timer records.
- Click Day, Week, or Month to set the range you want to see.
- Hover over the Recap of Hours widget to access the left and right arrows, allowing you to change which day, week, or month is viewed.
- Click the billable or non-billable time to open the Fee Recap list, which shows the detail that makes up the amount.
- Click the
 to change the timekeeper, select to compare the hours with a specified daily target, or select to show unprocessed timer records.
 - Click the Add Fee button to add a fee on the fly.
- Click Hide Recap of Hours if you do not want to see this information.
Note: The Home page must be selected in the PracticeMaster Theme Settings (View | Theme Settings | Home Page) to view the dashboard.
Tabs3 version 19 has been released, and there are many great new features! The following features are only some of the enhancements we made for this version:
All Tabs3 & PracticeMaster Software
- New Look – Includes larger font, new color, theme, and navigation options.
- New Quick Launch – Provides a search bar to search for actions, includes your recent matters and recent actions, and lets you pin and reorder your frequently used matters and actions.
- New Tabbed Interface – Quickly switch between open windows.
- New Home Page – The new Home Page provides a modern look and feel while keeping the accessibility of the classic Task Folders.
- New Theme Settings – Each user can customize their own theme for each product.
Tabs3
- Tabs3 Online Payments – Added the ability to include a ProPay payment link with your emailed statements allowing clients to pay their bill online.
- Recap of Hours – New graphical Recap of Hours with daily, weekly, and monthly options that shows billable and non-billable hours and amounts.
- Reorder Fees on Statements – The new Reorder Fees utility allows you to change the order in which fees with the same date appear on statements.
- Write-Up/Write-Down Fees and Costs Across Matters – You can now write-up or write-down all matters for a client at the same time.
- Apply Payments to Multiple Matters – Payments for multiple matters can now be applied to individual statements.
- Better Handling of Credit Transactions – Entering credits for paid transactions will automatically apply the credit to accounts receivable when the statement is updated. Produce a credit memo by running a statement with only credit transactions.
PracticeMaster
- Batch Journal Record Creation from Outlook – Added the ability to create journal records from multiple Outlook email messages at the same time.
- Designate Restricted Fields – Added the ability to prevent editing of specific fields by designating which users have rights to edit restricted fields in a file.
- Recap of Hours – New graphical Recap of Hours with daily, weekly, and monthly options that shows billable and non-billable hours and amounts and optionally includes unprocessed timer records.
- Dashboard – New dashboard on the Home page shows the user’s calendar, task list, and recap of hours.
- Outlook Plug-in – Added a new Attach PM Document button to the Outlook Plug-in toolbar that makes it easy to attach PracticeMaster documents while composing email in Outlook.
General Ledger
- New Statement of Cash Flows Report – Added a new Statement of Cash Flows Report that shows how changes in Balance Sheet and Income Statement accounts affect the firm’s cash flow.
- New Advanced Client Costs Report – Added a new Advanced Client Costs Report that makes it easier to reconcile advanced client costs between Tabs3, Accounts Payable (APS), and General Ledger (GLS).
Accounts Payable
- Designate Vendors and Bank Accounts as Inactive – Added the ability to designate vendors and bank accounts as inactive.
- New EFT Transaction Type – Added a new Transaction Type of EFT, making it easy to record invoices that were paid electronically.
- Print Checks – The Select Invoices to Print feature now displays the number of invoices selected and total amount to pay. Added a Tabs3 column that shows if the invoice is paid, unpaid, or not associated to a Tabs3 cost. Added the ability to exclude invoices with unpaid Tabs3 cost transactions.
- Check Register & Report Improvements – The Tabs3 section of the reports has been enhanced to include the Tabs3 Tcode number, Transaction Type (“E” for Expense or “A” for Advance), and Payment Status (Paid or Unpaid), thus making it easier to reconcile Advanced Client Costs.
Trust Accounting
- Designate Bank Accounts as Inactive – Added the ability to designate a bank account as inactive.
Tabs3 Connect
- Recap of Hours – New graphical Recap of Hours with daily, weekly, and monthly options that shows billable and non-billable hours and amounts.
- Fee Entry – Added the Timekeeper field making it easy to add fees for other timekeepers. Added the Bill Code field making it easy to override the default billable or printable status.
For in-depth information on all of the new Version 19 features, including screenshots, see the What’s New List or Knowledge Base Article R11744, “Version 19 Introduction to New Features.” A list with links to all Version 19 information can be found in R11746, “Version 19 Information and Resources.”
To download Version 19, select Check for Updates from the Help menu, visit Tabs3.com/support/update/v19upd.html, or contact your local consultant.
If you have any questions about the update, please contact your consultant, or contact Technical Support at (402) 419-2210.
Is your desk cluttered with sticky notes, miscellaneous pieces of paper, and phone messages? Clear your work area, consolidate your notes, and link them to the appropriate clients and contacts by using the PracticeMaster Journal file!
The following types of records can be added to the Journal file (File | Open | Journal) by clicking the ![]() (New) button:
(New) button:
- Notes: Add free-form notes to keep track of any necessary information.
- Time Tasks: Keep track of how much time you spend on the various tasks associated with your matter.
- Phone Tasks: Keep track of phone calls to and from clients and third parties, including the phone number and whether you spoke with the desired person or left a message.
- Research Tasks: Keep all of your research notes in one place, including the Web site URL and a linked file.
- E-mails: Use the Outlook Toolbar Plug-in (Maintenance | Integration | Toolbar Plug-ins | Outlook tab) to save both sent and received e-mails.
Alternatively, Time Tasks, Phone Tasks, and Research Tasks can be created via the Timer (File | Timer). When integrated with Tabs3, any Client Notes from Tabs3 (File | Open | Client | Client Notes tab) can also be viewed, but not edited, in the PracticeMaster Journal file.
Not only can you move information from paper to PracticeMaster, but every journal record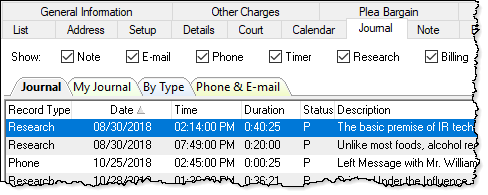 provides a Client ID and Contact field. This links the record directly to the client’s matter and/or contact for which it applies and allows others to access the same information when they need it. Simply open the Client and/or Contact file and click on the Journal tab to see all journal records pertaining to this client, or select a Journal Page tab (e.g., E-mail, Phone, Timer, etc.) to see specific record types. You can configure which tabs to display in the Client file by opening Configure Client Pages (Edit | Configure Client Pages) from the List tab, and in the Contact file by opening Configure Contact Pages (Edit | Configure Contact Pages).
Use PracticeMaster to help organize your notes, research, and more – unclutter your workspace and allow others access to valuable information!
Did you know that there are several ways of filtering your reports and statements so that you only see the data you want to see? Most reports have a Client tab and several reports have a Transactions tab. Likewise, when generating statements, both the Client tab and the Transactions tab are available. These tabs provide options for which clients and/or transactions are to be included on the report.
Client tab
The Client tab provides the ability to select a client range based on several different factors including the Client ID, Name Search, Primary/Secondary/Originating Timekeeper, Billing Category, Billing Frequency, Location, Status, and Open/Close Date. When filtering by Status, the following options are available: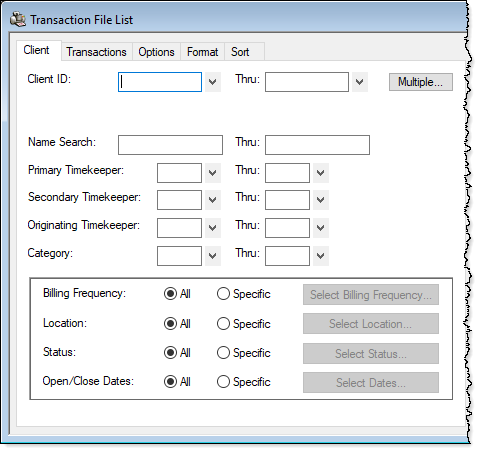
- Active, Inactive, or Both
- Progress, Non-Progress, or Both
- Billable, Non-Billable, or Both
- Task Based, Non-Task Based, or Both
- Release to Bill, Non-Release to Bill, or Both
- Bill on Demand, Non-Bill on Demand, or Both
- Statement Delivery Options
- Mail Statement: Yes, No, or Both
- E-Mail Statement: Yes, No, or Both
Transactions tab
The Transactions tab provides the ability to select a transaction range based on several different factors including whether to include Fees, Expenses, Advances, 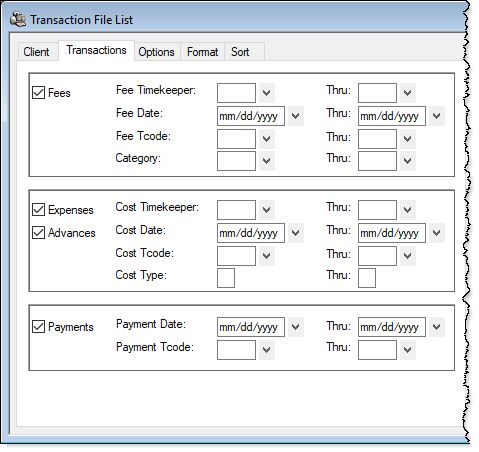 and Payments. Additionally, ranges for Fee/Cost Timekeeper (working timekeeper), Fee/Cost/Payment Date, Fee/Cost/Payment Tcode, Category, and Cost Type are available.
These are the most common options for filtering reports. However, some reports may have additional options to further filter data that are specific to that report. For example, the Transaction File List provides the option to include Work-In-Process and/or Archived transactions, Billable and/or Non-Billable transactions, and more.
So if you’re running reports or statements and you’re getting more clients and/or transactions than you want included, try using the filter options to help fine-tune your report!
If you need to find data in PracticeMaster based on just a word or phrase, we have you covered! There are several ways to search in PracticeMaster to find what you need.
Search Box
The search box, which is available on the List tab for 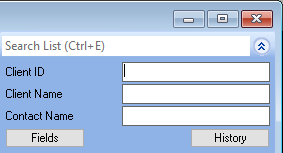 all files, the Matter Manager, and the Graphical Calendar, can be used to quickly search for all records that contain a specific string of text in any of the fields included in the currently selected column layout. You can optionally search for different text in multiple fields at one time. You can enter text directly in the Search List field, or click the
 ![]() button to show a list of fields for more specific searching. If the desired field is not shown, click the Fields button for a list of all fields in the current column layout.
button to show a list of fields for more specific searching. If the desired field is not shown, click the Fields button for a list of all fields in the current column layout.
Conflict of Interest
PracticeMaster’s Conflict of Interest Search (Search | Conflict of Interest Search) provides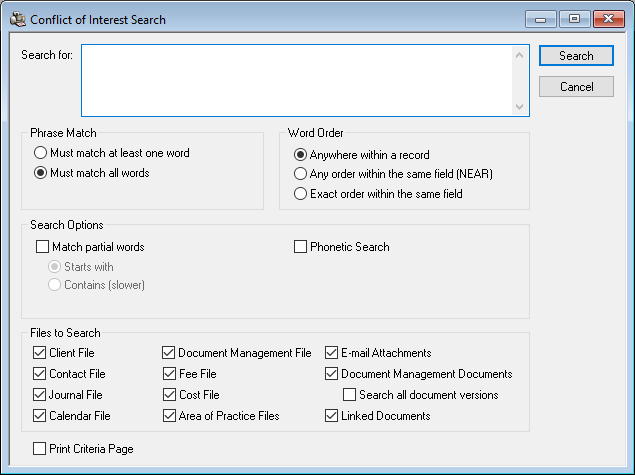 robust searching capabilities including whole word or partial word searching and word order, phonetic searching, and record drill-down capabilities on reports.
Files searched in PracticeMaster include the Client file, Contact file, fee transactions, cost transactions, Calendar, Journal, Document Management, and Area of Practice files, which include e-mail records, call logs, research tasks, and phone timer records. If PracticeMaster is integrated with Tabs3, all fields in PracticeMaster that exist in both programs (such as Miscellaneous Lines in the client file), will contain information from Tabs3 in addition to existing information in PracticeMaster.
Note: A field must be marked as Include in Conflict Search in File Maintenance (Maintenance | File Maintenance) in order to be included in the Conflict of Interest Search.
Document Search
The Document Search program (Search | Document Search) is a powerful program used to 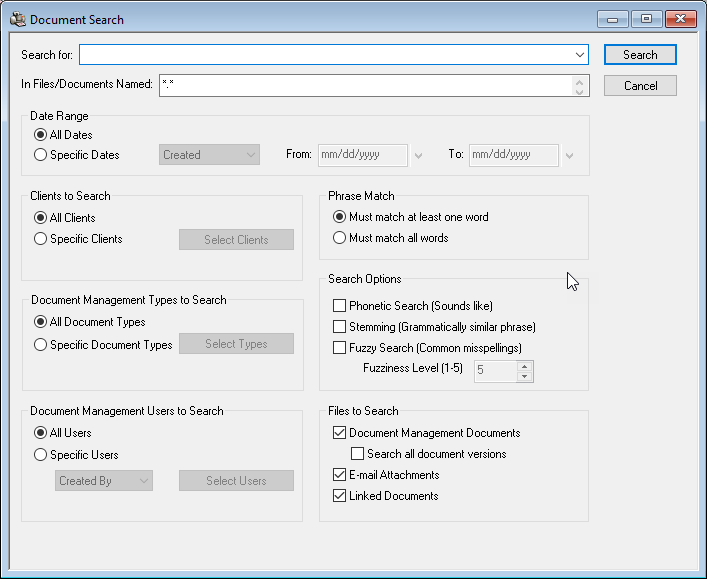 search the contents of Document Management documents, e-mail attachments, and linked documents associated with PracticeMaster records.
Searching capabilities including whole word or partial word searching; phonetic, stemming, and fuzzy searching; and record drill-down capabilities on reports. Additionally, you can narrow your search to specific dates, clients, document types, and/or users.
Contact Search
The Contact Search (Search | Contact Search) lets you quickly find a single contact so that 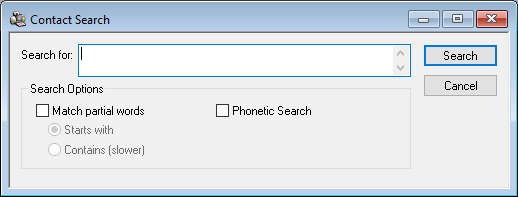 you can drill down to a phone number or other information for the contact. Searching capabilities including partial word searching, phonetic searching, and record drill-down capabilities on reports.
Note: A field must be marked as Include in Contact Search in File Maintenance (Maintenance | File Maintenance) in order to be included in the Contact Search.
Find and Replace
On any List tab, the Find and Replace program (Edit | Find and Replace) can be used to 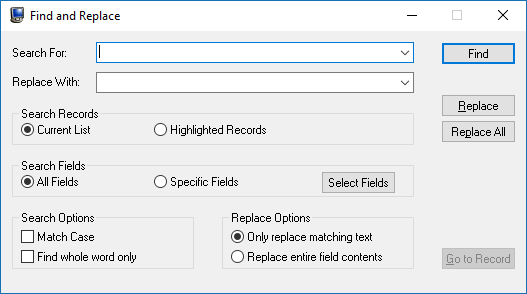 find one or more records containing specific text, and optionally replace the text with a new value. You can search the current list or just highlighted records, all fields or specific fields.
Find and Replace is a quick and easy alternative to updating multiple records with the same information one by one.
Data can always be found using the various search options in PracticeMaster. Learn more about the various PracticeMaster search features in the PracticeMaster Search Guide.
A common task when beginning to use the software is adding a new field to a file. PracticeMaster allows you to customize the software and add the fields that you need. Adding a field is a two-step process – once you have added the field to the file, you then need to add the field to the 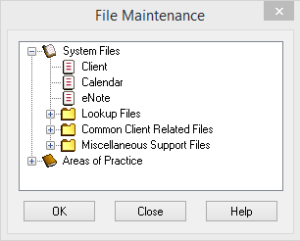 form layout so that it displays when entering data. Form layouts are used to determine the layouts of the data entry screens used when adding, changing, or deleting records from a file. A form layout consists of the various fields and tabs shown in the entry program for a file. Each file has its own form layout that can be customized using the Form Designer.
To add a field, open File Maintenance (Maintenance | File Maintenance), select the file you need to add a field to, and click OK. For example, if you want to add a field to the Client file, select the Client file and click OK. From the Field tab, click the ![]() (New) button and enter any desired information and settings. Click Done to save the new field.
(New) button and enter any desired information and settings. Click Done to save the new field.
Once the field has been added to File Maintenance, it must be added to the Form Designer Layout. Let’s say you have added a Clerk field to the Client file in File Maintenance, and have named it Scheduling Clerk. To add this field to the Court tab, open the Client file; from the Edit menu, select Form Designer.
Select the Court tab and click the button (Add Field). In the Field Selection List window, select the Scheduling Clerk field and click OK. The new field will be located at the top of t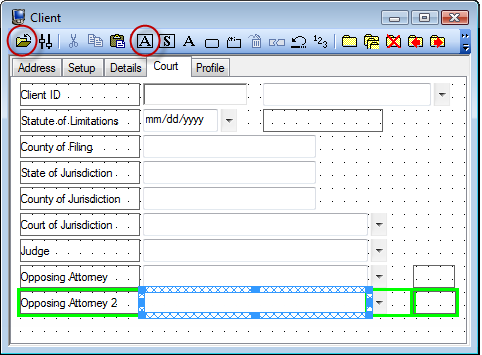 he screen with a blue and green border. Move your mouse over the blue border until the cursor becomes a , then click and drag the field to where you want it positioned on the form.
Now let’s say you want to change the name of the field to be displayed. Double-click the Scheduling Clerk box, and a Label Properties window will be displayed. Rename the field as desired and click OK. Click the icon to save and run the form.
Just remember, once you add a new field to a file, you must also add it to the data entry page via Form Designer!
There are several ways to customize how you store data in PracticeMaster. When you need a way to add multiple records of the same type for your client, Common Client Related Files are a great way to go!
You can use Common Client Related Files to store information for which you can have multiple records for each client. Unlike Area of Practice Files, Common Client Related records can be added for any matter in the Client file. Existing Common Client Related files include the Journal, Document Management, Fee, and Cost files. A couple examples of how you might use Common Client Related Files are as follows:
- Expert Witness files may be used in multiple Areas of Practice. For a litigation firm this may be a good file to configure as Common Client Related instead of setting up a separate file for each applicable Area of Practice.
- Some firms have physical files or other physical items. One way to track these files would be to create a Common Client Related File that includes the files’ current location, destroy date, and who is responsible for different items.
To add a Common Client Related File
- From the Maintenance menu, select File Maintenance.
- Right-click Common Client Related Files and select Add Common Client Related File.
- Enter the desired File Name and Description and click Next.
- Add the desired fields that you want to be available in the file using the
 (New) icon and click Next.
 - Optionally add one or more indexes using the (New) icon and click Finish.
Accessing Common Client Related Files
Common Client Related Files can be accessed a few ways:
- If the Client file is set up to view Common Client Related Files, an additional tab for your new file will be displayed. If the new tab is not displayed, you must select the Common Client Related Pages check box via Edit | Configure Client Pages.
- Common Client Related Files can be accessed via the Record Type Selector in Matter Manager (File | Matter Manager).
- Common Client Related Files can also be accessed via File | Open | All Other Files.
If you need to be able to add multiple custom records for your client, you can add and access a Custom Client Related File in no time!
Take a look at the Customizing PracticeMaster Guide for other ways to customize data storage in PracticeMaster including adding fields to existing files and adding Lookup Files and Areas of Practice. The Customizing PracticeMaster Guide can help you take advantage of PracticeMaster’s tremendous flexibility, help you configure PracticeMaster to best meet your firm’s needs, and show you how you can customize the different areas of PracticeMaster to work for you.
The Data File Integrity Check (DFIC) and Archive File Integrity Check (AFIC) are important tools used to test data files for valid information and structure. The DFIC can be run from any Tabs3 and PracticeMaster program via Utilities | Data File Integrity Check, whereas the AFIC is run from Tabs3 Billing via Utilities | Archive Integrity Check.
If errors are found when the DFIC or AFIC is run, a report is available to preview or print out. The report provides information on the error(s), including the Error Code and where the error is located in the system (e.g., field, file, client, etc.). DFIC Error Codes can be found in Knowledge Base Article R11653, “Data File Integrity Check Errors,” and AFIC Error Codes can be found in Knowledge Base Article R10771, “Archive File Integrity Check Errors.” These articles provide links to information on what the error means, potential causes of the error, and how to resolve the error.
But when and how often should you run the DFIC and AFIC? We recommend running these checks at the following times:
- Before backups.
- During month-end procedures.
- When moving the data to a new server.
- When updating the software to a new version.
- If anything unusual occurs in the software, such as loss of network connectivity or loss of power, or when a fatal error occurs and after it is corrected.
It is very important that errors are taken care of right away. Ignoring errors in the data can compound into larger issues, making the original error more difficult to correct and in some cases not possible. Since some errors require restoring the data, ignoring these errors for long periods of time can lead to data loss, or the need to have your data repaired.
When was the last time you ran the DFIC or AFIC? You can easily see when each of these utilities has been run via the Support Log.
To use the Support Log to determine when a DFIC and/or AFIC have been run
- From the View menu, point to Log Files and select Support Log.
- Next to Features, select Specific.
- In the Select Features window, select Data File Integrity Check and/or Archive File Integrity Check (Tabs3 Billing only).
- Click OK.
- Click Print.
The DFIC and AFIC can be set up to run when opening the program or at a specific time using a startup option of “/DFIC” or “/AFIC”. Using a startup option in conjunction with a batch file can automate your DFIC and AFIC to run at any time, including after regular business hours. More information on startup options is available in the program’s Help using “startup options” for the Index keywords. Information on automating tasks can be found in Knowledge Base Article R11034, “Automating Tabs3 and PracticeMaster Maintenance Tasks.” Take the time now to verify how often your firm is running the Data and Archive File Integrity Checks so that you can implement any necessary procedural changes.
Help keep your data error free by running the DFIC and AFIC regularly.
We recommend updating statements on a regular basis, but why is that? What does the Update Statements program actually do?
Why Statements Should Be Updated
When the Update Statements program is run, numerous files are updated in the software. Furthermore, some processes cannot take place until statements are updated.
The following is a list of what occurs when statements are updated:
- Fee, cost, payment, and client funds transactions included on a final statement will be updated and archived.
- Accounts receivable is updated.
- Billed productivity figures are updated.
- E-mail Statements can be sent via the E-mail Statements window.
- Unallocated payments are allocated if billed amounts are due. If integrating with General Ledger Software (GLS), GLS journal entries are posted to reflect the new allocations.
- Archived payment records are created for any Client Funds Payment to Firm transactions that do not have a Fund Application of WIP Payment.
- Archived payment records are created for any Pending Auto Trust Payments that were included on the final statements.
Backing Up Before Updating Statements
Because Update Statements affects so many files, we highly recommend backing up your data files (File | Back Up Data Files) prior to updating statements. If the statement update process is interrupted (e.g., network drop, power loss, etc.), you must restore your data before continuing to work. This is because your data may be mismatched, meaning some files may have been updated for a client’s statement, but the interruption may have occurred before all files were updated. For more information on the effects of an Update Statements interruption, see Knowledge Base Article R10064, “Update Statements Program was Interrupted.”
Platinum Note: Platinum users have a huge benefit because backing up before updating statements is not necessary. This is because Platinum software provides Transaction Processing, which allows firms to automatically recover data in many potential data loss situations, including when Update Statements is interrupted. For more information on Platinum’s Transaction Processing feature, see Knowledge Base Article R11179, “Transaction Processing: Auto-Recovery of Interrupted Database Transactions.”
Updating Statements
To update a statement, you must first run a final statement, which is different than a draft statement (and is specified on the Options tab of the Generate Statements program). Once a final statement has been generated, complete the following steps to update the statement:
- From the Statements menu, select Update Statements.
- Click Yes to create a backup.
- Optionally select a Client ID and/or Timekeeper range.
- Click OK.
After Statements Have Been Updated
Need to get another copy of an older statement? You can always reprint updated statements using the Reprint Single Updated Statement program (Statements | Reprint Updated Statement | Reprint Single Updated Statement) or Reprint Multiple Updated Statements program (Statements | Reprint Updated Statement | Reprint Multiple Updated Statements).
Additionally, you may occasionally need to undo a statement that was updated in order to make changes. This can easily be accomplished via the Undo Single Updated Statement program (Statements | Undo Updated Statement | Undo Single Updated Statement) or Undo Multiple Updated Statements program (Statements | Undo Updated Statement | Undo Multiple Updated Statements).
Updating statements is an important part of the billing process in Tabs3. If you’re not already updating statements on a regular basis, take the time to review your current procedures and consider making a change.
Are there additional notes that you want to add to statements for one or more clients? There are multiple areas in Tabs3 Billing to enter notes that can then be shown on statements for a single client, a group of clients, or all clients. A graphic is provided at the end of this article that represents each of the following elements.
Statement Notes for a Single Client
If you want to add notes to a single client’s statement, this can be set up in the Client file using the Beginning and Ending Statement Notes fields (File | Open | Client | Statement Options tab), or the Miscellaneous Lines 1-3 (File | Open | Client | Custom Fields tab).
Beginning and Ending Statement Notes
The Beginning Statement Notes will print following the Work Description and Miscellaneous Lines 1-3. The Ending Statement Notes will print at the end of the statement, but before any statement notes included in a statement template or ending text defined on the Headings tab of Statement Customization. Each of these fields has a maximum of 250 characters.
You can optionally select to Change Notes to blank after Statement updated if you want the note to only be included on the next statement.
Tip: You can optionally use the Change Client Options program (Maintenance | Client Related | Change Client Options) to copy Beginning and Ending Statement Notes for multiple clients.
Miscellaneous Lines 1-3
The Miscellaneous Lines 1-3 will print following the Work Description. Each of these fields has a maximum of 50 characters.
Statement Notes for a Group of Clients
To add notes to multiple clients’ statements, you can use the Statement Notes program (Statements | Statement Setup | Statement Notes). Statement Notes can be up to 511 characters. Once Statement Notes have been created, they can be assigned to a statement template (Statements | Statement Setup | Statement Templates | General tab | Statement Notes section).
Statement templates provide the ability to include a Beginning Note that is shown below the Client’s Beginning Statement Notes, and an Ending Note that is shown below the Client’s Ending Statement Notes. Statement templates are assigned to each client via the Client file (File | Open | Client | Statement Options tab).
To recap, adding statement notes for a group of clients can be set up as follows:
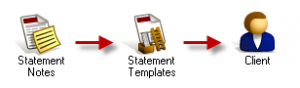
Statement Notes for All Clients
If you want to show the same note on every statement for every client, then you want to use the Statement Customization program (Statements | Statement Setup | Statement Customization | Headings tab). You can add up to 9 lines of text at the top of the statement (60 characters each), or 250 characters of text at the bottom. When adding Lines of text to be printed as a heading on the first page of each billing statement, this text will be the first text shown on the statement. When adding Lines of text to be printed as a message at the end of each billing statement, this text will be the last text shown on the statement.
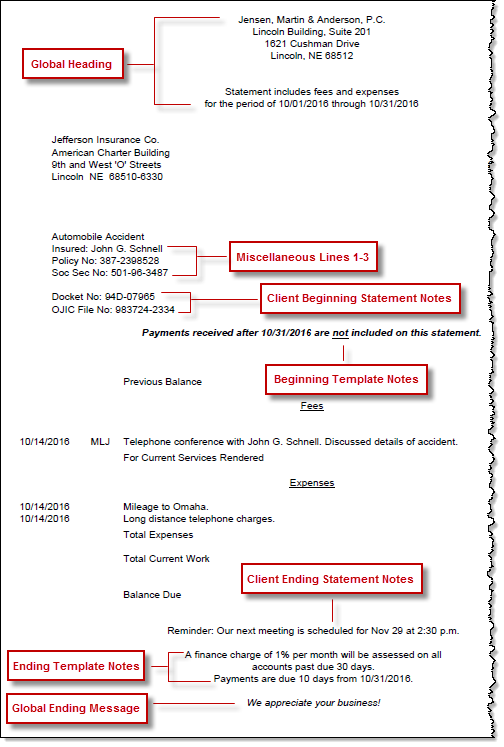
For more information on Statement Notes, see the Tabs3 Billing Help or the Statement Formatting Guide located at Tabs3.com/support/docs.html.
It’s Friday the 13th and, true to the superstition surrounding the date, nothing is going right today. You keep working but are amassing a list of things gone wrong.
You ran this month’s bills, finalized, and ran the Update Statements program a couple of weeks ago. Your boss wants to see productivity figures, but when you run Productivity reports, you realize you forgot to advance the current reporting month! None of the most recent figures are correct.
- Starting with Version 18, all period-based reports in Tabs3 Billing are now date based, which means they can be run for previous months and no longer rely on advancing the current reporting month. The following reports can now be run for any period:
- Timekeeper Productivity Report
- Category Productivity Report
- Timekeeper Profitability Report
- Productivity Report by Category for each Timekeeper
- Productivity Report by Tcode for each Timekeeper
The temporary bookkeeper finalized last month’s reconciliation while you were away, but this month things don’t look right. You look a little closer and find a big mistake – the bookkeeper finalized without the reconciliation balancing! If you restore your data, you’ll lose a month’s worth of data. You’ll have to add manual journal entries to work around the temp’s errors.
- Starting with Version 18, reconciliations can be undone so that adjustments can more easily be made without restoring from a backup.
An attorney tells you to go ahead and split the fees and costs for a client. You run the utility, and ten minutes later he recants – the client just called to add an additional party to the split. This party needs to be added to the current bill, but the split’s already been made.
- Starting with Version 17, you can reverse the split billing process for individual clients (Maintenance | Transaction Related | Undo Split Billing). This allows you to easily reverse the split, make any necessary changes, and then split fees and costs again.
You just found out that your firm is getting audited, and you need financial information for the last several years. While opening each archived GLS Client to print out the necessary reports, you discover that there are a couple of years missing. This was before your time, but you’ll still need to talk to the boss and do the extra work.
- Starting with Version 17, you no longer have to archive clients and can store unlimited years of journal entries. This makes it easier to run the reports you need for internal purposes, or if you are audited. In addition, you no longer have to close the month or year in GLS, and you can use date restriction settings to ensure journal entries from prior periods cannot be edited.
You wake up, it’s still dark out, and your heart’s pounding. You look at the clock and it’s one in the morning. After some deep breaths, you lie down and close your eyes, falling back asleep almost effortlessly because you know you’re on the current version of Tabs3 and PracticeMaster, and you have every GLS Client archived back to inception, so these horror stories can’t happen to your firm. Besides, there isn’t even a Friday the 13th in October this year.
Older software versions are sometimes a ghost of what could be. Ensure you stay current and get all of the latest updates. For steps to download and install the latest version of the software, visit Knowledge Base Article R10154, “How to Download Files from Software Technology, Inc.’s Download Pages.”
Tabs3 version 18 has been released, and update notifications have been sent to all eligible users! There are many great new features in Version 18! The following features are only some of the enhancements we made for this version:
Tabs3 Billing
- Date-Based Reports – All productivity reports are now date-based and no longer rely on advancing the current reporting month. Use the Set Current Reporting Month feature to see productivity figures from prior years.
- Print Receipts – Print a receipt for all forms of payment from the Payment window, or print a receipt for deposits from the Client Funds window.
- and more…
PracticeMaster
- Fee and Cost Entry – The Rate, Rate Code, and Sales Tax fields can now be shown. When changes are made to the Timekeeper, Date, Tcode, Activity Code, or Expense ID, the Amount can be recalculated.
- Fee Recap – A new Fee Recap button has been added to the PracticeMaster toolbar. This button lets you review fees for a timekeeper and date.
- OL Synchronization Settings Report – You can now run an Outlook Synchronization Settings Report to view synchronization settings for yourself or for all users.
- Graphical Calendar Agenda – Selecting Agenda when printing a Graphical Calendar Report will print items in a list format.
- ScanSnap™ Integration – Integration with Fujitsu® ScanSnap scanners imports documents to PracticeMaster’s Document Management program once the scan has completed. Selecting the Optical Character Recognition (OCR) option in the ScanSnap Manager makes text searchable in PracticeMaster.
- Form Designer – Align fields using the new Magnetic Snaps, or show the familiar grid and use Snap to Grid. Magnetic Snaps help align fields with other fields, whereas Snap to Grid helps position fields based on grid dots. Use keyboard shortcuts to Copy (Ctrl+C), Paste (Ctrl+V), Cut (Ctrl+X), and Undo (Ctrl+Z).
- and more…
General Ledger Software (GLS)
- Account Information Report – Print from the Balances, Budgets, or Journal Entries tab of the Account Information program to view a report with that tab’s information.
- Reports – Many changes were made to GLS reports. You can now select a Date Range for any report, making it easy to select a preset period or specify a custom range; pick multiple ranges of accounts or departments; and sort accounts in Chart of Accounts order or Account Number order. New Include options are provided for the Balance Sheet and Income Statement reports, and more.
- Bank Account Manager – View a summary of all bank and credit card accounts from one window. Optionally open a Reconciliation for the selected account, or select to Import Bank Transactions.
- Import Bank Transactions – Import Bank Transactions from an OFX, QFX, or QBO file provided by your bank or credit card company. Match imported bank and credit card transactions with General Ledger journal entries.
- Reconciliation – Optionally enter interest and service charge in the Reconciliation Settings window. View a Reconciliation Discrepancy Report if the Beginning Balance entered does not match the calculated Beginning Balance. The Reconciliation window has been updated to show side-by-side sections for transactions going out and coming in. Additionally, you can now password protect reconciliation PDFs generated by GLS and undo reconciliations finalized in Version 18.
- and more…
Accounts Payable Software (APS)
- Vendor Information – Moved the MTD, YTD, and TD Paid and Discount figures to the Vendor Activity window. These figures are all calculated automatically based on the system date.
- Vendor Analysis Report – The Vendor Analysis Report is now transaction based. Figures are based on the report date.
- and more…
Trust Accounting Software (TAS)
- Auto Trust Payments from Tabs3 – Tabs3 can now be set up to automatically create a Payment to Firm trust transaction when generating final statements, thereby paying current work, accounts receivable, or both.
- Combine Trust Transactions – Optionally combine deposits, EFTs, or checks into one combined transaction, making reconciliation easier.
- Bank Account Manager – View a summary of all bank and credit card accounts from one window. Optionally open a Reconciliation for the selected account or select to Import Bank Transactions.
- Import Bank Transactions – Import Bank Transactions from an OFX, QFX, or QBO file provided by your bank or credit card company. Match imported bank and credit card transactions with Trust Transactions.
- Reconciliation – Optionally enter interest and service charge in the Reconciliation Settings window. View a Reconciliation Discrepancy Report if the Beginning Balance entered does not match the calculated Beginning Balance. The Reconciliation window has been updated to show side-by-side sections for transactions going out and coming in. Additionally, you can now password protect reconciliation PDFs generated by TAS and undo reconciliations finalized in Version 18.
- Three-Way Reconciliation Report – A new Three-Way Reconciliation Report is available that compares the Client Trust Ledger, Reconciliation, and Check Register balances.
- Print Receipts – You can now print a receipt for deposits in addition to credit card deposits.
- and more…
For in-depth information on all of the new Version 18 features, including screenshots, see the What’s New List or Knowledge Base Article R11647, “Version 18 Introduction to New Features.” A list of all Version 18 information can be found in R11646, “Version 18 Information and Resources.”
To download Version 18, visit Tabs3.com/support/update/v18upd.html.
If you have any questions about the update, please contact your reseller and consultant, or contact Technical Support at (402) 419-2210.
Over the years, the User Newsletter has had different looks and delivery methods. In 1992, the first newsletter was published and mailed to our users. In 2002, we stopped mailing the newsletter and provided it as a PDF. Now, in 2016, we are excited to announce our newsletter is now a website!
Why the change?
Nothing to download. You don’t need to download a PDF in order to read the content.
Easy to browse articles. You can quickly skim the current month’s content and click on the articles you want to read.
Easy to find information. The new site gives you one-click access to common categories and topics (a.k.a. tags) in addition to a built-in Search box.
Dynamic formatting. We can highlight the most popular articles among all of our readers.
Feedback. You can comment on articles, and see what readers like yourself have to say as well.
Familiar content
All of the featured sections of the newsletter are still included:
Feature Article
Tabs3 Connect
Product Spotlight
Platinum
KB Corner
Quick Tip
Q&A
New features!
The slideshow at the top rotates through important announcements and upcoming events. Click the slideshow to see more information.
In the sidebar on the right, the following features are available:
Search – Use the Search box to find content not specific to a category, or not available in the Tag Cloud.
Popular Posts – Quickly see which articles have the most views.
Recent Posts – Easily access the most recent posts from anywhere on the site.
Categories – View the content you want to see by clicking a category to view related articles. For example, you can click the Quick Tips category to see all of the Quick Tip articles.
Tag Cloud – Click a tag in the Tag Cloud to view all articles with that tag regardless of category. Tags with larger fonts indicate there are more articles with that tag. As we work to populate the site with archived articles, tags will become more relevant.
Archive – Want to view a prior month’s content? Select the desired month. We are currently working on adding prior newsletter articles; links to past newsletter PDFs are available in the interim.
Accessing the Newsletter
Each user will still receive a reminder on the 15th of each month. Clicking the link will take you directly to the newsletter site. Alternatively, selecting Help | Internet Resources | User Newsletter from within the software will also take you directly to the site. Either of these ways will automatically log you in to the newsletter site. However, you can also access the newsletter via your web browser. Simply browse to Tabs3.com, select Newsletters from the Support menu, and then click Access The User Newsletter.
We hope you enjoy the new format. Keep watching for more content in the coming months!
Did you know that you can easily split fees and costs between multiple matters in Tabs3 Billing? The Split Billing program provides the ability to enter fees and costs once, but have multiple matters pay for them. You must first determine which client you will be entering fees and costs for; this is your “main client”. Next, determine which clients/ matters will be splitting the bill, and for what percentage each party will be responsible. You can now configure split billing for the client.
To configure clients for split billing
- From the File menu, point to Open and select Client.
- From the Split Billing tab, in the Client ID field, select the desired main client.
- Click the Add button to open the Split Billing Matter window.
- Select the desired Split Matter ID.
- Enter the desired Split Billing Percentages for the split matter.
- Enter the desired Statement Options settings for the split matter.
- Click OK.
- Repeat step 3 for each additional split matter. (Note: This may include the main client.)
- Select the desired Split Fee Options and Split Cost Options.
- Press Ctrl+S.
Fees and costs may be entered before and/or after configuring split billing, but keep in mind that when it comes time to perform the split, only those fees and costs entered for the main client will be split amongst all parties. Additionally, only Type 0 (Normal) and Type 5 (Miscellaneous) fee and cost transactions that are not on hold can be split.
When you are ready, you can run the Perform Split Billing program (Statements | Statement Preparation | Perform Split Billing). Transactions that have already been split cannot be split again so this program can be run as often as needed. The Perform Split Billing program should be run prior to generating statements every time in order to make sure that all transactions are billed appropriately.
If, after performing the split, you need to change the way in which transactions should be split, simply run the Undo Split Billing program (Maintenance | Transaction Related | Undo Split Billing). This program will revert all split transactions for the selected Main Client ID and Split Billing Ref # that are still work-in-process to their pre-split values. This provides a way to easily make adjustments as needed. If you have even one client who splits amounts due with other matters, and you’ve been splitting the fees and costs manually, make your billing easier by using the Split Billing feature in Tabs3.
For more information on split billing features, see Knowledge Base Article R11616, “All About Tabs3 Split Billing,” the Billing Adjustments Guide, and the Split Billing Training Video.
You open the software and enter your User Name and Password, only to see the message “Duplicate User IDs were found.”
One of the most common support calls we receive is about this message. 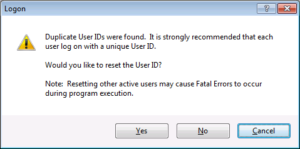 Clicking Yes opens the Active User List where you can select your user name and then click the Reset button, which opens the Active User List – Reset Confirmation window. This window prompts you to verify the user in question is not in the software and that you understand potential data corruption can be caused by resetting the user.
So, why are you receiving this message and why do you have to verify the 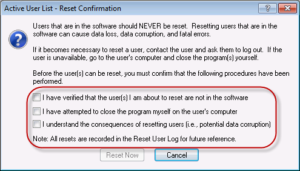 user isn’t in the software when that user is you?
Each user should be logged in only once at any given time. If the software is improperly closed, the User ID remains logged in to the software, thus creating a “duplicate” User ID the next time the user tries to log in. To properly close the software, you can use one of the following: select File | Exit, click the ![]() (Close) button in the upper-right corner of the application’s window, or press Alt+F4. Alternatively, you can click the Exit button on the Main Task Folder. If this button is not displayed on your firm’s Task Folder, you can customize the Main Task Folder to include the Exit button if desired.
(Close) button in the upper-right corner of the application’s window, or press Alt+F4. Alternatively, you can click the Exit button on the Main Task Folder. If this button is not displayed on your firm’s Task Folder, you can customize the Main Task Folder to include the Exit button if desired.
The following items are examples of improperly closing the software:
- Power loss.
- Computer lockups.
- The network connection to the server is broken/interrupted.
- The server is shut down or rebooted while users are still logged in to the software.
If the Duplicate User ID message is received and you choose to reset the user, you should always verify that the user is not in the system. If you reset an active user in the software, this can cause data loss and data corruption that results in Data File Integrity Check Errors and/or Fatal Errors. Because of this, we provide a checklist when resetting a user as a reminder to not reset anyone you are not 100% sure is out of the software. Once you have determined it is safe, you can reset the user and then log in to the software without receiving the message again.
Depending on why the Duplicate Users message is received, you may want to run a Data File Integrity Check.
For more information on resetting users, visit Knowledge Base Article R10789, “Resetting Users.”
You’ve heard about Platinum, but haven’t had time to look into it yet. Now you wonder if your firm should take action now, before it’s too late. You’ve heard the horror stories whispered around the water cooler; you try to shake off the cold chill as you walk back to your desk – is that just air conditioning, or premonition? The following stories wend their way through your thoughts for the rest of the day…
Your boss tells you that not only has the server crashed, but the external backup has been failing recently. He wants you to restore the internal backup of the Tabs3 and PracticeMaster software. You start to tremble. Time is money, so when prompted to make a backup you always click No, because you don’t want to interrupt workflow by having everyone exit the software. You close your eyes in dread; there is no internal backup…
- Platinum’s HotBackup features let you back up files while users are working, schedule backups throughout the day, and receive e-mails confirming when backups have completed. Additionally, you can maintain up to 198 HotBackups.
It’s nearing the end of a dark and stormy Friday before a long holiday weekend. You start to update statements, skipping the backup because you want to wrap things up so you can leave. The lights flicker and your computer reboots as a loud clap of thunder makes you jump. You open Tabs3 Billing again, but when trying to work in the software, you receive a message that a backup needs to be restored due to the Update Statements program being interrupted. Your pulse leaps, knowing that some of the attorneys will probably come in to work this weekend. Now they can’t use the software until the data has been restored…
- Platinum’s Transaction Processing and Auto-Recovery features help prevent the need to restore a backup. Transaction Processing ensures that transactions completely succeed while the software is running. In the case of the software not shutting down correctly, such as with a power failure, Auto-Recovery “rolls back” the data to its previous state before the transaction began.
The phone rings. You answer it, only for your breath to catch in your throat – an attorney needs a report for her meeting in 5 minutes, but that report takes more than 20 minutes to run. There’s no way to get her the information she needs in time…
- With Platinum, common reports typically run 10 to 30 times faster than the Multi-User version. This means that you can provide needed reports at the drop of a hat.
It’s midnight, but you can’t sleep with the full moon lighting your room. You’re out of town and away from the office with the current case weighing heavily on you. You get up to check your e-mail and do some research since you’re awake anyway, and discover information that will change your entire case strategy. Your client’s case hangs in the balance; you must compare the new information to what’s saved in PracticeMaster, but it’s late and you can’t access it remotely. A dog howls outside. The hair on the back of your neck raises as you pace the floor. Finally, you grab the phone to wake the managing partner…
- With Platinum, you can quickly access clients, contacts, fees, calendar records, journal records, documents, and more using Tabs3 Connect from any internet-enabled device. Whether you’re at home or out of town, and it’s midnight or Saturday, access your work while away from the office.
Someone received an error in the software, and you need to run a Data File Integrity Check. Unfortunately, several of the employees are away from their desks. You don’t have the password for their computers, nor the time to go to each one, and you know resetting users is bad. You need to make sure the data is fine before the attorneys come back from lunch. You begin to sweat, jumping at shadows as you expect someone to come in at any time demanding answers…
- Platinum provides the ability to safely Log Off Users. Select a time interval for users to wrap up tasks, and a notification will be sent that they will be automatically logged out of the software when the displayed countdown ends.
In addition to all of these features, Platinum also provides eNotes, accelerated filtering and column sorting, the Platinum Exchange Connector, an Accounts Receivable by Timekeeper Report, and enhancements to the Detail Accounts Receivable Report. For more information on all of the Platinum features, see Knowledge Base Article R11379, “Platinum Overview.”
Don’t succumb to terror. For information on a 30-day trial offer, to get a price quote, or to order Platinum, contact your local reseller, consultant, or our Sales Department at (402) 419-2200!
Creating form letters, documents, and contracts for clients can be time consuming, and using mail merge is limited by field availability in Word or Outlook. PracticeMaster’s Word Document Assembly is the solution! Word Document Assembly lets you instantly assemble documents that you frequently use.
The Word Document Assembly Toolbar Plug-in can be installed (Maintenance | Integration | Toolbar Plug-ins | Word tab) and used to set up templates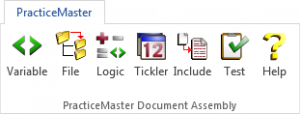 for assembling documents. Templates can include placeholders (variables) for specific types of information, such as client name, client address, judge, etc. You can even have the document assembly process prompt you to provide information that you may not have in the client’s file, such as the date that a document was signed.
Use ticklers in a template to automatically create a billing entry for the time you spend on a document, or to schedule other tasks. For example, ticklers can automatically schedule a follow-up task for you x number of days after you create the document to follow up with opposing counsel regarding the letter you are sending them.
Once a template has been created, you can assemble a document. Assembling a document will insert the relevant client and case information in your template to produce a new document. Assembling documents from templates is quick and easy. Just click the Word Document Assembly icon on your Documents Task Folder, select the client, and click OK. Once assembly is complete, the document can be saved and printed. PracticeMaster can even create a Document Management record automatically that is linked to the appropriate client, allowing you to easily find this document in the future.
If you haven’t yet worked with the Document Assembly feature in PracticeMaster and are interested in learning more, we recommend the following to help you get started:
View the following training videos at Tabs3.com/videos:
Word Document Assembly Overview
Word Document Assembly Coding
Review the following Knowledge Base articles:
R11015 – How to Start a New Word Document Template
R11447 – Working with PracticeMaster Document Assembly
Identify your top two or three documents to create document assembly templates.
If you have questions, give your PracticeMaster consultant or our Technical Support staff a call at (402) 419-2210. We will be happy to help you.
Have you ever wondered how to make your statements stand out to clients? Have you wanted to add additional fields to your statements? You can do both by using Statement Designer! Statement Designer enables you to design custom letterhead, cover letters, statements, invoices, and envelopes.
With Statement Designer (Statements | Statement Setup | Statement Designer), you can edit one of the Sample 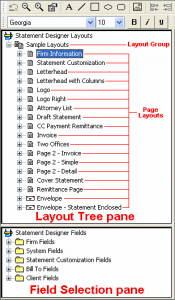 Layouts included with the software or create your own. On the left-hand side of the window there are two sections; the Layout Tree pane shows the layouts currently available, while the Field Selection pane shows the fields that are available to add to a layout.
When a layout is selected, the Page Layout pane is available on the right-hand side. This is where you can design 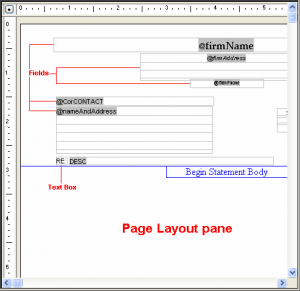 your statement layout. Simply double-click a field from the Field Selection pane, and it will appear in the page layout. From here, you can move the field to the appropriate place, resize the field, or right-click the field and select Properties to change properties such as font face, font size, color, rich text attributes, and more.
Once you have changed or created a Statement Designer layout, you will need to associate the layout to a Statement Template (Statements | Statement Setup | Statement Templates). Simply select the Template you want to change, or create a new one, and edit the Layouts tab. The template can now be assigned to a client by opening the Client file, clicking the Statement Options tab, and selecting a Draft Template or Final Template.
To enable Statement Designer when printing statements, from the File menu, select Print Setup. Click the Statement Setup button. On the right-hand side, select the Enable Statement Designer Layouts check box and click OK. Now when you print a statement for the client(s) whose statement template is associated with a statement designer layout, you will see your new statement layout!
For more information on customizing the sample layouts included with the software, see Knowledge Base Article R10901, “Customizing the Sample Page Layouts Provided with the Tabs3 Statement Designer.”
Did you know that you can add tabs to the Client file, Contact file, and Journal file that are specific to an Area of Practice, Contact Category, or Journal Type? These tabs are called Category Pages. Category Pages are a special type of page that is only shown in the Editor window when the selected client or record is associated with that category. You can use the Form Designer to design how the pages will look.
- Client category pages are configured for individual Areas of Practice (e.g., Personal Injury, Family Law, Workers’ Compensation, etc.). These pages will only appear when a client belonging to that Area of Practice is selected.
- Contact category pages are configured for individual contact categories (e.g., Attorney, Insurance Adjuster, Witness, etc.). These pages will only appear when a contact assigned to that contact category is selected.
- Journal category pages are configured for individual journal record types (e.g., E-mail, Phone Task, Research Task, etc.). These pages will only appear when a journal record of that record type is selected.
Setting up a Category Page provides a way of showing only those fields that are relevant to the selected “category,” thus reducing the number of visible pages.
In order to create a Category page, you must first add the fields for the Category page to the associated file using File Maintenance (e.g., add the desired fields to the Contact file). Once the fields have been added, the Category page and fields must be added to the data entry window using the Form Designer.
To create a Category Page
- From the List tab of the Client, Contact, or Journal file, select Edit | Form Designer.
- To add a Category page, click the
 (Add Category Page) button.
 - Select the appropriate Area of Practice, Contact Category, or Journal Type that the Category page will be associated with and click OK.
- A new page will be displayed. To rename the page, right-click the Category page and select Rename Page. Specify a name for the page and click OK. You are now ready to add fields to the Category page.
- Click the
 (Add Field) button.
 - Select the field you want to add and click OK.
- Continue adding fields, group boxes, and labels until the Category page is complete.
- Close the Form Designer and save the changes made to the form layout.
Additional information regarding Category Pages can be found in Knowledge Base Article R10566, “Category Pages in PracticeMaster.”
Would you like to see data in Microsoft® Excel® instead of in report format? Do you 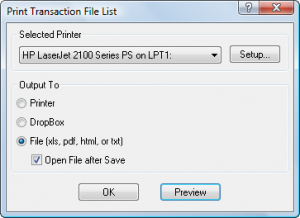 occasionally need to manipulate how data is organized for reporting purposes? Tabs3 makes it easy to send information to Excel. From any of the Tabs3 and PracticeMaster programs, you can use the Print to File option to easily send a report to Excel, or copy items from lists and paste the information into Excel.
Print to File
Reports can be printed to Excel using the File option in the Print dialog window. Excel files can be saved in either an .xlsx or .xls format.
Report Formatting – When saving to Excel, you can opt to Remove Formatting when Saving to Excel such as font size adjustments and styles, number formatting, grey and black lines, and shading. This option is located via File | Print Setup | Advanced Printing Features.
Page Layout – Page layout is different when generating the Excel report from the Preview window. When selecting the Excel File option from the Print Dialog box, the generated file will be output without page breaks, page numbers, and continuation page headings. Report headings are included at the beginning of the report only. However, when selecting the Print option from the Preview window and saving to an Excel file, the generated file will be output the same as it appears in the Preview window, including page breaks, page numbers, and continuation page headings.
Optimized Reports – Many reports have been optimized for Excel output. Optimized reports adjust the columns to match the width of data in the report, maintaining a similar output to the Tabs3 and PracticeMaster report output. Reports that have not been optimized may have a large number of columns that are all the same width. Additionally, non-optimized reports may have columns with no data in them, and number fields shown as a “#” if the number is too big for the cell.
Copy from a List
You can copy the contents of any list window into any word processing software, but the output is optimized for Microsoft Word and Excel. This feature pastes the information into columns, retaining formatting and the appearance of the information from the Tabs3 and PracticeMaster software.
To copy records from a List
- In a PracticeMaster list, you can select one record, multiple records, or all records. To select a range of records, highlight the first record that you want to copy, and either hold Shift and click the last record you want (to copy a section of the list) or hold Ctrl while clicking to select specific records to copy. To select all records, press Ctrl+A. Then, press Ctrl+C to copy the highlighted records to the Windows Clipboard.
- In Tabs3 Billing, General Ledger Software (GLS), Accounts Payable Software (APS), or Trust Account Software (TAS), you can select one record to copy (Ctrl+C) or all records to copy (Ctrl+Alt+C).
Once records have been copied to the Windows Clipboard, press Ctrl+V to paste the records into Excel or other software of your choice.
For more information on sending data to Excel, including a list of reports that are optimized for Excel output, detailed information is provided in Knowledge Base Article R11280, “All About Outputting Tabs3 and PracticeMaster Data to Excel.”

