
Tabs3 Cloud is a cloud-based legal billing and financial software solution designed specifically for the way today’s fast-paced, multifaceted law firms operate. It includes all the benefits of the Platinum edition of our Tabs3 Billing, PracticeMaster, and Financials software so you can manage your firm more effectively.

The following are just some of the benefits of Tabs3 Cloud:
- Managed by Tabs3 – With Tabs3 Cloud, the Tabs3 Software is installed and managed by the Tabs3 Team. You don’t need to purchase and maintain a server computer. If your firm has IT staff or network administrators, they will not be responsible for managing Tabs3 Cloud beyond ensuring you can access the software via the internet.
- Automatic Backups – With Tabs3 Cloud, the Tabs3 Software is automatically backed up throughout the workday, along with a daily archival backup that is stored offsite. In the event you need to restore from a prior backup, Tabs3 Support will handle the restore process and notify you when Tabs3 Cloud is available again.
- Simple Pricing – Tabs3 Cloud is offered on a per user basis.
- Data Privacy – Tabs3 Cloud secure login uses multi-factor authentication to control access to your firm’s data.
- Software updates are handled by the Tabs3 Team – The Tabs3 Team will keep Tabs3 Cloud up to date.
Propel your firm toward higher profits with reliable software that’s designed specifically for law firms like yours.
Tabs3 Cloud includes all of the features you trust from Tabs3 Software and puts them on your browser in the same easy-to-navigate interface you’re familiar with.
Whether you’re a longtime Tabs3 Software user or switching from another billing tool, Tabs3 Cloud is the perfect solution to keep your firm running.
Discover what the most dependable software solution for billing and financials on the market can do for your legal practice.
To learn more about Tabs3 Cloud, visit Tabs3.com/Cloud, check out Knowledge Base Article R11941, “All About Tabs3 Cloud,” or watch the Introducing Tabs3 Cloud video. To get pricing or to purchase a Tabs3 Cloud subscription, contact your local consultant or contact our Sales department at 402-419-2200.
Note: Tabs3 Software is available in Tabs3 Cloud or on-premises.

Want to see all of the new features in Version 2025? Check out Knowledge Base Article R11975, “Introduction to New Features!”
This article provides information on each new feature. Features are listed by application and include screenshots and links to additional information when applicable. Each time we add a new feature to Version 2025, this article is updated so that you can get the information you need to begin using the feature.
Our Knowledge Base can be accessed at support.Tabs3.com. You can also access our Knowledge Base in the Quick Launch by searching for and selecting “Knowledge Base.”

Did you know that Tabs3Pay can help you get paid faster? Accepting credit cards helps make it easier for clients to pay their bills. Sign up directly from Tabs3 Billing or Tabs3 Trust Accounting; in the Quick Launch, search for and select “Tabs3Pay Web Portal.”
With Tabs3Pay, you can:
- Manage separate trust and operating accounts.
- Securely store payment information for future use.
- Accept credit cards and electronic checks, all from within Tabs3 Software.
- Include a payment link in email statements, allowing your clients to easily enter payment information through the secure Tabs3Pay portal.
- Include trust replenishment request links with email statements or generate email requests directly from the Tabs3 Billing Matter Manager using Request Trust Deposit.
- Schedule future or recurring payments for clients.
- Take advantage of the Surcharging feature, allowing you to minimize the expense of processing fees.
- Enable clients to pay their current balance from the Tabs3 Client Portal.
To learn more about Tabs3Pay, visit Knowledge Base Article R11871, “Tabs3Pay Frequently Asked Questions,” or R11869, “Configuring Tabs3Pay.”

Version 2025 has some great new features to check out!
Tabs3 Billing Highlights
- Pre-Bill Tracking – Made multiple improvements to pre-bill tracking and the statement review process.
- Generate Statements – Added a new Pre-Bill option in Generate Statements to improve the paperless review process in the Pre-Bill Tracking window. Pre-bills streamline the review process and prevent unintended transaction changes.
- Statement Information – Added the ability to preview pre-bills and final statements in the Pre-Bill Tracking window using drill-down via the date columns to enhance accessibility. The Pre-Bill or Final Statement Information window also includes the Take Action pane, providing quick links to common actions.
- Transaction Protection – Transactions in pre-bills are protected, allowing users to make changes during the review process by drilling down to the transaction in the Pre-Bill tracking window. For changes to be made outside of Pre-Bill tracking, users must be assigned a new access right “Modify Pre-Bill Transactions Outside of Pre-Bills.”
- Statement Comments – Added a Comments pane in the Pre-Bill Information and Final Statement Information windows, allowing users to view and add comments during the review process. The pane’s icon displays a notification badge when there are unread comments, ensuring important notes are easily noticed.
- Transactions on Statements – Added “Pre-Bill” and “Final Statement” hyperlinks to the upper-right corner of entry windows to identify transactions included on a pre-bill or final statement. Users with rights to View Statements will be able to open the pre-bill or final statement using this link.
- Task Based Budgets – Added an Edit Task Based Billing Budget link to the Take Action pane in Matter Manager. Also added a new access right to control who has the ability to use this link.
- Fee Recap – Added column sorting to the Fee Recap Lookup window making it easy to group records when verifying hours.
PracticeMaster Highlights
- Document Preview – Added the ability to preview documents in the SnapShot pane when viewing Document Management lists.
- Archived Fees and Costs – Added the option to limit the range of archived fees and costs synchronized from Tabs3 Billing by date. This is particularly useful when adding PracticeMaster to an existing Tabs3 Billing system.
- Fee and Cost History – Fee and cost custom field and history tracking information is now retained when fee and cost transactions are archived (final billed and updated).
- Meeting Attendees – Updated the Dashboard to display the attendees for Outlook meetings in the tooltip.
- Fee Recap – Added column sorting to the Fee Recap Lookup window making it easy to group records when verifying hours.
Accounts Payable Highlights
- Costs on Statements – Added “Pre-Bill” and “Final Statement” indicators to the upper-right corner of the Cost Transactions window to identify transactions that cannot be edited in AP because they are included on a pre-bill or a final statement.
Tabs3 Taskbill Highlights
- Contact Initials – Added the ability to override a timekeeper’s initials using a custom field in the PracticeMaster Contact file.
Tabs3 Platinum Software Highlights
- Multi-Factor Authentication – Added the option to enable and configure multi-factor authentication (MFA) for individual Tabs3 Connect users.
All Tabs3 Software
- Access Right – Added a new access right “Modify Pre-Bill Transactions Outside of Pre-Bills.” Users, including Managers, will need assigned this new access right in order to edit transactions included on pre-bills from outside the Pre-Bill Information window.
For in-depth information on all of the new Version 2025 features, including screenshots, refer to Knowledge Base Article R11975, “Version 2025 Introduction to New Features.” A list with links to all Version 2025 information can be found in R11977, “Version 2025 Information and Resources.”
To download Version 2025, check for updates via the Quick Launch by searching for and selecting “Check for Updates” or via the Help | Check for Updates menu option, or contact your local consultant.
 Did you know there is a calculator built into number and amount fields? When your cursor is in any number or amount field, you can use the math operators (+, -, *, /, or =) to add, subtract, multiply, and divide values just as you would on a calculator. When you press Enter, the total of your calculations will be displayed in the field that you are currently in. This feature can be used to easily perform calculations without using a separate calculator. The popup calculator can be accessed from a number or amount field by pressing M or one of the math operators.
What if you could create a personalized workspace in each Tabs3 Software application, giving you quick access to your most frequently used features? With My Actions, you can!
The My Actions page view of the Home Page can be customized to display the features you use most, including reports. You can even create groups of features for easy categorization! My Actions can be customized in Tabs3 Billing, PracticeMaster, Trust Accounting (Trust), Accounts Payable (AP), and General Ledger (GL).
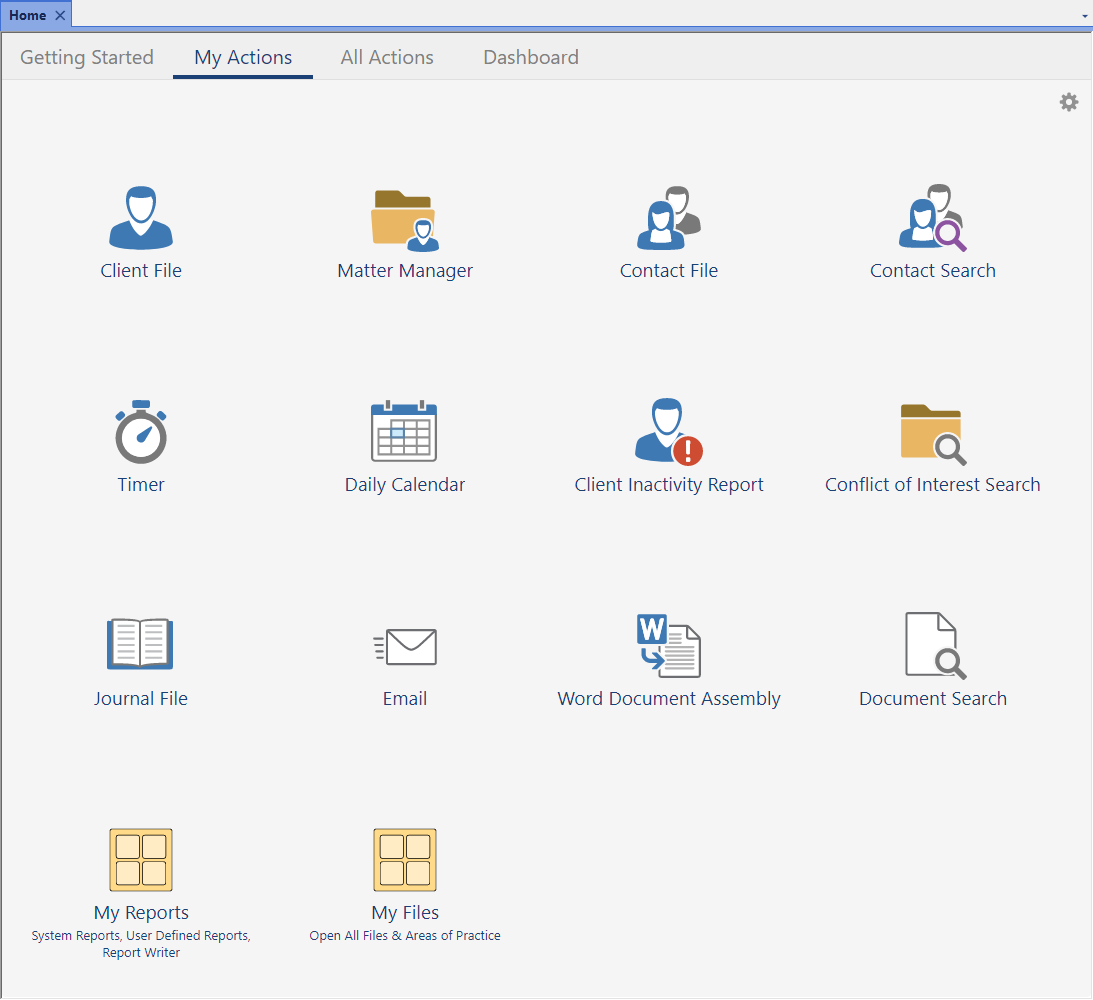
Customizing Actions
Add your favorite features for quick access.
To add an action
- Click the
 (Customize My Actions) icon.
 - Click the Add Actions button.
- Select the desired features in the Available Actions column.
- Click the Add button to move them to the Actions to Add column.
- Click Finish on the Add Actions window.
- Click Finish on the My Actions tab.
You can also add actions by right-clicking an item in Quick Launch and selecting Add to My Actions, or by hovering over an action on the All Actions tab and clicking the ![]() star.
star.
To remove an action, click the ![]() (Customize My Actions) icon and then click the
(Customize My Actions) icon and then click the ![]() minus sign on the action you want to remove.
minus sign on the action you want to remove.
Groups
Groups can be created to help categorize your favorite programs. For example, you could create groups for Daily Tasks, Monthly Reports, or Year-End just to name a few! Assign a color to the folder to make identification easier.
To create a group
- Click the (Customize My Actions) icon.
- Click the Add Group button.
- Enter the desired group Name.
- Optionally enter a Description.
- Select the desired Color.
- Click Next.
- Select the desired features in the Available Actions column, click the Add button to move them to the Actions to Add column, and then click Finish.
You can add actions to an existing group by dragging and dropping an action onto the group icon, or by clicking the group and then clicking the Add Actions button.
To remove a group, click the ![]() (Edit Group Properties) icon and click the Delete button.
(Edit Group Properties) icon and click the Delete button.
Want to see it in action? Check out the four minute Using and Customizing My Actions video:
Updating Tabs3 Software is as easy as one-two-three! Although major version releases introduce new features and enhancements, interim updates provide additional improvements throughout the year. These updates are designed for quick installation with little to no downtime for your office. Simply select Help | Check for Updates in the software.
For additional information on checking for updates, downloading an update, and installing an update, refer to Knowledge Base Article R11937, “Keeping Tabs3 Software Up to Date.”
Access our Knowledge Base at support.Tabs3.com, or find it in the Quick Launch by searching for and selecting “Knowledge Base.”
Stay up to date and take advantage of the latest features and improvements!
Firm information can change for many reasons, such as when you move, add partners, or the firm splits. Updating the software with your new information is important so that your firm is accurately represented on statements, checks, and more. Informing Tabs3 Software is also important so that information regarding changes to the software reaches you in a timely manner.
The main changes to firm information are made in System Configuration; however, other changes may also be necessary depending on your use of the software and are outlined below.
System Configuration
You can change your firm’s name, address, phone, website, and Federal ID # in System Configuration’s Firm Information window (File | Open | Firm). Changes to the firm’s name, address, Federal ID #, or phone will prompt you to print and send us a form with the changes. This is so that we can update our records.
Making changes to the Firm Information will automatically change the following information in the software:
- Heading of all reports in Tabs3 Billing, PracticeMaster, Trust Accounting (Trust), and Accounts Payable (AP).
- Firm name displayed on Trust and AP 1099 Forms.
- Firm name printed on Trust checks to your firm.
- Statement Designer layouts that use a variable for any of the fields that have changed.
- Document Assembly templates and report definitions that use any of the fields that have changed.
Note: When a change to the firm name is made in the Platinum edition, all users must exit the Tabs3 Software before the change will apply to the Tabs3 Software report headings or Trust checks to your firm.
Tabs3 Billing
The following changes to statement information may need to be made in Tabs3 Billing for changes to your firm’s information.
- If your firm uses the Headings tab in Statement Customization (In the Quick Launch, search for and select “Statement Customization”) to enter up to nine lines to be printed as a heading on each statement, these lines may need to be updated.
- If your firm uses Statement Designer layouts that provide firm information manually entered, instead of using variables, these layouts may need to be updated.
- If your firm uses bitmaps on statements that include the changed firm information, the bitmaps will need to be recreated.
General Ledger (GL)
In GL, the Client Name field in the Edit GLS Client utility (In the Quick Launch, search for and select “Edit GLS Client”) prints as a heading on all GL reports.
Tabs3 Remote
In Tabs3 Remote, the firm name is saved in Customization (Utilities | Customization) and is printed as a heading on all Tabs3 Remote reports.
If your firm information changes, make sure you update all of the necessary areas to help make the transition smooth.
Did you know that some activities are logged in the software, such as when the software is backed up or restored? This information can come in handy when you want to determine when something happened and who initiated it.
A Support Log is available for viewing or printing in every application, but provides different information based on the application. Not all activities are logged, but those that have a high impact are typically included.
To print a Support Log
- In the Quick Launch, search for and select “View the Support Log.”
- Optionally enter a Date range.
- Optionally select the Specific option next to Users, and then select the desired users for whom you want the report to run.
- Optionally select the Specific option next to Features, and then select the desired features for which you want the report to run.
- Click the Print button.
There are many helpful features in the Support Log. For example, let’s say you are sure that you updated statements last week, but now those transactions are showing as work-in-process again. In Tabs3 Billing, you can print the Support Log and include the Undo Updated Statements feature. When reviewing the report, you will see a list that includes every time Undo Updated Statements has been run. The following information will also be included: Date, Time, User, Statement, Cnt (Count), Client Range, and Reporting Month. Now you can see who undid the statements and talk to them to find out why.
To view a complete list of what features are included in the Support Log for each application, visit Knowledge Base Article R11288, “Support Log Information.”
Your clients use credit cards, and accepting payments from them has never been easier for your law practice. With Tabs3Pay features such as easy invoicing, next day funding, scheduled payments, surcharging, and more, all within Tabs3 Software, you can make payments effortless for your clients and get paid faster. Tabs3Pay setup is quick and hassle-free. And because credit card processing fees can impact your firm’s profitability, we offer surcharging as a cost-saving solution.
With Tabs3Pay you can:
- Accept credit cards and electronic checks within Tabs3 Software.
- Reduce credit card expenses with optional surcharging – process unlimited credit cards for as low as $50.
- Manage separate trust and operating accounts from Tabs3 Software.
- Securely store payment information for future use.
- Email an invoice with a secure payment link.
- Send statements with a payment QR Code.
- Schedule future and recurring Tabs3Pay payments.
- Request Trust replenishment.
Other Benefits Include:
- Get paid faster.
- Eliminate manual errors.
- Save time and collection hassles.
- Certified PCI compliant and secure.
To sign up for Tabs3Pay
- In the Tabs3 Billing or Trust Quick Launch, search for and select “Tabs3Pay Web Portal.”
- Click the Let’s Get Started button.
For more information on signing up for and configuring Tabs3Pay, see Knowledge Base Article R11869, “Configuring Tabs3Pay.”
*Surcharging laws vary by state and are subject to change. Always check with your local bar association for the most updated information.
Did you know that you can quickly start other Tabs3 Software applications from within any application? Once you have opened one of the Tabs3 Software applications, simply click on the desired application button in the application toolbar! The application toolbar is located at the bottom of the Quick Launch pane.
![]()
When starting any application from the application toolbar, the new software will use the same User ID as the current application. An application’s button will not be displayed on the application toolbar if you do not have access rights to that application or if it is not installed on your workstation.
Are you planning on purchasing a new server, or moving from one computer to another? Sometimes it becomes necessary to move the Tabs3 Software from one location on the network to another location. Knowledge Base Article R11895, “Moving Tabs3 Software,” and Knowledge Base Article R11896, “Moving Tabs3 Platinum Software,” walk you through the steps to move the software to a different computer.
Our Knowledge Base can be accessed at support.Tabs3.com. You can also access our Knowledge Base in the Quick Launch by searching for and selecting “Knowledge Base.”
With 2024 coming to a close, year-end tasks are also swiftly approaching. Get a jump on 2025 by reviewing the recommended year-end procedures! As always, look no further than our Knowledge Base and Help topics to guide you through the process.
Knowledge Base Article R10429, “Year-End Overviews for Tabs3 Software Products,” includes links to KB articles that provide checklists and frequently asked questions. The types of questions found in each year-end article are outlined below:
Tabs3 Billing – R11693
- Retaining Previous Year’s Information
- Next Year’s Entries
- GL Integration
Tabs3 Trust Accounting – R10433
- Bank Account Reconciliation
- Reports
- 1099s, including E-file
- GL Integration
Tabs3 Accounts Payable – R11278
- Checks
- Void Posted Checks
- Reports
- 1099s, including E-file
- Deleting Vendors
- GL Integration
Tabs3 General Ledger – R11600
- Advancing the Year
- Reports
Lists of basic year-end procedures are also available in Help for each Tabs3 Software application. Simply enter the keyword “year-end” on the Index tab to display the year-end procedures Help topic.
It’s almost 1099 season! If you don’t want to E-file, and you have 10 forms or fewer to send, continuous 1099 Forms can be ordered directly from the IRS. However, for laser printer forms, we recommend ordering 1099 forms from Nelco. These forms are guaranteed to be 100% compatible with AP and Trust. Likewise, you can order W-2 Wage and Tax Statement laser forms from Nelco. Now is a good time to take inventory of your 1099 forms, AP checks, and Trust checks so you can order them all at the same time! Nelco has over 50 years of experience in the business forms industry.
Knowledge Base Article R10978, “Ordering Tabs3 Software Compatible Checks and Forms from Nelco,” includes which forms are compatible with Tabs3 Software and links you to the Nelco website where you can order them.
Our Knowledge Base can be accessed at support.Tabs3.com. You can also access our Knowledge Base in the Quick Launch by searching for and selecting “Knowledge Base.”
Tax time is stressful for everyone, but especially for businesses. Tabs3 Software has partnered with Nelco® to provide Tabs3 E-file, a complete solution to filing your forms 1099-MISC, 1099-NEC, and 1096. You don’t need to deal with the forms, envelopes and postage, or configuring your printer at your office; instead, simply upload your data to the Tabs3 E-file portal and they can be electronically filed, printed and mailed, or emailed on your behalf, saving you time and manpower every year.
To transmit Form 1099-Misc and Form 1099-NEC to the Tabs3 E-file portal
- From the Accounts Payable Quick Launch, search for and select “Tabs3 1099 E-file.”
- Optionally specify a Minimum YTD Amount other than 600.
- In the Trust Transactions section, optionally select Merge transactions where Firm is the payer and/or Include transactions where Trust Account is the payer. (Note: Tabs3 E-file can also be started from Tabs3 Trust Accounting, with similar options.)
- Click Transmit.
- Log in with your Tabs3 E-file account information.
- In the Forms in Progress section, select the desired options and click Next.
- Verify your information is correct and click Next.
- Enter your payment information and click the Pay & Submit button.
Prefer not to use the Tabs3 E-file portal? No problem! Tabs3 Accounts Payable (AP) and Tabs3 Trust Accounting (Trust) allow you to view 1099 information on reports, print Form 1099-MISC or Form 1099-NEC for filing, or create a 1099 Disk File which can be used to electronically file with the IRS. Using both AP and Trust together allows you to create a combined file by merging your Trust data into AP to run one set of 1099 forms or create a single electronic file.

Did you know that law firms who accept credit cards get paid sooner and collect on more billable work than firms that don’t?
With Tabs3Pay, accepting and managing electronic payments has never been easier for your law practice! Not only can you accept credit cards and electronic checks, but you can manage separate trust and operating accounts, and securely store payment information for future use. Additionally, by including a payment link in email statements, your clients can easily enter payment information through the secure Tabs3Pay portal.
Watch this six-minute video here:
Training Videos can be accessed at Tabs3.com/videos. You can also access the videos in the Quick Launch by searching for and selecting “Training Videos.”
Tabs3 Cloud is a fully integrated practice management suite that includes Tabs3 Billing, Financials, and PracticeMaster. With Tabs3 Cloud, your Tabs3 Software data is accessible from any internet connection, at any time. Enjoy the freedom to work from your office, home, or on the go, all within a secure environment. Experience the full functionality and data privacy of Tabs3 Software without having to worry about servers or backups.
Knowledge Base Article R11941, “All About Tabs3 Cloud,” includes the benefits of Tabs3 Cloud, what’s included, and how it works, as well as performance, licensing, and general information.
Our Knowledge Base can be accessed at support.Tabs3.com. You can also access our Knowledge Base in the Quick Launch by searching for and selecting “Knowledge Base.”
Do you sometimes forget where to access features or reports in the software that you only use occasionally? Use the Quick Launch to find what you need!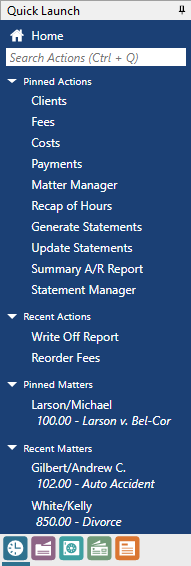
The Quick Launch provides a Search Actions field to quickly find actions in the current application. Simply start typing, and a list of possible choices that contain the characters entered will be displayed, allowing you to easily select an action to launch. For example, searching for “check” will include Check for Updates and Data File Integrity Check in the list of options. In addition to the feature names, common acronyms and alternate references are included. For example, searching for “attorney” in Tabs3 Billing will include all references to “timekeeper” in the list such as Timekeeper Information, Timekeeper Productivity Report, etc.
In addition to search capabilities, the Quick Launch displays the most recent actions and matters accessed and provides the ability to pin actions and matters. To pin an action or matter, hover over the item and click the ![]() icon. Pinned actions or matters are removed from the Recent Actions or Recent Matters sections and added to the Pinned Actions or Pinned Matters sections. Pinned items can be reordered by dragging them to the desired position in the list. To unpin an action or matter, hover over the item and click the
icon. Pinned actions or matters are removed from the Recent Actions or Recent Matters sections and added to the Pinned Actions or Pinned Matters sections. Pinned items can be reordered by dragging them to the desired position in the list. To unpin an action or matter, hover over the item and click the ![]() icon.
icon.
Another great feature is the ability to access other applications using the application icons at the bottom of the Quick Launch pane. This provides quick access to all of the Tabs3 Software installed. No need to find the shortcut on your desktop or in the Start menu.
Tip: You can instantly access the Search Actions box by pressing Ctrl+Q.
Tabs3 Cloud is a cloud-based legal billing and financial software solution designed specifically for the way today’s fast-paced, multifaceted law firms operate, and PracticeMaster is now available to provide a complete suite of Tabs3 Software applications!
With this new release, users have more ways to access the powerful features and tools that have transformed the way legal professionals work, in addition to the cloud-based billing and financial tools already accessible in Tabs3 Cloud.
Features include:
- Matter management tools
- Legal calendaring
- Document management
- Document assembly
- And more
Contact Sales at (402) 419-2200 for more information, or sign up for a demo at Tabs3.com/cloud.
Note: Tabs3 Software is available in Tabs3 Cloud or on-premises.
Did you know that there are several record types throughout the software in which you can mark people or accounts as inactive? Selecting the Inactive check box provides the ability to keep the associated history, but removes the ability to accidentally add associated records. You can also typically choose whether or not you want to include inactive people or accounts on lookup windows and reports.
Records in the following files can be marked as inactive:
- System Configuration – Users
- Tabs3 Billing – Clients, Contacts, and Timekeepers
- PracticeMaster – Clients and Contacts
- General Ledger Software (GLS) – Chart of Accounts
- Accounts Payable Software (APS) – Vendors and Bank Accounts
- Trust Accounting Software (TAS) – Contacts and Bank Accounts (Note: Clients must be marked as inactive in Tabs3 Billing)
For more information on marking records inactive, press F1 to open the Help, enter “inactive” on the Index tab, and select the desired topic.
Do you ever wonder how figures on reports are calculated? Sample Report Packs take the mystery out of reporting. Sample reports are available for every Tabs3 Software application and each report is broken down field by field to explain exactly how the information is represented.
Each report consists of three sections: a sample report, the description of the report, and field definitions.
Sample Reports
At least one example is provided for each report so you can see how the report looks. More than one example is shown if there are significant differences in the formatting when different settings are selected.
Description
An overview of each report briefly explains the purpose of the report and provides a summary of available options. You can use the overview to help determine if the report suits your current reporting needs.
Definitions
The Definitions section for each report provides a detailed breakdown of every field available on the report. This may be as simple as a Date field on a report representing “The date the report was printed,” or a calculation based on multiple fields. For example, on the Client Analysis Report, the Effective Rate field shows that it is calculated as “Hourly billing rate based on original hours. (Fees Billed minus Fee Write Offs) divided by Original Hours.”
To access the Report Packs
- Open the report for which you want to view the Sample Report Pack.
- Press F1.
- Click the icon at the top of the Help topic (Report pack in PDF format).
When this icon is clicked, not only is the report pack opened, but you are taken directly to the page where the report is located. Alternatively, the Tabs3 Report Packs can be accessed via the Quick Launch by searching for and selecting “Documentation,” Help | Documentation, or Tabs3.com/docs.
In the Platinum SQL edition, users can now be linked to their Windows account. Using Windows Authentication instead of passwords allows an easier, more secure, logon experience.
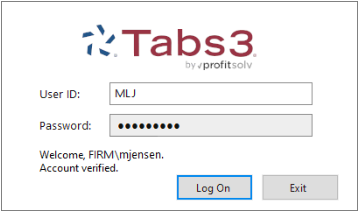
For additional information about using a Windows account, see KB Article R11935, “Using Windows Authentication to Log in to Tabs3 Software.”
Tip: Now that User IDs can be associated with a Windows account, you can use the Windows Task Scheduler to automatically log into Tabs3 Software and perform tasks (such as Data File Integrity Checks) while maintaining security for all users. Additional information about using a Startup Option can be found in KB Article R11034, “Automating Tabs3 Software Maintenance Tasks” or the Help included with Tabs3 Software.
Version 2024 has some great new features to check out!
Tabs3 Platinum Software Highlights
- Added the ability to link your Tabs3 User ID to your Windows user account. Once you log into Windows, you can launch Tabs3 Software without having to enter another password. This allows you to use the Windows login security to ensure that only the associated user can access Tabs3 Software. (Requires Platinum SQL and an Active Directory Domain Server)
- Improved performance when refreshing or rebuilding PracticeMaster search indexes.
- Added the ability to schedule PracticeMaster search index rebuilds.
- Added the option to send an email notification when a search index rebuild fails or succeeds.
- Added the ability in PracticeMaster to rebuild the Conflict/Contact index file (used for Conflict of Interest Searching) while other users are in the software.
- Simplified the process of managing SQL ODBC access rights for users.
Tabs3 Billing Highlights
- Added new configuration options for Tabs3Pay payment links and request trust deposit links:
- Added the ability to specify if overpayments are allowed.
- Added the ability to specify if payments can be made by Credit Cards and/or eChecks/ACH.
- Made multiple improvements to the Tabs3 Billing Matter Manager:
- A final statement can now be updated by clicking the “1” badge in the Work-in-Process tile.
- Added a Perform Split Billing link to the Take Action pane. This link is only displayed when viewing the main Split Billing client.
- Added an Adjust Flat Fee Amount link to the Take Action pane. This link is only displayed when viewing a Flat Fee client.
- Added NetDocuments integration, allowing client information to be pushed to NetDocuments. This feature requires PracticeMaster Basic.
PracticeMaster Highlights
- Added the ability to synchronize event attendees from Outlook to PracticeMaster (when using the Microsoft 365 Exchange Connector).
- The Document Search index no longer needs to be rebuilt when a Renumber Client or Change Key Type is performed.
- Added the ability to select specific Journal record types when running a Conflict of Interest Search.
Tabs3 Trust Accounting Highlights
- Added new Positive Pay configuration options to support Wells Fargo Bank.
- Added new configuration options for Tabs3Pay payment links and request trust deposit links:
- Added the ability to specify if overpayments are allowed.
- Added the ability to specify if payments can be made by Credit Cards and/or eChecks/ACH.
Tabs3 Accounts Payable Highlights
- Added new Positive Pay configuration options to support Wells Fargo Bank.
Tabs3 Taskbill
- Added an option to export invoice attachments from Tabs3 Accounts Payable (AP) for costs included on a statement.
For in-depth information on all of the new Version 2024 features, including screenshots, refer to Knowledge Base Article R11947, “Version 2024 Introduction to New Features.” A list with links to all Version 2024 information can be found in R11949, “Version 2024 Information and Resources.”
To download Version 2024, check for updates via the Quick Launch by searching for and selecting “Check for Updates” or via the Help | Check for Updates menu option, or contact your local consultant.
Tabs3 Trust Accounting (Trust) is designed to help your firm keep track of the trust accounts you manage.
- Trust tracks an unlimited number of client trust accounts, and can warn you when an account goes below a minimum balance.
- You can print checks, record manual checks, record electronic funds transfers (EFTs), record deposits, reconcile your bank account in the software, and track your trust transactions through a variety of reports.
- The 3-Way Reconciliation Report helps you stay compliant when balancing your accounts. Not only that, but Tabs3 Trust Accounting has a wide range of reports that can be customized to fit your needs.
- Using the Tabs3 Trust Accounting Dashboard, you can easily stay on top of your Trust Account bank balances and quickly monitor any recent activity at a glance.
- Trust Accounting includes a Positive Pay Export program that allows you to export a list of all approved checks that can then be uploaded to your bank or financial institution’s fraud prevention program.
- The best way to accept credit card deposits for your firm is with Tabs3Pay. Securely make credit card or ACH deposits directly through Trust.
Trust provides seamless integration with Tabs3 Billing, PracticeMaster, Tabs3 Accounts Payable (AP), and Tabs3 General Ledger (GL).
- In Tabs3 Billing, trust balances can be shown in the Matter Manager and on work-in-process reports, trust transactions or balances can be shown on billing statements, and payments made to your firm from a client’s trust account can automatically generate a payment.
- Firms using Tabs3Pay can email a request to replenish the Trust balances at any time, giving clients a link to replenish their funds right away.
- In PracticeMaster, trust balances are shown as part of Matter Manager’s Billing Summary.
- In the Platinum edition, check requests can be created in PracticeMaster and sent to Trust.
- You can upload 1099 information to Nelco’s portal to make producing and sending 1099s a snap. Alternatively, IRS 1099 Forms (1099-MISC or 1099-NEC) information can be printed in Trust or be combined with AP 1099 information.
- Payments to the firm from Trust can create journal entries in GL. Additionally, accrual entries for Trust bank balances can optionally be posted in GL.
Trust accounting regulations require strict adherence. Tabs3 Trust Accounting provides peace of mind with the tools to help your firm manage your trust accounts. For more information, contact your local consultant, or contact our Sales Department at sales@tabs3.com.

The 1099 filing season is just around the corner. New for tax year 2023, the IRS is requiring that anyone filing an aggregate total of 10 or more forms (including Forms 1099-MISC, 1099-NEC, 1096, etc.) must file electronically. Corrections do not count towards this total; however, all corrections must be filed in the same manner as the originals, with penalties for failure to do so.
To prepare:
- Use Tabs3 E-file. Tabs3 Software has partnered with Nelco to provide Tabs3 E-file, a complete solution to filing your Forms 1099-MISC, 1099-NEC, and 1096. With Tabs3 E-file you don’t need to request a transmittal code from the IRS. You also won’t need to deal with forms, envelopes, postage, or configuring your printer; instead, simply upload your data to the Tabs3 E-file portal. From there, forms can be electronically filed, printed and mailed, or emailed on your behalf, saving you time and manpower. For additional information on Tabs3 E-file, see KB Article R11788, “All About Tabs3 E-file.”
- If you are using the Create 1099 Disk File utility in Tabs3 Accounts Payable, you must configure a Filing Information Returns Electronically (FIRE) account from the IRS. This provides you with the necessary Payer Name Control and Transmitter Control Code for the process. Be sure that you apply for a transmittal code early. It could take 45 days to receive the code from the IRS. For more information, see https://www.irs.gov/e-file-providers/filing-information-returns-electronically-fire.
- If you plan to print the forms using Tabs3 Software, we recommend ordering 1099 forms from Nelco®. These forms are guaranteed 100% compatible with Trust Accounting and Accounts Payable. Nelco has over 50 years of experience in the business forms industry. You can order forms by calling 1-800-266-4669 or via http://www.nelcosolutions.com/Tabs3.
To learn more about the Form 1099-MISC and Form 1099-NEC, see E-file Forms 1099 with IRIS | Internal Revenue Service (irs.gov).

We run the Positive Pay export process in Trust on a daily basis. Is there a way to automate this utility?
You can use a startup option with Trust to automatically export Positive Pay. This allows you to create the export using a shortcut. You can use the same shortcut to add this as a scheduled task in Windows.
The startup option is “/POSITIVEPAY #”, where # is the bank account that you want exported.
To add POSITIVEPAY as a startup option
- Make a copy of your Trust desktop icon with a distinctive name (e.g. “Positive Pay Export”).
- Right-click the new desktop icon and select Properties.
- In the Target field, add a space after the path and then enter “/POSITIVEPAY #” (e.g., “C:\Program Files\Tabs3\TAS.EXE” /POSITIVEPAY 1).
- Click OK to update the shortcut.
The export file is overwritten each time the export is run. If you want to retain a copy of the export, copy or move the export file before performing the export again.
Note: Trust will close once the export has been completed.
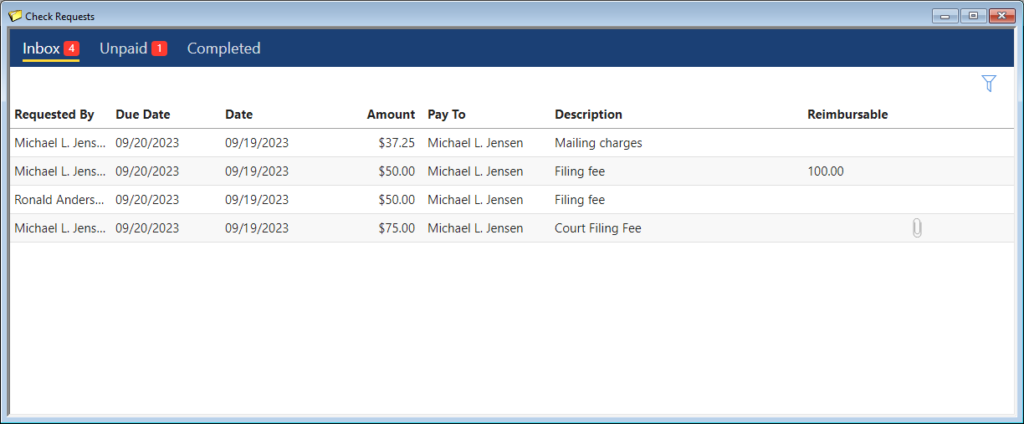
A Check Requests feature is now available in PracticeMaster, which allows users to add a check request for payment on behalf of a client or a work expense. Once the request is approved, users in Tabs3 Accounts Payable or Trust Accounting can create an invoice and generate a check or electronic funds transfer (EFT).
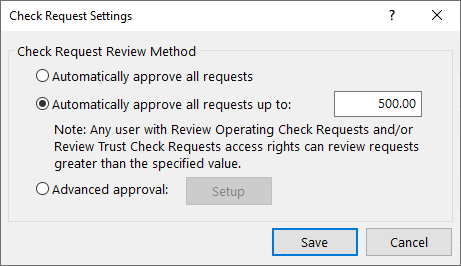
The Check Requests Settings window in PracticeMaster allows you to optionally configure a threshold at which a check request must be reviewed. An advanced option is available to set additional thresholds for which users can review requests, based on the amount. To access the Check Request Settings window, in the PracticeMaster Quick Launch search for and select “Check Request Settings.”
The Check Requests window in PracticeMaster allows users to enter their requests, as well as allows those who can review check requests to approve or deny them. To access the Check Requests window, in the PracticeMaster Quick Launch, search for and select “Check Requests.”

The Check Requests window in Trust and AP shows approved requests and allows users to create Trust Transactions or Invoice/Manual Check entries based on the check request. To access the Check Requests window, in the Trust or AP Quick Launch, search for and select “Check Requests.”
New access rights to Add Operating Check Requests, Add Trust Check Requests, Delete Other Users’ Check Requests, Review Operating Check Requests, Review Trust Check Requests, and Allow Self-Approval of Check Requests have been added. For additional information, see KB Article R11818, “Access Rights.”
This feature is available in Version 2023. For more information about check requests, see KB Article R11923, “Tracking Check Requests.”
The Tabs3 Software provides a wide range of reports, as well as documentation resources to help you get the most out of reports. Information on reports can be found in many places, so where should you look first?
Knowledge Base Article R11793, “Reports Information & Resources,” provides a list of resources with information regarding reports in the Tabs3 Software, making it easy to find what you are looking for. This article includes links to Knowledge Base Articles, Report Packs, Guides, and Videos. You can find information on comparing report information, report analyzation, specialty reports, and more!
Our Knowledge Base can be accessed at support.Tabs3.com. You can also access our Knowledge Base in the Quick Launch by searching for and selecting “Knowledge Base.”
Is it possible to combine multiple Trust checks into a single transaction to make the reconciliation process easier?
The Combine Trust Transactions utility is used to combine two or more unpaid check, EFT, or deposit transactions into a single combined transaction that can be cleared on the reconciliation.
To Combine Trust Transactions
- In the Quick Launch, search for and select “Combine Trust Transactions.”
- Select the desired Bank #.
- Select a Type of Checks and enter the Check # that will be used for this transaction.
- Click the Select Transactions button.
- Select the desired transactions by clicking in the (check mark) column.
- Click OK.
- Press Ctrl+S.
Now all of the entries you included on the combined transaction will show as a single item on your reconciliation.
We just ordered new Trust checks. Before we start printing checks, is there a way to make sure that everything will line up properly?
In Trust Accounting, a check test pattern can be printed that is comprised of “X’s” where the information would be printed. Although the test pattern can be printed on an actual check form, we recommend using a blank sheet of paper and holding it up to the check form so as not to waste checks.
To print a check test pattern
- In the Quick Launch, search for and select “Print Check Test pattern.”
- In the Selected Printer section, select your check printer.
- In the Output To section, select Printer and click OK.
- Select the Bank and then click OK.
If the information does not line up, adjustments can be made to the margins and printer offset adjustment via Print Setup.
Version 2023 has some great new features to check out!
Tabs3 Platinum Software Highlights
- Client Portal – We’ve added a client portal to Tabs3 Billing that allows selected clients to access their current balance and billing history with any web browser. When combined with Tab3Pay, clients can submit electronic payments that automatically apply towards their current balance due.
- Check Requests – A check request feature has been added to the software allowing you to enter, track, and review requests for reimbursements via PracticeMaster. Those check requests can then be used to create an invoice and generate a check or electronic funds transfer (EFT) in Tabs3 Accounts Payable or Trust Accounting.
- Outlook Recurring Event Synchronization – Enhanced the Microsoft 365 Exchange Connector so recurring events created in Outlook will synchronize with the PracticeMaster calendar.
PracticeMaster Highlights
- Tabs3 CRM – Easily track and manage potential client leads with Tabs3 CRM (client relationship management). Tabs3 CRM is an add-on service that will help your firm build your business with customized intake forms and marketing automation. Once your firm is ready to take on the client, you can easily create a client in PracticeMaster using an import process. Additionally, the PracticeMaster Conflict of Interest Search can optionally check leads in Tabs3 CRM for conflicts.
- Contact Categories – A new access right has been added allowing you to control who can add new Contact Categories. Contact Categories are used in the Contact file to classify contacts by type such as attorney, judge, opposing counsel, etc.
Tabs3 Software Highlights
- Simplified Update – Beginning with Version 2023, any necessary data conversions are done automatically during the installation. This means you don’t need to perform additional steps prior to using the software, greatly simplifying the update process. Furthermore, if you are currently on Version 2020 or later, updating to the latest version can be done with a single installation.
For in-depth information on all of the new Version 2023 features, including screenshots, refer to Knowledge Base Article R11925, “Version 2023 Introduction to New Features.” A list with links to all Version 2023 information can be found in R11927, “Version 2023 Information and Resources.”
To download Version 2023, visit Tabs3.com/update or contact your local consultant.
Dashboards are an easy way to get a quick overview of important data. Dashboards can be accessed via the Dashboard tab of the Home Page and provide the following information:
Tabs3 Billing Dashboard – Displays Accounts Receivable and Work-in-Process for each aging period, as well as a Cash Receipts and a Billing History billing widget to compare figures for the past two years. The dashboard can optionally be filtered in Platinum edition applications for one or more timekeepers, categories, or locations.
PracticeMaster Dashboard – Displays the current month’s Calendar, a list of upcoming events, a My Task list that allows you to easily check off completed items, and a Recap of Hours graph. Additionally, buttons to Add Event, Add Task, and Add Fee are included.
Trust Accounting Dashboard – Displays a summary of your firm’s active Bank Accounts and a list of Recent Trust Transactions. Additionally, buttons to Import Bank Transactions, Print Checks, and Add Transactions are included.
Accounts Payable Dashboard – Displays a list of Unpaid Invoices. Additionally, buttons to quickly Print Checks, Post Checks, print a Check Register, and Add Invoices are included.
General Ledger Dashboard – Displays a summary of your firm’s Bank Accounts and a list of Recent Bank Transactions. Additionally, buttons to Import Bank Transactions and Add Journal Entries are included.
Did you know that you can choose whether or not to print the initials of the user who runs a report on the left side of the footer?
To print the user initials in the report footer
- In the Quick Launch, search for and select “Print Setup.”
- Select the desired Printer.
- Click the Advanced Printing Features button.
- In the Footer section, select the Print User Initials check box.
- Click OK.
- Click OK.
Our bank has started offering a Positive Pay service and we want to start participating. Does Trust have that capability?
Both Tabs3 Trust Accounting (Trust) and Tabs3 Accounts Payable (AP) include the ability to export a Positive Pay file which can be submitted to your bank.
To configure the Positive Pay export for the first time
- In the Quick Launch, search for and select “Positive Pay Export.” A First Time Configuration wizard will be displayed.
- Select the Bank Account you want to configure and then click Next.
- Specify which additional columns you want to include in the export file. If you are not sure which columns to include, contact your bank to determine their requirements.
- Specify whether to include voided checks in the export file and if so, which character to use as an indicator, then click Next.
- Specify the date range of the checks you want to export and click Next.
- Specify the location to which to save the export file and click Export.
You can now upload the export file to your bank. For future exports, any new checks added since the last export will be included by default.
For more information on using Positive Pay and steps to configure additional banks, see Knowledge Base Article R11833, “Exporting Checks Using Positive Pay.”
I need to transfer money from one trust account to another trust account. How do I record the process in Tabs3 Software?
We recommend using positive and negative EFT transactions to transfer the amount from one account to another. A positive EFT will reduce a trust balance, whereas a negative EFT will increase a trust balance.
To transfer funds from one trust account to another
- In the Quick Launch, search for and select “Trust Transaction Entry.”
- Enter an EFT to remove the funds from one trust.
- Select the Trust ID from which you want to remove funds.
- Select a Type of EFT.
- In the Amount field, enter a positive amount.
- Enter any other information as needed.
- Press Ctrl+S.
- Enter an EFT to deposit the funds to another trust.
- Select the Trust ID to which you want to move funds.
- Select a Type of EFT.
- In the Amount field, enter a negative amount.
- Enter any other information as needed.
- Press Ctrl+S.
The difference between Timekeepers and Users is often confused. So what exactly is the distinction between how timekeepers and users are used in the software?
Users represent anyone who uses the software, or a resource that needs to be scheduled, such as a conference room. Timekeepers represent any person whose time is entered or billed, such as attorneys and paralegals.
You work with timekeepers and users every day, possibly in ways you don’t even realize. Let’s take a look at some different ways timekeepers and users are used in the software below.
Timekeepers can be used to:
- Track time
- Assign billing rates
- Specify which timekeeper is primary, secondary, and originating for a matter
- Track billing and productivity
- Specify reporting ranges
- Specify fee compensation rules (Tabs3 Billing only)
- …and more
Users can be used to:
- Log in to the software
- Specify access rights
- Track who enters data in Tabs3 Billing, PracticeMaster, Trust Accounting (Trust), Accounts Payable (AP), and General Ledger (GL)
- Add to groups to make entering calendar records easier
- …and more
Because there are such different uses for timekeepers and users, when, how, and why you should add or delete them vary. When adding or deleting timekeepers and users, keep the following in mind:
- You can only add as many timekeepers as your license allows. Because of this, it may be necessary to renumber or delete timekeepers or add timekeepers to your license.
- There is no limit to the number of users you can add; you are instead limited by how many users can be logged in to the software at the same time. Because of this, there is never a need to delete users. In fact, deleting users can cause Data File Integrity Check Errors.
It is important to note that Tabs3 Billing and Trust are licensed by Timekeeper whereas PracticeMaster, AP, and GL are licensed by User. For more information on timekeeper and user limits, refer to Knowledge Base Article R10788, “Active User Limits.”
Not sure what your timekeeper or user login limits are? These can be found in the About window (in the Quick Launch, search for and select “About”). The About window displays the Active User Limit in each of the applications. In Tabs3 Billing, you can also see the Maximum Timekeeper Limit, and in Trust you can see the Maximum Attorney Limit. For more information about what is contained in the About window, refer to Knowledge Base Article R11865, “Information in the About Window.”
For more information on deleting timekeepers and users, refer to Knowledge Base Articles R10969, “Renumbering vs. Deleting Inactive Timekeepers,” and R10840, “Deleting User IDs.”
Knowing the difference between timekeepers and users can help you know which settings may need to be changed when necessary, as well as when you should add or delete them, or update your license. For more information on timekeeper and users, refer to the Help by pressing F1 from any window.
Ethics are an integral part of any business, but in the field of law they are especially important. Tabs3 Software works to ensure that your firm has the tools to maintain ethical walls in order to protect your clients and cases.
Knowledge Base Article R11459, “Ethical Walls in Tabs3 Software,” discusses how to use Tabs3 Software to create ethical walls in your firm. The Tabs3 Software provides Conflict of Interest searching, the option to make clients secure and accessible by only certain users, the ability to control who sees work by assigning timekeepers, and the ability to set up access profiles to control who can access specific functions of the software.
Our Knowledge Base can be accessed at support.Tabs3.com. You can also access our Knowledge Base in the Quick Launch by searching for and selecting “Knowledge Base.”
The IRS changed the layout of Form 1099-MISC and Form 1099-NEC for tax year 2022. Tabs3 Trust Accounting (Trust) and Accounts Payable (AP) have been updated to print using the new form layouts. To ensure compatibility, order your forms from Nelco®. These forms are guaranteed to be 100% compatible with Tabs3 Software. You can order forms by calling 1-800-266-4669 or visiting NelcoSolutions.com/Tabs3.
Additionally, the Tabs3 E-file feature has been updated to support the state of Alabama’s requirement for the State income amount to be filled in. See KB Article R11922, “Form 1099-MISC and Form 1099-NEC Changes for Tax Year 2022” for additional information.
Update to Version 22.2.15 or later for changes to 1099s.
Note: Due to the form changes, you will not be able to print 1099 forms for tax year 2021 or prior after updating. The 1099 Report can still be used to gather information for prior year.
Verification lists are optional and can make it easy to confirm what activities have been done by whom in the software. Many firms review these on a regular basis, verifying which transactions have been added, changed, and deleted by the users in the firm. Verification Lists can be generated for much more than fees; there are more than 15 different verification lists in Tabs3 Billing, Trust Accounting (Trust), Accounts Payable (AP), and General Ledger (GL).
Knowledge Base Article R10793, “All About Verification Lists,” provides detailed information about the various verification lists available in the software including a breakdown of verification lists, how to enable or disable optional verification lists, which verification lists are temporary, how to delete verification lists, a complete list of all verification lists, and much more.
Our Knowledge Base can be accessed at support.Tabs3.com. You can also access our Knowledge Base in the Quick Launch by searching for and selecting “Knowledge Base.”
With tax season just around the corner, Tabs3 E-file is here to help simplify your 1099 submission process! Tabs3 has partnered with Nelco to provide Tabs3 E-file, a complete solution to filing your Form 1099-MISC, Form 1099-NEC, and Form 1096. Learn how to easily upload your data to the Tabs3 E-file portal so that your 1099’s can be electronically filed, printed and mailed, or emailed on your behalf.
Watch this three-minute video here:
Training Videos can be accessed at Tabs3.com/videos. You can also access the videos in the Quick Launch by searching for and selecting “Training Videos.”
Did you know that you can save reports generated from Tabs3 Software as PDFs? Instead of maintaining folders and/or boxes of paper, store your reports digitally instead!
When printing your reports, there are two ways to save the file as a PDF:
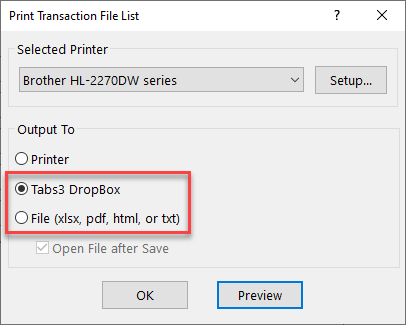
- Select an Output of Tabs3 DropBox. Tabs3 Software’s DropBox is a good option if you want to review the PDF report(s) before saving them to their final location. You can then save multiple files in the DropBox to another location simultaneously. Once all your reports are saved to the DropBox, simply drag them to the desired location.
- Select an Output of File, and then save the file as a PDF to the desired location. This is a good option if you’re ready to save the report and be done.
Once you start saving your reports as PDFs, think about saving them as document management records in PracticeMaster. When saved to PracticeMaster, your reports become easily searchable. Worried about security? Assigning documents to a secure client will limit the information available to users. When running a conflict search, any hits belonging to a secure client will display “This is a secure record.”
Tip: Use the Send to PracticeMaster option while in File Explorer to automatically create document management records in PracticeMaster for multiple reports. For more information on the Send to PracticeMaster feature, see Knowledge Base Article R11571, “Document Management Frequently Asked Questions.”
How can I change the terminology used in the trust section of my statements?
The terminology for trust information on statements is stored in Tabs3 Trust Accounting, and is specific to each bank you have configured.
To change the trust account terminology
- In the Quick Launch, search for and select “Bank Account.”
- Select the bank you want to modify in the Bank Account field.
- Click the Integration Settings button.
- In the Tabs3 Billing Statement/WIP Terminology section, enter the text you want to use in each field.
- Click on the OK button.
- Press Ctrl+S.
You can now schedule a future-dated payment or series of payments from within Tabs3 Billing and a future-dated trust deposit or series of trust deposits from within Trust Accounting that will automatically process via Tabs3Pay. This allows you to get paid on a specific date, even when you’re not in the office. Additionally, recurring payments are a convenient way of providing a simple payment plan for your clients. Once the payment is processed, it will be displayed in the Tabs3 Billing Import Online Payments window for import.
In Tabs3 Billing, the Schedule Payments window can be accessed via the Quick Clicks pane in Matter Manager or Statement Manager, a toolbar button in Payment Entry, or in the Quick Launch pane by searching for and selecting “Schedule Payment.”
In Trust, the Schedule Payments window can be accessed via a toolbar button in Trust Transaction Entry, 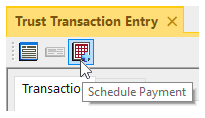 or in the Quick Launch pane by searching for and selecting “Schedule Payment.”
Note: Managing scheduled payments is performed in the Tabs3Pay Web Portal.
We need a list of all payments to our firm from trust accounts in the last year. Which report should I run for this?
The Check Register by Payee can be used to print a list of checks written to any payee for any date range.
To print a Check Register by Payee for firm payments
- In the Quick Launch, search for and select “Check Register by Payee.”
- On the Transactions tab, enter the desired Date range.
- On the Options tab, select a Payee range of “FIRM” Thru “FIRM”.
- Select any additional criteria.
- Click OK.
Did you know that you can have certain software features automatically run as soon as a Tabs3 Software application is opened? You can use startup options to help automate tasks by entering command line options in the Target field of the desktop shortcut icon.
For example, in Tabs3 Billing you can have the Fee Entry window automatically open, and in PracticeMaster you can have the Matter Manager window automatically open. Other popular startup options include opening the Calendar and the Timer window. Some startup options, such as the Data File Integrity Check, can be automatically started in every application. You can even use a startup option to automatically enter your User ID. If you do not use a password, the Logon window will be bypassed and you will automatically be logged into the software. However, if a password has been set up for the user, the User ID will be filled in and a password will be required.
To add a startup option to PracticeMaster
- Right-click the desktop icon used to start PracticeMaster and select Properties.
- From the Properties window, click the Shortcut tab. The startup option can be entered following the program file name in the Target field. An example of the Target field when using the User ID startup option is:”C:\Program Files\Tabs3\CM.EXE” ALICEAn example of the Target field when using the option to start the Data File Integrity Check at a specified time is:”C:\Program Files\Tabs3\CM.EXE” /DFIC /T 11:30p
Multiple startup options can be specified in the Target field if desired. Options must be separated by a space. An example of multiple startup options is:
“C:\Program Files\Tabs3\CM.EXE” /TIMER /CALENDAR /WEEKLY
- Click OK.
You can find a complete list of startup options applicable to the application you are working in by searching for “Help Topics” in the Quick Launch. On the Index tab, simply type “Startup Options”. For more information on automating tasks, including startup options, refer to Knowledge Base Article R11034, “Automating Tabs3 Software Maintenance Tasks.”
With a 72-year record of providing smart, creative, and effective legal guidance to their Washington community, the time was right for the firm’s billing and payment processing solution to evolve once more.
Hanson Baker wanted to create an effortless billing experience for clients by emailing invoices to clients and accepting online credit card payments. Finding a processor with transparent rates that integrated easily with their current software and workflows proved challenging, so the firm turned to Tabs3 Software.
As long-time Tabs3 Software users, they enjoyed Tabs3’s excellent software support and the many features available to them through PracticeMaster, such as the matter manager and dashboard. With affordable fees, transparent pricing, and the ability to attach payment links directly to their emailed invoices, Tabs3Pay was a natural choice.
To help with implementation, Hanson Baker worked with software consultant Christina Cline of C.R. Cline and Company. As a certified Tabs3 consultant, Cline was able to guide Hanson Baker through the implementation process and address potential hang-ups. With her oversight, adopting Tabs3Pay went off without a hitch.
Now, Hanson Baker’s clients enjoy a modernized, reliable payment process – and the firm saves time with smoother invoicing workflows. Not only has Hanson Baker seen improved cash flow due to shorter payment processing times with Tabs3Pay, but the need for collections has also declined.
Hanson Baker appreciates Tabs3Pay’s straightforward pricing and low processing fees, as well as usability features like the ability to print receipts after the fact. They’ve also benefited from Tabs3Pay’s integration with Tabs3 Software, reducing errors from manual input and wasted time from double data entry.
Cline reports that Tabs3 Software’s long record of excellent service is another reason Tabs3Pay was the right choice for Hanson Baker. “Tabs3 has been around for a long time,” Cline says, “Their support is in Lincoln, NE. You’re going to have your problem resolved. When you purchase Tabs3 and get it up and running, you’re not left to flounder.”
If you’re a current Tabs3 Software user and want to improve your firm’s billing and payment workflows, Tabs3Pay could be the solution. Tabs3Pay is designed to offer streamlined, trust accounting-compliant payment processing for law firms while integrating seamlessly with other Tabs3 Software applications. For more information, call (402) 419-2200, email sales@tabs3.com, or visit Tabs3.com.
When adding a payee, we misspelled the name. How can we change the payee’s name?
Beginning with Version 2022, Trust payees are now contacts. Therefore, in order to rename a payee, you must rename its associated contact using the Rename Contacts utility.
To rename a payee in Trust
- From the Quick Launch, search for and select “Rename Contact.”
- In the Old Contact ID field, select the contact associated with the payee you want to rename.
- In the New Contact ID field, enter the new name you want to use for that payee.
- If you want to update the individual name fields of the contact, select the Update Name fields check box and fill in the New Value fields for each name field. (Note: If you want to update the Full Name field based on these changes, select the Update Full Name based on First, Middle, and Last Name fields check box.)
- If you want to review the contact after changing it, select the Open the contact record after renaming the contact to update additional fields check box.
- Click OK.
Tabs3 Billing includes the ability to insert a personalized link or button to Tabs3Pay in your email templates used for emailing statements and sending trust deposit requests. These links can then be used by your clients to pay their bills or make trust deposits directly via credit/debit card or electronic check. Those payments and trust deposits can then be imported into Tabs3 Billing using the Import Online Payments program.
Knowledge Base Article R11905, “Requesting and Importing Tabs3Pay Online Payments and Trust Deposits,” guides you through the steps necessary to include payment links in your Email Statements and import any payments you receive.
Our Knowledge Base can be accessed at support.Tabs3.com. You can also access our Knowledge Base in the Quick Launch by searching for and selecting “Knowledge Base.”
When it is time for a client to replenish a trust account, use the new Request Trust Deposit feature! Enter the amount requested and select the corresponding IOLTA account. Tabs3 Billing then creates an email message with an embedded payment button. Review the message and send it to your client.
Your client receives the message, clicks the Make Trust Payment button, and funds the trust account by ACH bank transfer or credit/debit card.
Request Trust Deposit is powered by Tabs3Pay, the secure online payments platform built into Tabs3 Billing and Trust Accounting.
Note: The Trust Request feature requires Tabs3 Billing and Trust Accounting Version 2022 (Build 22.2.3) and later. Including a Make a Trust Payment button in a trust request requires a Tabs3Pay merchant account configured in Tabs3 Billing and Trust Accounting. For additional information, see KB Articles R11869, “Configuring Tabs3Pay,” and R11905, “Requesting and Importing Tabs3Pay Online Payments and Trust Deposits.”
When was the last time you backed up your Tabs3 Software data and tested the viability of your backup? If your firm was required to restore from a backup right now, how much data would be lost?
Regular backups are critical to the safety of your data. Tabs3 Software automatically prompts you to run a backup when a function cannot be easily reversed or when interruption of a process can cause errors in the data. When prompted to make a backup, review the date and time of the last backup shown on the prompt, and ask yourself how much data will need to be reentered if a restore is required. If you are not comfortable with the amount of work required after restoring, then you should back up your data before going any further. If you regularly find yourself skipping backups because it’s difficult to get every user to exit the software, consider the Platinum edition of Tabs3 Software. The HotBackup feature allows you to make backups while other users are still working in the software and Tabs3 Platinum Software can automatically recover from interruptions to many functions, including Update Statements.
Tabs3 Software provides the ability to back up and restore data from within the software. If you are using the non-Platinum edition of the software, you can keep up to three internal backups with a size limit of 2GB each. If you are using the Platinum edition of the software, backups are practically unlimited! You can keep up to 198 user-defined HotBackups, each limited in size only by the available hard drive space.
But is that enough? Backups made via the Tabs3 Software are considered temporary backups and only include your data files. These backups do not include executable files to run the programs, nor is every file in the Tabs3 Current Working Directory included. We recommend making regular backups of the entire Tabs3 Current Working Directory via a third-party backup program for purposes of recovering from a catastrophic failure, such as flood, theft, server hard drive failure, etc. If you already have a third-party backup in place, make sure that it is periodically tested to verify it is working correctly.
Now may be the perfect time to take a closer look at your current backup strategy and to verify the procedures you have in place. If you cannot take the time to review procedures now, add a reminder to your calendar to review them as soon as possible. Don’t be lulled into a false sense of security; backups that don’t restore correctly, or not having a backup, can cost you a great deal in both time and data loss.
For a list of resources on backing your data up and restoring, visit Knowledge Base Article R11524, “Backup/Restore Information Resources.”

Network and hardware failure can cause data corruption in any firm, regardless of preventative measures. Auto-Recovery helps provide peace of mind when faced with these issues.
For example, if you are updating statements and you lose network connectivity in the middle of the update, without Platinum you would have to restore your data and potentially lose many hours of work. Not so with Auto-Recovery! Auto-Recovery monitors the software. When it recognizes a transaction has not completed properly, it rolls back the database to its previous state before the database transaction began.
In the case of Update Statements being interrupted, Auto-Recovery means that if the interruption occurs during the update to client 1240.00’s statement, then all statements prior to client 1240.00 will remain updated, while client 1240.00 will be “rolled back” to the state before you started Update Statements. You will simply receive a message indicating that Update Statements needs to be run again.
This is a powerful feature that can save your firm time and money. Power failures, computer crashes, and network failures can occur on even the best networks. Auto-Recovery helps greatly reduce the impact of these issues.
For more information about Platinum features, see Knowledge Base Article R11379, “Platinum Overview.” If you have any questions regarding Platinum features, contact your local consultant, or call Technical Support at (402) 419-2210.
A new employee selected the wrong bank account for a new trust account. Is there an easy way to fix this, now that trust transactions have been entered?
The Renumber Trust Account utility can be used to change the bank account associated with a trust account.
To change the bank account associated with a trust account
- In the Quick Launch, search for and select “Renumber Trust Account.”
- In the Old Trust ID field, select the Trust ID that you need to change.
- In the New Trust ID field, select the same Trust ID.
- In the New Bank Number field, enter the bank account number to which you need to move this trust account.
- Click the Renumber button to complete this process.
Note: You cannot renumber a trust account with reconciled or combined transactions to use a different bank account. Additionally, the Trust ID and Bank number you are renumbering the account to cannot already exist.
Tabs3Pay now offers surcharging! Help your firm save on expenses while still providing clients the option to pay by credit card. While processing fees are normally paid by the firm, with surcharging, credit card fees are passed on to the cardholder instead. Only credit card transactions (Visa, Mastercard, American Express, Discover, etc.) are subject to surcharging. Processing fees for debit card and ACH (eCheck) transactions continue to be paid by the firm.
Tabs3Pay surcharging has the following requirements:
- Your firm must have Version 2022 (Build 22.1.8 or later) installed.
- You must verify your state allows surcharging.
- You must notify your clients and credit card company 30 days prior to surcharging.
- You must enable surcharging for all clients.
If you have not yet signed up for Tabs3Pay, simply update to Version 2022 (Build 22.1.8 or later) and sign up (in the Quick Launch, search for and select Tabs3Pay Web Portal). The option of enabling surcharging will be included in the signup process. If you are already using Tabs3Pay, contact Tabs3 Support at 402-419-2210 for assistance with enabling surcharging on your existing account.
For more information on Surcharging, see the Surcharging section of Knowledge Base Article R11871, “Tabs3Pay Frequently Asked Questions.”
Did you know that you can quickly print a single check in Accounts Payable (AP) and Trust Accounting (Trust) without opening the Print Checks program? This can be accomplished via the Invoice/Manual Check Entry (AP) and Trust Transactions (Trust) windows.
To print a single check in AP via the Invoice/Manual Checks window
- In the Quick Launch, search for and select “Invoice/Manual Check Entry.”
- Select the desired Vendor.
- Select the invoice you want to print, or enter a new one.
- Click the
 (Print Check) button.
To print a single check in AP via the Dashboard
- On the Home tab, select Dashboard.
- In the Unpaid Invoices section, click Print Check next to the invoice you want to print.
To print a single check in Trust Accounting
- In the Quick Launch, search for and select “Trust Transaction Entry.”
- Select the desired Trust ID.
- Select the transaction you want to print, or enter a new one.
- Click the
 (Print Check/Receipt) button.
These methods allows you to quickly print a check when you need it, saving you time when you don’t want to print a batch of checks.
One of our attorneys left the firm and we need to determine which trust accounts they were responsible for so we can reassign them. Is there a report that will show this?
A Trust Account List can be run to show all trust accounts for which the attorney is responsible.
To run a Trust Account List for a specific attorney
- In the Quick Launch, search for and select “Trust Account List.”
- On the Trust Accounts tab, select the desired Responsible Attorney.
- On the Options tab, select the Include Zero Balance Trusts check box.
- On the Sort tab, select the desired options.
- Click OK.
Tip: When previewing the report, click on the Trust ID or Client Name to drill-down to the Trust Account Information window. The Responsible Attorney can then be edited on the Balances tab.
Data entry lists now have a setting to position the list either below or to the right of the data entry fields. This allows you to take advantage of available space on widescreen monitors, and reduces the amount of scrolling necessary. Entry lists are available in the Fee, Cost, Payment, and Client Funds entry windows in Tabs3 Billing; the Trust Transaction entry window in Trust; and the Invoice/Manual Check entry window in AP.
The data entry list position can be toggled by pressing Alt+O in the data entry window and selecting either Right or Bottom in the List Location section.
This feature is available in Version 2022 (Build 22.1.4) and later.
In Version 2022, all contact information has been consolidated for all Tabs3 Software applications.
The Contact file now includes information for Trust payees, AP vendors, and users, making it easy to update address information in one place, including clients, billing contacts, related parties, vendors, payees, and logon users.
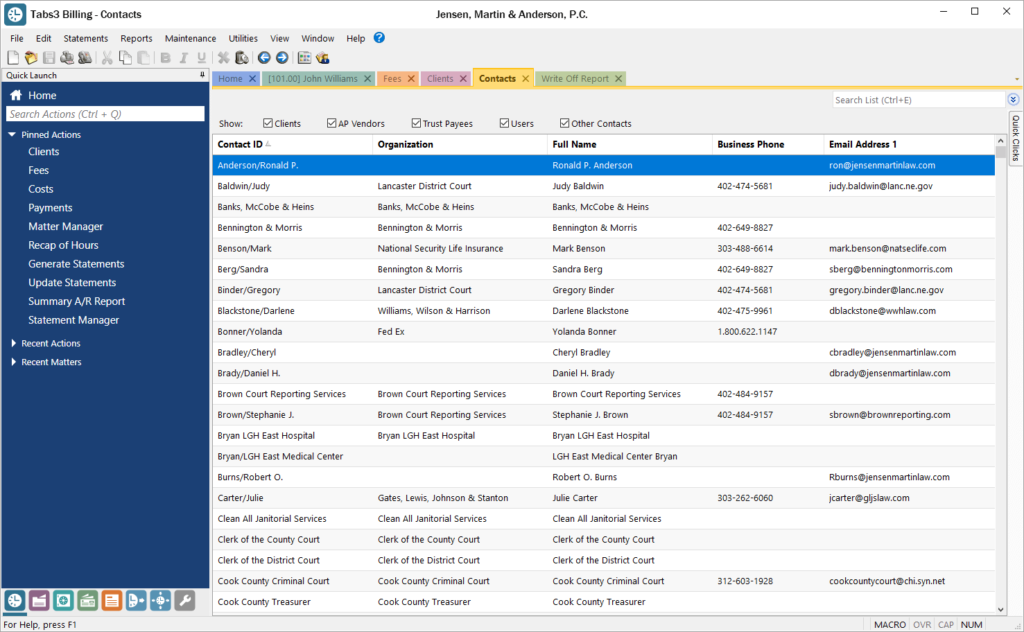
The Contact Information window is available in Tabs3 Billing, PracticeMaster, Trust Accounting, Accounts Payable, and System Configuration. This window now includes a Details button next to the Full Name field for individual contacts, which provides access to separate First Name, Middle Name, Last Name, and Initials fields. To select a contact, the Contact Lookup window has been enhanced for each of these applications, including a SnapShot pane, as well as check boxes at the top making it easy to quickly filter the list to just clients, AP vendors, Trust Payees, etc.
You can update to Version 2022 by going to Tabs3.com/update.
Is there a way to keep users from logging into the software while I run maintenance tasks?
The Lock Out All Users feature was designed for exactly this reason. This option allows a user with manager rights to lock out all other users in the Tabs3 Software applications. In addition, users will be able to finish the task they are working on when the Lock Out is initiated, but will receive a Conflicting Activities window if they try to do anything else before they exit.
To initiate Lock Out All Users
- In the Quick Launch, search for and select “Lock Out All Users.”
- Enter a Reason.
- In the Keep users locked out for field, select the desired amount of time.
- Click OK.
The lockout will automatically end at the designated time. Alternatively, you can click Unlock to unlock the software sooner or click the Reset lockout time link to extend the lockout.
We recently installed Trust Accounting. We started printing checks, but noticed that they are printing in the order that we are entering them. Is it possible to print them in order based on trust account?
Checks can be printed in either Entry Order or Trust Account Order.
To print checks in Trust Account Order
- In the Quick Launch, search for and select “Customization.”
- On the Main tab, in the Check Printing section, select the Trust Account Order option.
- Press Ctrl+S.
Now the checks will print in trust account order. If multiple check transactions exist for the same trust account, they are additionally sorted by transaction date and then reference number to establish check order.
Version 2022 has some great new features to check out!
Unified Contacts
- Consolidated contact information throughout the Tabs3 Software into a single Contact file, including clients, billing contacts, related parties, vendors, payees, and logon users. This makes it easy to update address information in one place.
- The Contacts list in Tabs3 Billing and PracticeMaster as well as in the Contact lookup window in Tabs3 Billing, Trust Accounting, Accounts Payable, and System Configuration include check boxes at the top making it easy to quickly filter the list to just clients, AP vendors, Trust payees, etc.
- The Contact Information window is now available across Tabs3 Billing, PracticeMaster, Trust Accounting, Accounts Payable, and System Configuration. When working with an individual, a Details button next to the Full Name field allows you to access fields for First Name, Middle Name, Last Name, and Initials.
- The Rename Contact utility is now available across Tabs3 Billing, PracticeMaster, Trust Accounting, and Accounts Payable. This utility has been enhanced to update the First Name, Middle Name, Last Name, and Initials fields. Because information is now stored in the Contact file, this utility replaces the Rename Payee utility in Trust.
Enhanced Lists
- Totals can now be displayed on the Fees, Costs, Payments, Client Funds, Write Offs, and Statement Manager lists in Tabs3 Billing and the Fees and Costs lists in PracticeMaster.
- Added a setting to position data entry lists either below or to the right of the data entry fields. Entry lists are available in the Fee, Cost, Payment, and Client Funds entry windows in Tabs3 Billing, the Trust Transaction entry window in Trust, and the Invoice/Manual Check entry window in AP.
New Filters and QuickViews
- New default filters and QuickViews have been added to the Clients, Fees, Costs, Payments, Client Funds, and Statement Manager lists. These allow timekeepers to easily see records for their own matters. These new QuickViews use a new function to determine the timekeeper assigned to the currently logged in user.
- Added a “My Clients Unpaid” QuickView to the Tabs3 Billing Statement Manager.
- Added the ability to easily filter the PracticeMaster Journal file list to include just Note, Email, Phone, Timer, Research, or Billing Notes by simply selecting the corresponding check box at the top of the list. Previously these check boxes were only available on the Journal tab of the Client file.
1099-NEC Forms
- Updated printing of Form 1099-NEC to utilize the 3-forms-per-page format required by the IRS for Tax Year 2021.
Updated Calendar Code File
- Added Phase/Task and Activity code fields to the Calendar Code file so you can specify which default codes need to be used when converting calendar records to fees for task based billing clients.
Exchange Online Integration
- Updated the PracticeMaster Exchange Connector with a new synchronization option for Exchange Online / Microsoft 365.
Updated Installer
- Updated to a Microsoft Installer. This change requires the first installation to be performed at the server, but will reduce the need to directly access the file server when installing future updates.
For in-depth information on all of the new Version 2022 features, including screenshots, refer to Knowledge Base Article R11880, “Version 2022 Introduction to New Features.” A list with links to all Version 2022 information can be found in R11885, “Version 2022 Information and Resources.”
To download Version 2022, visit Tabs3.com/update or contact your local consultant.
All Tabs3 Software applications include navigation features, such as the Home page, Quick Launch pane, and tabbed interface, in addition to the typical menus. Knowledge Base Article R11877, “How to Navigate Through the Tabs3 Software,” discusses these navigation elements, provides information for those updating from prior versions, and answers some frequently asked questions. Information on All Actions, My Actions, the Dashboard, Guided Tour, and the Getting Started Checklist is included.
Our Knowledge Base can be accessed at support.Tabs3.com. You can also access our Knowledge Base in the Quick Launch by searching for and selecting “Knowledge Base.”
Do you have a question about the software? Any questions that you want to ask have likely been asked by others as well. Because of this, we have created several Frequently Asked Questions (FAQs) articles, and made it easy to access them all in one place.
Knowledge Base Article R11567, “Frequently Asked Questions for All Products,” provides a list of articles answering FAQs. Articles are grouped by general, software features, and version specific questions.
- General FAQs include year-end and software specific articles, such as Platinum, Tabs3 Billing, PracticeMaster, and more.
- FAQs for software features include articles on printing, credit card processing, Tabs3 Connect, and more.
- Version specific FAQs include articles geared toward questions about new features in each version.
Our Knowledge Base can be accessed at support.Tabs3.com. You can also access our Knowledge Base in the Quick Launch by searching for and selecting “Knowledge Base.”
The Form 1099-NEC has changed for Tax Year 2021. Don’t want to deal with forms this year? Try Tabs3 1099 E-file!
1099-NEC Changes for Tax Year 2021
The IRS changed the requirements for Form 1099-NEC submissions for tax year 2021. The following is a brief overview of these changes:
- The format of Form 1099-NEC has been updated for tax year 2021.
- The height of the form has been reduced so it can accommodate three-per-page forms.
- Only one address line is printed for the recipient’s street address.
As a result of these IRS changes, we have made changes to Trust and AP in Version 2021. You must update Trust and AP to Version 2021 (Build 20.6.6) or later before printing Form 1099-NEC for tax year 2021; these changes will not be added to Version 2020 or prior. To update, in the Quick Launch, search for and select Check for Updates. For more information on changes to tax year 2021, see Knowledge Base Article R11893, “IRS 1099-NEC Changes for Tax Year 2021.”
Tabs3 1099 E-file
Tabs3 has partnered with Nelco to provide Tabs3 E-file, a complete solution to filing your Forms 1099-MISC, 1099-NEC, and 1096. You don’t need to deal with the forms, envelopes or postage, or configuring your printer at your office; instead, simply upload your data to the Tabs3 E-file portal and they can be electronically filed, printed and mailed, or emailed on your behalf, saving you time and manpower every year.
To transmit forms to the Tabs3 E-file portal
- In the AP Quick Launch, search for and select “Tabs3 1099 E-file.”
- Optionally enter a Minimum YTD Amount other than 600.
- In the Trust Transactions section, optionally select Merge transactions where Firm is the payer and/or Include transactions where Trust Account is the payer. (Note: Tabs3 E-file can also be started from Trust, with similar options.)
- Click Transmit.
- Log in with your Tabs3 E-file account information.
- In the Forms in Progress section, select the desired options and click Next.
- Verify your information is correct and click Next.
- Enter your payment information and click the Pay & Submit button.
Tax season is here again and Tabs3 Software is ready to help you quickly file your Forms 1099-MISC and 1099-NEC.
The Working with 1099s video covers how to verify which vendors and payees need to report 1099 information, how to generate 1099s, and provides solutions for filing your 1099s. Since Tabs3 Software has partnered with Nelco to provide Tabs3 E-file, you can easily E-file your Forms 1099-MISC, 1099-NEC, and 1096.
Watch this four-minute video here:
Training Videos can be accessed at Tabs3.com/videos. You can also access the videos in the Quick Launch by searching for and selecting “Training Videos.”
Are you ready to get paid faster? Using Tabs3Pay, accepting credit card payments has never been easier for your law practice!
With Tabs3Pay, you can:
- Manage separate trust and operating accounts.
- Securely store payment information for future use.
- Accept credit cards and electronic checks, all from within Tabs3 Software.
- Include a payment link in email statements, allowing your clients to easily enter payment information through the secure Tabs3Pay portal.
Best of all, Tabs3Pay provides simple pricing for all credit card types, which means that no matter what type of card is used, the same low fixed rate will be applied. There are no monthly fees or other charges.
Ready to take the next step? Tabs3Pay’s hassle-free setup means that you can begin accepting payments on the same day that you sign up. You can sign up and enable Tabs3Pay right from Tabs3 Billing or Tabs3 Trust Accounting (Trust)! Just have your law firm’s EIN number (Tax ID), the account and routing numbers for your bank accounts, and an estimate of your processing amounts ready.
To sign up for Tabs3Pay
- From the Reports tab, point to Credit Card and select Tabs3 Web Portal.
- Click the Let’s Get Started button.
Note: This feature is available in Version 2021 (Build 20.5) and later.
For more information on signing up for and configuring Tabs3Pay, see Knowledge Base Article R11869, “Configuring Tabs3Pay.”
Resetting users incorrectly can be a costly practice in terms of lost time and productivity. It is important to realize the risks involved when users reset other users.
If you are using the Platinum edition of Tabs3 Software, performing any exclusive function when other users are in the software is easy. Use the Log Off Users function to safely close any Tabs3 programs that other users have open, even when users are away from their desks, without worrying about data loss. However, performing those same exclusive tasks in the non-Platinum edition with active users in the software requires that you ask each person to close the software because resetting a user who is in the software can have consequences.
Why is resetting a user not recommended? When the software is used, files are opened, saved, and closed by the server as they are requested by the workstation. When a user exits the software improperly, either by an unexpected computer shutdown, or being reset by another user, files that were opened by the server are not closed. Therefore, errors can occur when another user tries to access the same files. Users should always exit the software properly, and the resetting of users should only be performed for specific scenarios.
When is it ok to reset a user?
- Once you have confirmed that the user is not currently logged into the software on any computer.
- In some situations, such as if the computer shuts down unexpectedly, a “Duplicate User IDs were found. Would you like to reset the User ID?” message is displayed. In this scenario, because the User ID is locked in the software, you must reset the user.
When resetting a user, a Reset Confirmation window will be displayed. You must select each check box before the 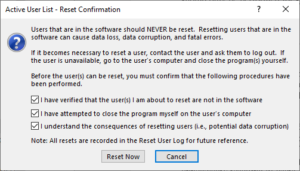 Reset Now button is available. This is intentionally designed to help prevent unnecessary resetting of users.
Manager access rights are required in order to reset other users. Users who are not managers can reset themselves, but cannot reset other users.
If you suspect that users are being reset at your firm without first verifying that they are out of the software, there is an easy way to check. Each time a user is reset, an entry is made to the Reset Log (View | Log Files | Reset Log). We strongly recommend that you periodically review the Reset Log to help ensure best practices are being implemented.
For more information on resetting users, check out Knowledge Base Article R10789, “Resetting Users.”
Taking the time to be prepared and educating your employees about resetting users and how to properly exit the software can prevent future problems and save you time and money.
It is important to have a good backup of your data. To ensure that the data from your backup routine is good, you should periodically test your backup system. We recommend that you schedule and perform the testing of your third-party backup procedure periodically throughout the year.
Knowledge Base Article R10456, “Testing Your Backup System,” provides information on different ways to test your backup, including step-by-step instructions to test restoring both a single file and an entire directory, and how to compare restored files using the FC command.
Do you want to be able to back up data throughout the day, helping to ensure you always have a viable backup that requires less reentry of data? HotBackup, a Platinum feature, provides the ability to back up data while users are working! HotBackups can be scheduled, or can be run on demand.
Our Knowledge Base can be accessed at support.Tabs3.com. You can also access our Knowledge Base while in the software by selecting Help | Internet Resources | Knowledge Base.
When it comes to tracking your matters, accounts receivable, work-in-process, and funds balances at a glance as well as providing quick access to individual entries for fees, costs, payments and more, the Tabs3 Billing Matter Manager can be used to organize your matters all from one place.
See how Tabs3 Billing’s powerful Matter Manager can save you time by making it easy to maintain your clients’ matters.
Watch this three-minute video here:
Training Videos can be accessed at Tabs3.com/videos. You can also access the videos while in the software by selecting Help | Training Videos.
Did you know that there are several keyboard shortcuts you can use to quickly adjust the date in any Date field?
- To quickly set the date to the current system date, press T (Today) or D (Date).
- To open the QuickDate Calculator, which can be used to calculate a past or future date, press Q (QuickDate) or M (Date Math).
- To change the value of the Date field to mm/dd/yyyy, press C (Clear).
- To increase or decrease the month, press PgUp/Page Up or PgDn/Page Down, respectively.
- To increase the day, press one of the following:
- Up-Arrow
- >
- . (period)
- To decrease the day, press one of the following:
- Down-Arrow
- <
- , (comma)
Additionally, if either no portion of the date is highlighted or the entire date is highlighted, pressing + (plus) or – (minus) will increase or decrease the day, respectively. However, keep in mind that if any segment of the date is highlighted, pressing + or – will increase or decrease that segment.
When previewing reports, you always get the best formatted view of the information for reading. However, when saving a report to an .html or .txt file, you may see different formatting or missing text. So how do you get better output? By using the Optimize for Print to File setting.
When selecting to Optimize for Print to File, the software will make adjustments that help with formatting and eliminate clipping problems. This can help significantly when printing to .html or .txt format.
To Optimize for Print to File
- From the File menu, select Print Setup.
- Select the desired Printer.
- Click the Advanced Printing Features button.
- Select the Optimize for Print to File check box.
- Click OK on the Advanced Printing Features window.
- Click OK on the Printer Setup window.
The next time you print a report to a file, try selecting Optimize for Print to File and see the difference it makes.
Note: We do not recommend selecting this option for your normal printing jobs because of adjustments made to avoid clipping problems. When saving output to a file, the best solution is to configure a special printer for print-to-file output.
Want to see all of the new features in Version 2021? Check out Knowledge Base Article R11860, “Version 2021 Introduction to New Features!”
This article provides information on each new feature. Features are listed by program and include screenshots and links to additional information when applicable. Each time we add a new feature to Version 2021, this article is updated so that you can get the information you need to begin using the feature.
Our Knowledge Base can be accessed at support.Tabs3.com. You can also access our Knowledge Base while in the software by selecting Help | Internet Resources | Knowledge Base.
Drill-down capabilities provide the ability to quickly access data while previewing reports. Additionally, drilldown is available in entry lists (WIP only), the Tabs3 Billing Matter Manager, PracticeMaster Matter Manager, and Tabs3 Billing Recap of Hours.
- Reports – While previewing a report, when you mouse over a drill-down field, the field will be highlighted in yellow. Clicking the field will open an information page or a data entry window allowing you to view or edit the record. If an edit is made to a record, clicking the Refresh button (or pressing F5) in the Preview window will update the report to reflect the change made.
- Tabs3 Billing Matter Manager – Drill down to the client or contact as well as fees, costs, payments, client funds, statements, write offs, and Trust entries.
- PracticeMaster Matter Manager – Drill down to the client or contact as well as fee, cost, calendar, journal, and document records.
- Tabs3 Recap of Hours – Click on a day to display transactions for the selected timekeeper, and then double-click the transaction to open it.
For a complete list of reports and features with drill-down capabilities, refer to Knowledge Base Article R10646, “Drill-Down Features in the Software.”
Version 2021 has some great new features we know you’ll want right away!
All Applications
- Simplified Update – Updating from Version 2020 to Version 2021 does not require a conversion. If updating from Version 19 to Version 2021, only a single conversion is required.
- New Look – We’ve updated the icons for all of the actions on the Home page in each Tabs3 Software application to provide a fresh look.
Tabs3 Billing Highlights
- Payment Information – Provides detailed payment allocation information for both archived and work-in-process payments. In addition to payment allocation, this page shows associated Tabs3 General Ledger transactions and payment adjustments (refunds or reversals).
- Write Off Information – Provides detailed information about the selected write off, including a breakdown of how the write off was applied (each timekeeper, cost type, tax amount, or finance charge) across each statement that was written off, and who performed the write off.
- Matter Manager:
- Write Off List – This list provides an easy way to see any write off performed on the matter. Clicking an entry in the list displays the Write Off Information page.
- Statement Status Indicators – The statement list in the Matter Manager now includes color-coded indicators to help you see at a glance which statements are unpaid and for how long.
- Email an Individual Statement – In the Statement Manager or Statement Information window, a new Send Email action is available. This reprints the selected statement, just like using the Reprint Updated Statements feature, and then starts a new email with the statement attached.
- Report Drilldown – We’ve updated numerous Tabs3 Billing reports to support drilling down to statements, payments, and write offs in the Report Preview window.
Tabs3 Trust Accounting and Accounts Payable Highlights
- IRS 1099-MISC and 1099-NEC Changes for Tax Year 2020 – We’ve updated the software to support new requirements from the IRS for tax year 2020.
Updating to Version 2021 is as easy as using Check for Updates (Help | Check for Updates)!
Tabs3 Software occasionally links to external files that can contain sensitive information, such as contact information, bank balances, or payment information. Some firms will restrict access to those files by setting the access rights on the folders where those files are maintained to prevent access by users who do not require such information.
Knowledge Base Article R11841, “Folders with Special Rights,” discusses the access rights that can be adjusted, and provides some best practices for maintaining these locations.
Our Knowledge Base can be accessed at support.Tabs3.com. You can also access our Knowledge Base while in the software by selecting Help | Internet Resources | Knowledge Base.
In Version 2020, multiple improvements have been made to the Lock Out All Users feature (File | Lockout All Users). This feature can be useful when you want to keep others from logging in while you perform maintenance.
- When initiating a lockout, you can now exit the software to perform server maintenance tasks, such as external backups, server moves, etc., without worrying about users opening the software. The user performing the lockout will continue to have full access to the Tabs3 Software, including applications that were closed prior to the lockout.
- Lockouts can now be assigned an optional duration. Once the assigned duration has expired, the lockout is automatically lifted and users can begin using the software again. If you need additional time to complete your tasks, the lockout can be extended. In the event a lockout must be ended early and the user who initiated it is unavailable, another user with manager rights can override the lockout.
- If other users are currently in the Tabs3 Software, initiating a lockout now opens a Conflicting Activities window, indicating which users need to exit the software before the lockout can begin. Additionally, with Tabs3 Platinum Software you can use the Request Log Off feature to request that users exit the software and, if necessary, force them to exit the software after a specified time period.
- The Active User List (View | Active User List) now includes two new features:
- A Start Time column to determine when users began their activities.
- A Lock Out All Users button so you can initiate a lockout directly from the Active User List.
Note: These feature enhancements are included in Version 20.3.4.
The IRS changed several requirements for 1099-MISC and 1099-NEC submissions for tax year 2020. Stay up-to-date on how these changes affect Tabs3 Software!
Knowledge Base Article R11856, “IRS 1099-MISC and 1099-NEC Changes for Tax Year 2020,” provides a brief overview of upcoming changes to IRS Forms 1099-MISC and 1099-NEC tax filing, as well as recommendations to help your firm prepare.
As a result of these IRS form changes, we will be making future changes to Tabs3 Trust Accounting and Tabs3 Accounts Payable in an upcoming release. Once these changes have been implemented, this Knowledge Base Article will be updated with more information.
We are also offering two webinars to learn more about 1099-MISC and 1099-NEC form changes. You can sign up for the following dates at https://register.gotowebinar.com/rt/8704973605526448655:
- Tuesday, December 8 from 11:00 am to 12:00 pm CST
- Thursday, January 7 from 2:00 pm to 3:00 pm CST
Our Knowledge Base can be accessed at support.Tabs3.com. You can also access our Knowledge Base while in the software by selecting Help | Internet Resources | Knowledge Base.
Have you started using the great new navigation features, or are you still using Task Folders? If you’re using Quick Launch, All Actions, and My Actions, then you already know that we provide several customizable ways to access the features you need whether they’re tasks you perform every day, only once a year, or somewhere in the middle.
Theme Settings
The following options for navigating the software can be turned on or off via View | Theme Settings.
When selected, the Quick Launch can be used to search for a feature, pin frequently accessed actions and matters, or quickly access a recent action or matter.
When selected, the Home Page adds options for quickly accessing features and information:
- The All Actions tab provides a way to access every feature in the application, grouped by like action. For example, client and contact related features are located in the People group.
- The My Actions tab provides the ability to customize your experience. This tab can be used to add frequently accessed features or create your own groups, such as frequently used reports, month-end, and more. (Tip: If you’re still using Task Folders, you’re missing out on customization that can help streamline your processes!)
Other Navigation
The menus in each application provide access to all of the features in the application.
Many keyboard shortcuts are included in the software for power users. Keyboard shortcuts can help save time by keeping your hands on the keyboard more, instead of repeatedly moving to and from the mouse.
For more information on these navigation features and more, check out the Navigating Through Tabs3 Software Video. If you’re not using these navigation features, you’re missing out!
Did you know that the autofill feature allows you to type in certain fields in order to quickly find what you’re looking for?
All fields with lookup windows have autofill capabilities. As you enter characters into a lookup field, the field will autofill based on the information entered. The first available result will be displayed as highlighted text, with additional characters entered replacing the autofill and updating the results.
When an autofill suggestion exists, a list of possible choices matching the characters entered will also be displayed, allowing you to easily select the entry you want to complete the field. For records that use an identifier, such as the Client ID field for Client records (Tabs3 Billing, PracticeMaster, and Tabs3 Trust Accounting) or User/Group field for Calendar records (PracticeMaster), a second column will be shown containing additional information about the record (e.g., the client’s Name and Work Description, or the User Name).
Note: This feature can be disabled by selecting the Disable Autofill for all lookup fields check box in User Configuration (System Configuration | File | Open | Users).
The IRS is changing the layout of Form 1099-MISC for the 2020 tax year. Additionally, Form 1099-NEC is being added to replace Box 7 on Form 1099-MISC.
Tabs3 Software will support these new forms. An update to Tabs3 Trust Accounting and Accounts Payable is already in process to address these changes and will be available before 1099 forms need to be filed.
To prepare:
- If you plan to print the forms using Tabs3 Software, order the number of forms you need for filing 1099-MISC and 1099-NEC forms. We recommend ordering 1099 forms from Nelco®. These forms are guaranteed 100% compatible with Accounts Payable and Trust Accounting. Nelco has over 50 years of experience in the business forms industry. You can order forms by calling 1-800-266-4669 or via http://www.nelcosolutions.com/Tabs3.
- Electronic filing requirements have changed. If you are now required to file electronically through the Filing Information Returns Electronically (FIRE) System, be sure that you apply for a transmittal code early. It could take 45 days to receive the code from the IRS. For more information, see https://www.irs.gov/e-file-providers/filing-information-returns-electronically-fire.
To simplify the filing process, Tabs3 Software has partnered with Nelco to provide Tabs3 E-file, a complete solution to filing your 1099-MISC, 1099-NEC, and 1096 forms. With Tabs3 E-file you don’t need to request a transmittal code from the IRS. You also won’t need to deal with forms, envelopes, postage, or configuring your printer; instead, simply upload your data to the Tabs3 E-file portal. From there, forms can be electronically filed, printed and mailed, or emailed on your behalf, saving you time and manpower. For additional information on Tabs3 E-file, see KB Article R11788, “All About Tabs3 E-file.”
To learn more about the 1099-MISC and 1099-NEC forms, see https://www.irs.gov/instructions/i1099msc.
Stay tuned for more information!
Want to know who backed up the data last and when, or who restored it? You can easily confirm who performed these actions and many more.
The Support Log (View | Log Files | Support Log) can help you determine which processes were run at what time by which user. This log is present for each application, including System Configuration. When running a Support Log, you can optionally specify a date range and/or select specific users. Manager users can access support logs for all applications at the same time via System Configuration (View | Support Log).
Every application includes the options to see when Back Up Data, Data File Integrity Check, and Reindex Files were run, in addition to when data was last restored and updates were last installed, and more. Each application also has information logged that is specific to the application, and although information included can vary, each feature includes who ran it and when it was run. The following are some of the features that are tracked in the Support Log:
Tabs3 Billing
- Customization
- Transfer Transactions
- Update Statements
- Undo Updated Statements
- …and more
PracticeMaster
- File Maintenance
- Form Designer
- Import Data
- …and more.
Trust Accounting
- Finalize Reconciliation
- Positive Pay Export
- Undo Reconciliation
- …and more
Accounts Payable
- Positive Pay Export
- Vendor Changes
General Ledger
- Edit GLS Client
- Finalize Reconciliation
- Undo Reconciliation
- …and more
With these tools in place, it is easy to quickly assess the various software events that occurred while you were out. This allows you to remain up to speed, even after a well-deserved vacation. More information regarding the Support Log is provided in Knowledge Base Article R11288, “Support Log Information,” and in each program’s “Support Log” Help topic.
We have just added several new features! Use the Check for Updates feature (Help | Check for Updates) to make sure you are running the most recent release of Version 2020.
Update to Version 20.2.6 to access the following:
- Tabs3 Billing Matter Manager – The Client Manager has been revamped and renamed to the Matter Manager. Like the PracticeMaster Matter Manager, the Tabs3 Matter Manager acts as a central hub for matter-related information and activities in Tabs3 Billing. The Matter Manager allows you to view relevant information for each matter at a glance, perform common tasks, and run reports.
- Statement Information Window – Clicking on a Statement from the Matter Manager in Tabs3 Billing displays a Statement Information window for that statement. The Statement Information window includes matter information, statement totals, a preview of the statement, and the ability to perform common tasks.
- Time Zones – PracticeMaster now allows you to specify a time zone for calendar events and tasks. If you opt to enable the time zone feature, new calendar records will be shown relative to the local time for each user. The PracticeMaster Calendar, PracticeMaster Dashboard, and Tabs3 Connect Calendar will all utilize the time zone setting on the device where records are being accessed. This also provides a more seamless integration of calendar records with Microsoft Outlook.
- Field Length Changes – Increased the field length for several fields in the software, such as the Work Description in the Client file and the Amount field in the Payment file.
For more information on these great new features, as well as a detailed list of all new features in Version 2020, check out Knowledge Base Article R11812, “Version 2020 Introduction to New Features.”
Tabs3 Financial Software is the best accounting solution for your law firm because it is specifically designed to meet the accounting requirements of law firms. With minimal setup and zero workarounds to satisfy most bar associations, you can print financial statements, write checks, reconcile bank statements, and manage client trust accounts in one easy-to-use and fully integrated software package. Additionally, because Tabs3 Financials is designed to work with Tabs3 Billing, you only need to call one support phone number if you ever have questions.
General Ledger Software (GLS) provides insight into your firm’s business with detail and summary financial statements. The following features are highlights of what GLS has to offer:
- Reports – Create Balance Sheet, Income Statement, Trial Balance, Journal Reports, and Advanced Client Cost Reports for you and your accountant. The General Ledger Report shows the opening balance, all journal entries, total debits and credits, and the closing balance for each account that is printed. Financial statements for your firm can be created for individual departments and locations.
- Chart of Accounts – GLS provides a chart of accounts that your firm can use as-is, or modify to fit your current account structure. You can also create budgets for each expense account. GLS allows multiple sets of books with unique charts of accounts and fiscal year-ends. Easily reconcile bank statements to cash accounts.
- Journal Entries – Add or adjust journal entries for prior months. Import transactions downloaded from your bank’s website to make reconciliation easy.
- Dashboard – The Home Page in General Ledger features a Dashboard that includes an easy to use graphical view of the firm’s financial standing. The Bank Accounts widget provides a summary of your active bank and credit card accounts. The Recent Bank Transaction widget shows the most recent journal entries and deposit slips made to bank and credit card accounts.
Accounts Payable Software (APS) makes bill paying easier. The following features are highlights of what APS has to offer:
- Write Checks – Print a batch of checks or use the Print Check feature to print a single check. Record handwritten checks. Print memos on checks. Enter invoices and let APS calculate the vendor discount. Use the partial payment feature to control how much you want to pay and how often. Put invoices on hold to prevent them from being paid until you want them to be paid. Combine multiple invoices from the same vendor on a single check.
- Integration – Categorize expenses for General Ledger Software when you enter invoices and checks. Include other Tabs3 information on reports such as the cost information if a cost was assigned through Tabs3 Billing, or which General Ledger account was used for the transaction. Post unpaid invoices to General Ledger to provide an accrual financial statement snapshot.
- Dashboard – The Home Page in Accounts Payable features a Dashboard that includes an easy to use graphical view of your payables, all on one screen. The Unpaid Invoices, Unposted Checks/EFTs, Paid this Month, and Unpaid Invoices widgets show summaries of outstanding invoices, printed and manual checks, and EFTs.
- Create 1099 Forms – Electronically file or print 1099 forms and combine amounts paid to vendors and Trust Accounting payees to meet IRS thresholds.
- Recurring Transactions – Automatically enter recurring transactions and summarize vendor payments. See all of your checks in one easy-to-use check register.
- Positive Pay – Accounts Payable includes a Positive Pay Export program that allows you to export a list of approved checks that can then be uploaded to your bank or financial institution’s fraud prevention program.
Trust Accounting Software (TAS) manages trust accounts for your clients accurately and easily. The following features are highlights of what TAS has to offer:
- Integration – Tabs3 Trust Accounting Software provides seamless integration with Tabs3 Billing Software, Tabs3 Accounts Payable Software, and Tabs3 General Ledger Software, with the same look and feel as Tabs3 Billing Software.
- Ease of Use – Track an unlimited number of trust accounts and manage up to 99 different bank accounts. The software warns you when an account goes below a minimum balance, and helps you easily reconcile your bank statements.
- Easily Manage Your Trust Accounts – Electronically file or print checks, ledgers for individual trust accounts and bank accounts, and IRS 1099 forms. You can also process client deposits via credit card (merchant account required, click here for more details).
- Dashboard – The Home Page in Trust Accounting features a Dashboard that includes an easy to use graphical view of the firm’s trust account standing. The Bank Accounts widget provides a summary of your firm’s active trust bank accounts. You can easily start a reconciliation or bank transaction import right from the Home Page. The Recent Trust Transactions widget shows the most recent trust transactions and combined trust transactions.
- Positive Pay – Trust Accounting includes a new Positive Pay Export program that allows you to export a list of approved checks that can then be uploaded to your bank or financial institution’s fraud prevention program.
Accepting and managing credit card and eCheck payments from your clients has never been easier!
Starting in Version 2020, Tabs3 Billing and Trust Accounting Software (TAS) supports integration with LawPay, making the process of entering payments, client funds deposits, and trust deposits both easy and secure.
Watch this five-minute video here:
Training Videos can be accessed at Tabs3.com/videos. You can also access the videos while in the software by selecting Help | Training Videos.
Did you know that you can easily review past reconciliation reports when needed, right from the software? Both General Ledger (GLS) and Trust Accounting (TAS) store Reconciliation Reports as PDFs for quick review.
To review a past Reconciliation Report
- From the Reports menu, select Reconciliation Reports.
- Select the report you want to view.
- Click Open.
Note: Reconciliation reports are stored in the Reconciliation folder of the Current Working Directory.
Did you know that you can print checks right from the Accounts Payable Software (APS) and Trust Accounting Software (TAS) Dashboards?
We’ve made it easier to quickly print checks when you need them.
- In TAS, click the Print Checks button to open the Print Trust Checks program and print a range of checks.
- In APS, click the Print Check button to open the Print Checks program and print a range of checks. Beginning in APS version 20.1.8.804, click the Print Check link next to any invoice to print only that invoice.
When was the last time you backed up your Tabs3 and PracticeMaster data and tested the viability of your backup? If your firm had to restore from a backup right now, would any data be lost? Regular backups are critical for your firm to make and maintain properly.
Internal Backups
Tabs3 Software ensures you are provided the opportunity to backup when needed.
- You will be prompted to make a backup in the software when the function cannot be easily reversed or when interruption of the process can cause errors in the data.
- When presented with a prompt to make a backup, ask yourself when the last backup was made and how much data will need to be reentered if a restore is required. If you are not comfortable with the amount of work required after restoring, then you should back up your data before going any further.
- If you regularly opt to not make a backup because it’s difficult to get every user to exit the software, consider the Platinum version. Platinum includes a HotBackup feature that allows you to make backups while other users are still working in the software and doesn’t require backups be made for as many functions, including Update Statements.
- If you are using the standard version of the software, you can keep up to three internal backups with a size limit of 2 GB each.
- If you are using the Platinum version of the software, backups are practically unlimited! You can keep up to 198 user-defined HotBackups, each limited in size only by the available hard drive space.
Third Party Backups
We also recommend making regular backups of the entire Tabs3 program directory via a third-party backup program.
- Third-party backups can help you recover from a catastrophic failure, such as flood, theft, server hard drive failure, etc.
- Backups made via the Tabs3 Software only back up your data files and do not include executable files to run the programs, nor is every file in the Tabs3 Current Working Directory included.
- If you already have a third-party backup in place, make sure that it is periodically tested to verify it is working correctly. For more information on testing your backup, see KB Article R10456, “Testing Your Backup System.”
Now may be the perfect time to take a closer look at your current backup strategy and to verify the procedures you have in place. If you cannot take the time to review procedures now, add a reminder to your calendar to review them as soon as possible. Don’t be lulled into a false sense of security; backups that don’t restore correctly, or not having a backup, can cost you a great deal in both time and data loss.
For a list of resources on backing your data up and restoring, visit Knowledge Base Article R11524, “Backup/Restore Information Resources.”
As your firm deals with the spread of COVID-19, we want to help you prepare to work from home.
Resources for working from home can be found at Tabs3.com/WorkFromHome.
Tabs3 remains committed to providing top rated customer support, and are available to help. As usual, Technical Support can be reached at (402) 419-2210, 8:00 a.m. to 5:00 p.m. (Central Time) Monday through Friday.
Beginning in Version 2020, you can now select whether you want the Newsletter Reminder window to pop up each month or not! Once you have updated to Version 20.1.5 or later, the Newsletter Delivery Options window will be displayed when logging in. You can select to either subscribe to the Email Newsletter, or to have the Newsletter Reminder window continue to open after the 14th of each month.
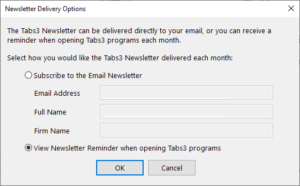
You can always change your mind later. Newsletter Delivery Options can be accessed via the Delivery Options button on the Newsletter Reminder window as well as via the Help | Internet Resources | Newsletter Delivery Options menu.
Thinking about purchasing a license for our Trust Accounting, Accounts Payable, and/or General Ledger software, but not sure what they offer? Take a quick tour!
The Tabs3 Financials Overview video walks you through the highlights of our financial software. Learn more about how you can easily manage trust accounts, get financial statements, write checks, reconcile bank statements, and print 1099’s in one seamlessly integrated software suite!
Watch this four-minute video here:
Training Videos can be accessed at Tabs3.com/videos. You can also access the videos while in the software by selecting Help | Training Videos.
We’ve added the ability to open the Three-Way Reconciliation Report via the TAS Dashboard! When you update to Version 20.1.7 or later, you can quickly run this report for the bank account’s last reconciliation by clicking the 3-Way Rec link.
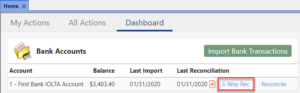
Note: The text “No reconciliation history” will be displayed if no reconciliation records exist for the account.
Beginning with Version 2020, Tabs3 Billing and Trust Accounting Software (TAS) supports integration with LawPay for electronic processing of payments, client funds deposits, and trust deposits. LawPay supports both credit and debit cards in Tabs3 Billing and TAS, as well as electronic fund transfers (eChecks) from checking or savings accounts in Tabs3 Billing.
Tabs3 Billing allows you to manage the client’s payment methods from either the LawPay tab of the Client file or from the Payment/Client Funds Entry windows. TAS allows you to manage your LawPay payment methods from the Trust Transaction Entry window. You can add or remove payment methods as well as update the email address for each payment method. When an email address is present, the client will automatically be emailed a receipt each time that payment method is used.
Once you have enabled LawPay in Tabs3 Billing, you can include a LawPay payment link in the statements you email to your clients. This allows clients to pay their statement with a credit card or eCheck without anyone at the firm handling sensitive payment information. Once a client has paid their bill via LawPay, you can import the payment into Tabs3 via the Import Online Payments program (Maintenance | Integration | Import Online Payments). See Knowledge Base Article R11767, “Using the Tabs3 Payment Link,” for more information regarding setting up payment links and importing payments. For more information on LawPay integration, see Knowledge Base Articles R11828, “LawPay Integration Frequently Asked Questions,” and R11826, “Configuring LawPay Integration with Tabs3 Software.”
If you haven’t updated to Version 2020 yet, you are missing out on some great new features! The following features are only some of the enhancements we made for this version:
LawPay
- Tabs3 Billing – LawPay integration adds a new option for processing electronic payments and client funds deposits.
- Trust Accounting Software (TAS) – LawPay integration adds a new option for processing electronic Trust deposits.
New Dashboards
- Tabs3 Billing – displays Aged Accounts Receivable, Unbilled work, and graphs comparing the last two years of Cash Receipts and Billing History.
- Accounts Payable Software (APS) – displays Unpaid Invoices, Unposted Checks and EFTs, and the total Paid this Month with shortcuts to Print Checks, Post Checks, and the Check Register report.
- General Ledger Software (GLS) – displays an overview of your Bank Accounts and a list of Recent Bank Transactions.
- Trust Accounting Software (TAS) – displays an overview of your Bank Accounts and a list of Recent Trust Transactions.
Positive Pay
- Positive Pay export from APS and TAS helps provide fraud protection.
APS Bank Balances
- The GLS Account balance is now displayed when adding invoices and printing checks. Additionally, you will now be alerted if the check or EFT you are entering could result in an overdraft.
Updated Help
- The Help files for each program are now opened in your default browser, and have a new look. Find what you’re looking for more quickly using the improved Search and Index features.
For in-depth information on all of the new Version 2020 features, including screenshots, refer to Knowledge Base Article R11812, “Version 2020 Introduction to New Features.” A list with links to all Version 2020 information can be found in R11814, “Version 2020 Information and Resources.”
To download Version 2020, select Check for Updates from the Help menu, visit Tabs3.com/update, or contact your local consultant.
If you have any questions about the update, please contact your consultant, or contact Technical Support at (402) 419-2210.
Want to be able to quickly tell if the software is up to date? Beginning in Version 2020, when an update to the software is available, a badge  is shown on the Check for Updates icon in the Quick Launch pane. This option is available for users who have rights to check for software updates.
Additionally, a notification banner is displayed on the Home Page when an update has been available for 15 or more days. For additional information about updates, see Knowledge Base Article R11804, “Keeping Tabs3 Software Up To Date.”
Want to see all of the new features in Version 2020? Check out Knowledge Base Article R11812, “Version 2020 Introduction to New Features!”
This article provides information on each new feature, both big and small. Features are listed by program and include screenshots and links to additional information when applicable. Each time we add a new feature to Version 2020, this article is updated so that you can get the information you need to begin using the feature.
Our Knowledge Base can be accessed at support.Tabs3.com. You can also access our Knowledge Base while in the software by selecting Help | Internet Resources | Knowledge Base.
Trust Accounting Software (TAS) and Accounts Payable Software (APS) now support Positive Pay!
Positive Pay Export utility (Checks | Positive Pay Export) allows you to export a list of approved checks that can then be uploaded to your bank or financial institution’s fraud prevention program (commonly known as Positive Pay). The export file is customized separately for each TAS or APS bank account, allowing you to provide the specific information your bank requires.
When you configure a new bank account for Positive Pay, the software walks you through the process of configuring your export file and exporting your first batch of checks. Once you have exported your initial batch of checks, the software tracks which checks have been printed, so you don’t need to specify a date range for future exports.
For more information on this great new feature, check out R11833, “Exporting Checks Using Positive Pay!”
Are you familiar with everything the Platinum version of the software offers? Platinum provides many great features including Tabs3 Connect, the ability to back up the software while others are working in the software, accelerated features, auto-recovery if errors occur, eNotes, special report options, and more.
Knowledge Base Article R11379, “Platinum Overview,” provides information on why we recommend everyone be on Platinum, how Platinum works, key features, frequently asked questions, and more.
Our Knowledge Base can be accessed at support.Tabs3.com. You can also access our Knowledge Base while in the software by selecting Help | Internet Resources | Knowledge Base.
Version 2020 has been released, and there are many great new features! The following features are only some of the enhancements we made for this version:
LawPay
- Tabs3 Billing – LawPay integration adds a new option for processing electronic payments and client funds deposits.
- Trust Accounting Software (TAS) – LawPay integration adds a new option for processing electronic Trust deposits.
New Dashboards
- Tabs3 Billing – displays Aged Accounts Receivable, Unbilled work, and graphs comparing the last two years of Cash Receipts and Billing History.
- Accounts Payable Software (APS) – displays Unpaid Invoices, Unposted Checks and EFTs, and the total Paid this Month with shortcuts to Print Checks, Post Checks, and the Check Register report.
- General Ledger Software (GLS) – displays an overview of your Bank Accounts and a list of Recent Bank Transactions.
- Trust Accounting Software (TAS) – displays an overview of your Bank Accounts and a list of Recent Trust Transactions.
Positive Pay
- Positive Pay export from APS and TAS helps provide fraud protection.
APS Bank Balances
- The GLS Account balance is now displayed when adding invoices and printing checks. Additionally, you will now be alerted if the check or EFT you are entering could result in an overdraft.
Updated Help
- The Help files for each program are now opened in your default browser, and have a new look. Find what you’re looking for more quickly using the improved Search and Index features.
For in-depth information on all of the new Version 2020 features, including screenshots, refer to Knowledge Base Article R11812, “Version 2020 Introduction to New Features.” A list with links to all Version 2020 information can be found in R11814, “Version 2020 Information and Resources.”
To download Version 2020, select Check for Updates from the Help menu, visit Tabs3.com/update, or contact your local consultant.
If you have any questions about the update, please contact your consultant, or contact Technical Support at (402) 419-2210.
You access sensitive client information on a daily basis, and may even have access to information that others in the firm do not. You know that maintaining client confidentiality is crucial, but who might have access to all of that data? The following features are built into the software, helping maintain client security and confidentiality.
- Assign users to Access Profiles. Access Profiles (System Configuration | File | Open | Access Profile) are used to control which users have access to which features in the software. For example, you can set up an Access Profile to allow for browsing clients, but not changing or deleting clients. You can also specify that an Access Profile not allow access to reports, certain utilities, or an entire system, such as General Ledger Software (GLS). Once Access Profiles have been set up, they can be assigned to users via the Users file (System Configuration | File | Open | Users). Each user can be assigned up to five Access Profiles.
- Assign Timekeepers to User IDs. Users who only need to see information for specific timekeepers can be restricted to accessing only those timekeepers. The Assign Tabs3/PracticeMaster Timekeeper option in the Users file (System Configuration | File | Open | Users) provides the ability to specify which timekeepers’ information a user can access. Users can add, change, and delete fee and cost transactions that are work-in-process; access archived transactions; and access productivity figures only for the selected timekeeper(s).
- Use Secure Clients. Access to client information can be specified at the client level. By selecting the Secure Client check box (File | Open | Client | Address tab), you can then select which users in the software have access to the specified client’s information including transactions, reports, and statements. Additionally, when you select the Secure Client check box, you will be prompted to either keep or remove related contacts from the Contact file. This is because only clients can be marked as secure, not contacts.
- Delete the (BLANK) user or assign it a password. The (BLANK) user is meant for initial access to the software when it is first installed. After users are set up in the software, we recommend deleting or assigning a password to this user in order for access to the software to be password protected.
- Platinum SQL Data Encryption. The Platinum SQL Data Encryption utility is used to encrypt Tabs3 and PracticeMaster data files that may contain sensitive information. Once data files are encrypted, they can only be read by the Tabs3 and PracticeMaster Platinum SQL software. Software can be encrypted via the Platinum | Data Encryption menu option in System Configuration.
- Platinum Data Security. Firms running a Platinum system can limit each user’s network access to the data files to the “read only” level, providing protection against the accidental moving or deleting of data files via Windows Explorer. In order to secure the Database folder, your system administrator will need to manually configure the Windows file sharing settings for that folder to ensure that only authorized users have Full Access rights.
For more information on these features, as well as more security features, see Knowledge Base Article R11717, “Security Resources.”
Various log files are maintained by different Tabs3 and PracticeMaster software products. These log files can be used as tools for troubleshooting errors and problems using Tabs3 and PracticeMaster software.
Knowledge Base Article R10013, “Log Files in Tabs3 and PracticeMaster Software,” contains a comprehensive list of the various log files and a brief description of the information contained in each file. Log files track errors encountered when running Tabs3 and PracticeMaster software as well as the date and time when a particular function was performed. Most log files can be accessed using any text editor such as Microsoft Notepad or WordPad.
Our Knowledge Base can be accessed at support.Tabs3.com. You can also access our Knowledge Base while in the software by selecting Help | Internet Resources | Knowledge Base.
Do you have Access Profiles set up? Access Profiles help with security by controlling what functions each user can access in the software. The Access Profiles training video walks you through creating a new access profile that limits a user to certain Tabs3 Billing functions. Once you know the basics of setting up one Access Profile, you can set up the profiles you need for your firm.
Watch this three-and-a-half-minute video here:
Training Videos can be accessed at Tabs3.com/videos. You can also access the videos while in the software by selecting Help | Training Videos.
Although we strive to provide superior documentation in our Help files, Knowledge Base, and Guides, we know that sometimes you want direct guidance with a human touch. Technical Support can be reached by phone or email! We are here to help, so reach out to us. Here are some examples of items we regularly assist our clients with:
- Are you new to the software and need guidance? We can help!
- Want to update to the most recent version of the software? We can help!
- Not sure how to do a procedure? We can help!
- Receiving a message you’re not sure of? We can help!
- Want to start using a new feature in the software, such as keeping track of client communications within PracticeMaster? We can help!
Phone and email support are available Monday through Friday, 8:00 a.m. to 5:00 p.m. (Central Time). We can be reached by phone at (402) 419-2210 or by email via Tabs3.com/support. And don’t forget! Technical Support is included with your maintenance or subscription plan at no additional cost – so give us a call!
We are looking for firms to provide early feedback on Tabs3 version 2020. The following features will be available in Tabs3 Version 2020:
- LawPay
- Tabs3 Billing – LawPay integration adds a new option for processing electronic payments and client funds deposits
- Trust Accounting Software (TAS) – LawPay integration adds a new option for processing electronic Trust deposits
- Dashboards
- Tabs3 Billing – displays Aged Accounts Receivable, Unbilled work, and graphs comparing the last two years of Cash Receipts and Billing History
- Accounts Payable Software (APS) – displays Unpaid Invoices, Unposted Checks and EFTs, and the total Paid this Month with shortcuts to Print Checks, Post Checks, and the Check Register report
- General Ledger Software (GLS) – displays an overview of your Bank Accounts and a list of Recent Bank Transactions
- Trust Accounting Software (TAS) – displays an overview of your Bank Accounts and a list of Recent Trust Transactions
- Positive Pay
- Positive Pay export from APS and TAS helps provide fraud protection
If you are using Version 19 and are on maintenance, you can jump on board early with these new features. To sign up, visit Tabs3.com/prerelease. If you have any questions, please email signup@tabs3.com.
If you don’t already use the Tabs3 Financial software, you may not realize the power of fully integrated software.
Trust Accounting – Track and reconcile deposits and payments for an unlimited number of client trust accounts. See warnings when an account goes below a minimum balance and prevent negative balances. Payments to your firm from a client’s trust account can automatically create payments in Tabs3 Billing. Trust balances also appear on work-in-process reports and on client statements in Tabs3 Billing. Print checks from your clients’ trust accounts. Use the Three-Way Reconciliation Report to ensure the accuracy of your trust balances.
General Ledger – Create Balance Sheet, Income Statement, Trial Balance, Statements of Cash Flow, and Journal reports for you and your accountant. General Ledger software comes with a chart of accounts for law firms that you can use or modify to fit your current account structure. Reconcile bank statements, print financial statements, and ensure your accounts stay balanced. Track all Advanced Client Costs across Tabs3 Billing, Accounts Payable, and General Ledger.
Accounts Payable – Stay on top of your cash flow by tracking cash requirements, invoice aging, and vendor accounts. Track invoices and keep a list of all vendors in one place. Print a batch of checks or use the Quick Print feature to print a single check. Easily see when cost advances billed in Tabs3 have been paid. See all of your checks in one easy-to-use check register. Save time and avoid having to re-enter payables on a regular basis by using recurring transactions.
To learn more about what you may be missing out on, take a look at Knowledge Base Article R11715, “Tabs3 Financial Software Resources (APS, TAS, GLS).” This article provides a list of resources pertaining to the Tabs3 Financials software, including integration, reconciliation, frequently asked questions, year-end overviews, checks, trust account regulations, troubleshooting, guides, report packs, and more.
Our Knowledge Base can be accessed at support.Tabs3.com. You can also access our Knowledge Base while in the software by selecting Help | Internet Resources | Knowledge Base.
We are looking for firms to provide early feedback on Tabs3 version 2020. The following features will be available in Tabs3 Version 2020 later this year:
- LawPay
- Tabs3 Billing – LawPay integration adds a new option for processing electronic payments and client funds deposits
- Trust Accounting Software (TAS) – LawPay integration adds a new option for processing electronic Trust deposits
- Dashboards
- Tabs3 Billing – displays Aged Accounts Receivable, Unbilled work, and graphs comparing the last two years of Cash Receipts and Billing History
- Accounts Payable Software (APS) – displays Unpaid Invoices, Unposted Checks and EFTs, and the total Paid this Month with shortcuts to Print Checks, Post Checks, and the Check Register report
- General Ledger Software (GLS) – displays an overview of your Bank Accounts and a list of Recent Bank Transactions
- Trust Accounting Software (TAS) – displays an overview of your Bank Accounts and a list of Recent Trust Transactions
- Positive Pay
- Positive Pay export from APS and TAS helps provide fraud protection
If you are using Version 19 and are on maintenance, you can jump on board early with these new features. To sign up, visit Tabs3.com/prerelease. If you have any questions, please email signup@tabs3.com.
A new look, faster processing time, and better reporting – Data File Integrity Check (DFIC) has been updated for Version 19!
New Look
The Data File Integrity Check window has been updated to include information on the last completed integrity check and provides a link to the last report with errors. You can optionally run a Full Scan or a Limited Scan (previously Read Only). The Full Scan requires exclusive access to the program, providing a complete check of your data and automatically fixing certain errors. The Limited Scan can be run while other users are in the software; however, it is typically slower to complete, may not report all errors, and cannot automatically correct any issues that it identifies.

Faster Processing Time
In the Platinum version of the software, the Tabs3 Billing and PracticeMaster DFIC is now processed at the server using the Platinum accelerators. This reduces network traffic as well as the time it takes to complete.
Better Reporting
When errors are encountered, a PDF of the Data File Integrity Check Error Report is automatically created and stored in the Current Working Directory. The software will maintain the last five reports for each program. The latest report can be accessed from the Data File Integrity Check window, and all five can be accessed from the Support Log (View | Log Files | Support Log). The DFIC Report has been enhanced to be easier to read, and includes information about how long the report took to complete and what options were used. See KB Article R11796, “Data File Integrity Check Error Reports” for additional information about what is included on these updated reports.
Did you know that software updates are included with maintenance at no additional charge? Our maintenance plan is best known for its first class technical support; however, there are more benefits to having maintenance!
The following benefits are included for firms on maintenance:
- You are assured of having access to the most up-to-date software available, including new reports and features, at no additional cost. The cost to receive each major update to the software for those without maintenance will be more than the annual cost of maintenance.
- You have access to free technical support from our trained representatives during business hours. Without maintenance, technical support charges are currently $50 for each 15-minute interval or fraction thereof.
- Maintenance preserves the value of the software license so you may apply the full purchase price toward an upgrade (traditional license).
If you’re considering not renewing your maintenance, consider how losing access to new versions, new features, and technical updates may affect your firm. Staying on maintenance not only ensures that you have someone to call for help, but that you have access to the most up-to-date software.
Not only can you easily search for any actions, file, or report in the software via Search Actions, but you can also customize the Quick Launch pane to always show your most used actions and most accessed client matters!
The Customizing and using Quick Launch video shows you how to make the most out of the Quick Launch pane. Learn how to pin and unpin the Quick Launch pane, use the Search action feature, pin items to the Pinned Actions and matters to the Pinned Matters groups, move items around, and more!
Quick Launch makes it easy to navigate the software, lets each user customize the contents, and is available in all Tabs3 and PracticeMaster programs.
Watch this three-minute video here:
Training Videos can be accessed at Tabs3.com/videos. You can also access the videos while in the software by selecting Help | Training Videos.
People rely on their credit cards more and more to pay for things like clothes, medical procedures, and legal services.
Two reasons law firms decide to accept credit cards are because clients pay faster, which allows firms to spend less time collecting on past due bills and clients are more likely to pay their bill in full, which allows firms to reduce the amount they write off.
If you accept credit cards, there is no better way than with Tabs3. Credit card payments can be entered directly into Tabs3, or a link can be emailed to a client for them to pay online. When a client pays online, their payment information can be imported into Tabs3 so there is no double entry. When a credit card payment is entered directly into Tabs3, it is automatically processed and the funds are deposited into your existing bank account.
If you use Tabs3 Trust Accounting Software, you can have trust account payments deposited into a separate account from where processing fees are deducted. This integration takes the guesswork out of bank account reconciliation and helps you comply with many state bars’ rules regarding commingling funds.
We are partnered with ProPay, a TSYS company, to provide you with credit card processing that is better than ever.
- No more waiting days to start accepting credit cards. With ProPay, you can start accepting credit cards within minutes.
- No more confusing price structures or price negotiations. With ProPay, rates are low and easy to understand.
- No more lengthy SAQ questionnaires to complete. With ProPay, you only have to complete a simplified annual SAQ questionnaire to achieve PCI compliance.
If you’re interested in accepting credit cards, you can sign up in minutes at Tabs3.com/ProPay. If you have any questions regarding processing credit cards in Tabs3, contact your local consultant, or contact Technical Support at (402) 419-2210.
Wondering what all the fuss is over the new look of Version 19, but don’t have time to read up on it? It takes less than two minutes to watch it in action.
The What’s New in Version 19 video provides a quick overview of some of the coolest new features in 19 – the new look and navigation! Watch this video to see how the new font and text size changes the way you view the software. You can also see how to access the features you use most quicker than ever via the Home Page, Tabbed Interface, Quick Launch, and the PracticeMaster Dashboard.
Watch this two-minute video here:
Training Videos can be accessed 24 hours a day, 7 days a week, at Tabs3.com/videos. You can also access Training Videos while in the software by selecting Help | Training Videos.
You may have already heard that Version 19 has been released, but you might have a few questions prior to updating, or while using the new version for the first time. Knowledge Base Article R11745, “Version 19 Frequently Asked Questions,” provides a list of questions that may come up while working with the new version.
Frequently asked questions (FAQs) in this article are broken down into categories for each program (e.g., Tabs3 Billing, PracticeMaster, etc.). Many FAQs are also provided regarding the new look, including questions on the new tabbed interface, how to quickly get to the Home page and the Quick Launch, changing Theme Settings, and more.
For in-depth information on all of the new Version 19 features, including screenshots, see the What’s New List or Knowledge Base Article R11744, “Version 19 Introduction to New Features.” A list with links to all Version 19 information can be found in R11746, “Version 19 Information and Resources.”
Our Knowledge Base can be accessed 24 hours a day, 7 days a week, at support.Tabs3.com. You can also access our Knowledge Base while in the software by selecting Help | Internet Resources | Knowledge Base.
If you’ve updated to Version 19, then you’re familiar with the new look. But did you know that you can customize it? We introduced several updates to the look of Tabs3 including a new font, larger text size, a tabbed interface, Home page, Quick Launch, and more. Many of these options can be changed via Theme Settings (View | Theme Settings). Let’s take a look at all of the options in the Theme Settings window.
General Settings tab
The General Settings tab of the Theme Settings window allows you to configure what features of the application are shown when you start the software. Theme settings are saved for each user.
The following Navigation options can individually be shown or hidden:
- Quick Launch –The Quick Launch is used to find any program or report quickly and easily via the Search Actions box, as well as to see recently used programs and reports, and pin those you use frequently for easy access.
- Home Page – Much like the Task Folders in previous versions of the software, the Home Page contains groups of icons used to access the various programs and reports within each application.
- Task Folders – Task Folders were used for navigation in Version 18 and prior.
- Application Toolbar – A moveable Application Toolbar is shown. Keep in mind that regardless of this setting, the application icons are always shown at the bottom of the Quick Launch.
- PracticeMaster Task Bar – The PracticeMaster Task Bar provides the ability to start commonly used PracticeMaster programs and tasks. This option is only available in PracticeMaster.
The following Interface options are available
- Tabbed – Select this option to display the various windows in the current system’s main application window as maximized, with tabs across the top to easily switch between active windows.
- Windowed – Select this option to display the various windows in the current system’s main application window in separate windows that can be positioned as desired.
- Open Maximized – Select this option if you always want windows opened in a maximized state. Open Maximized is only available when Windowed is selected.
- Minimize PracticeMaster to Tray – When this option is selected and PracticeMaster is minimized, the PracticeMaster taskbar button is removed. A PracticeMaster icon is displayed in, and can be opened via, the Windows system tray. This option is only available in PracticeMaster.
- Set to Standard Theme – Clicking the Set to Standard Theme button will select only the Quick Launch, Home Page, and Tabbed options.
- Set to Classic Theme – Clicking the Set to Classic Theme button will select only the Task Folders, Application Toolbar, PracticeMaster Task Bar, and Windowed options.
Text Size tab
- The Text Size tab of the Theme Settings window allows you to configure how large the text is displayed throughout the software. Theme settings are saved for each user.
- Large – Select this option to use a 10pt font size.
- Medium – Select this option to use a 9pt font size.
- Small – Select this option to use an 8pt font size. This matches the font size used in prior versions of the software (i.e., Version 18 and earlier).
- Note: Depending on your operating system, screen resolution, and scaling options, one of the Text Size options will be noted as Recommended.
Accounts Payable Software (APS) and Trust Accounting Software (TAS) allow you to view 1099 information on reports, print 1099-MISC forms for filing, or create a 1099 Disk File which can be used to electronically file with the IRS. Using both APS and TAS together allows you to create a combined file by merging your TAS data into APS to run one set of 1099 forms or create a single electronic file.
Continuous 1099 Forms can be ordered directly from the IRS. However, for laser printer forms, we recommend ordering 1099 Forms from Nelco®. These forms are guaranteed 100% compatible with APS and TAS. Likewise, you can order W-2 Wage and Tax Statement laser forms from Nelco. Now is a good time to take inventory of your 1099 forms, Accounts Payable checks, and Trust Accounting checks so you can order them all at the same time! Nelco has over 50 years of experience in the business forms industry. Order today by calling 1-800-266-4669 or go to nelcosolutions.com/Tabs3.
Tabs3 version 19 has been released, and there are many great new features! The following features are only some of the enhancements we made for this version:
All Tabs3 & PracticeMaster Software
- New Look – Includes larger font, new color, theme, and navigation options.
- New Quick Launch – Provides a search bar to search for actions, includes your recent matters and recent actions, and lets you pin and reorder your frequently used matters and actions.
- New Tabbed Interface – Quickly switch between open windows.
- New Home Page – The new Home Page provides a modern look and feel while keeping the accessibility of the classic Task Folders.
- New Theme Settings – Each user can customize their own theme for each product.
Tabs3
- Tabs3 Online Payments – Added the ability to include a ProPay payment link with your emailed statements allowing clients to pay their bill online.
- Recap of Hours – New graphical Recap of Hours with daily, weekly, and monthly options that shows billable and non-billable hours and amounts.
- Reorder Fees on Statements – The new Reorder Fees utility allows you to change the order in which fees with the same date appear on statements.
- Write-Up/Write-Down Fees and Costs Across Matters – You can now write-up or write-down all matters for a client at the same time.
- Apply Payments to Multiple Matters – Payments for multiple matters can now be applied to individual statements.
- Better Handling of Credit Transactions – Entering credits for paid transactions will automatically apply the credit to accounts receivable when the statement is updated. Produce a credit memo by running a statement with only credit transactions.
PracticeMaster
- Batch Journal Record Creation from Outlook – Added the ability to create journal records from multiple Outlook email messages at the same time.
- Designate Restricted Fields – Added the ability to prevent editing of specific fields by designating which users have rights to edit restricted fields in a file.
- Recap of Hours – New graphical Recap of Hours with daily, weekly, and monthly options that shows billable and non-billable hours and amounts and optionally includes unprocessed timer records.
- Dashboard – New dashboard on the Home page shows the user’s calendar, task list, and recap of hours.
- Outlook Plug-in – Added a new Attach PM Document button to the Outlook Plug-in toolbar that makes it easy to attach PracticeMaster documents while composing email in Outlook.
General Ledger
- New Statement of Cash Flows Report – Added a new Statement of Cash Flows Report that shows how changes in Balance Sheet and Income Statement accounts affect the firm’s cash flow.
- New Advanced Client Costs Report – Added a new Advanced Client Costs Report that makes it easier to reconcile advanced client costs between Tabs3, Accounts Payable (APS), and General Ledger (GLS).
Accounts Payable
- Designate Vendors and Bank Accounts as Inactive – Added the ability to designate vendors and bank accounts as inactive.
- New EFT Transaction Type – Added a new Transaction Type of EFT, making it easy to record invoices that were paid electronically.
- Print Checks – The Select Invoices to Print feature now displays the number of invoices selected and total amount to pay. Added a Tabs3 column that shows if the invoice is paid, unpaid, or not associated to a Tabs3 cost. Added the ability to exclude invoices with unpaid Tabs3 cost transactions.
- Check Register & Report Improvements – The Tabs3 section of the reports has been enhanced to include the Tabs3 Tcode number, Transaction Type (“E” for Expense or “A” for Advance), and Payment Status (Paid or Unpaid), thus making it easier to reconcile Advanced Client Costs.
Trust Accounting
- Designate Bank Accounts as Inactive – Added the ability to designate a bank account as inactive.
Tabs3 Connect
- Recap of Hours – New graphical Recap of Hours with daily, weekly, and monthly options that shows billable and non-billable hours and amounts.
- Fee Entry – Added the Timekeeper field making it easy to add fees for other timekeepers. Added the Bill Code field making it easy to override the default billable or printable status.
For in-depth information on all of the new Version 19 features, including screenshots, see the What’s New List or Knowledge Base Article R11744, “Version 19 Introduction to New Features.” A list with links to all Version 19 information can be found in R11746, “Version 19 Information and Resources.”
To download Version 19, select Check for Updates from the Help menu, visit Tabs3.com/support/update/v19upd.html, or contact your local consultant.
If you have any questions about the update, please contact your consultant, or contact Technical Support at (402) 419-2210.
Have you ever wanted to change the size of the windows, menus, page tabs, lists, and messages in the software? How about changing the font face and size on your PracticeMaster forms? Version 19 introduces a new, larger default font in the software and allows you more control over font via new customization options.
Knowledge Base Article R11778, “Customizing Fonts and Colors in Tabs3 Software,” discusses customizing the appearance in Tabs3 and PracticeMaster programs, customizing the printed output, and some common questions and answers. Included in this article is more information on the new Theme Settings, form designer changes, how to manually change the font, and how Windows personalization settings affect the color and font size in Tabs3 and PracticeMaster software.
Our Knowledge Base can be accessed 24 hours a day, 7 days a week, at support.Tabs3.com. You can also access our Knowledge Base while in the software by selecting Help | Internet Resources | Knowledge Base.
We wanted you to know that our family of products has grown – we recently acquired CosmoLex! CosmoLex is a leading provider of cloud legal practice management, billing, and accounting software.
Our three product lines together – Tabs3, Kurent, and CosmoLex – now serve over 100,000 legal professionals in the United States and Canada. By adding CosmoLex to our Kurent and Tabs3 product lines, we now have the most complete offering of billing, financial, and practice management software for solo to midsized law firms; whether you want a desktop or cloud solution.
The following products are now offered by Tabs3 Software:
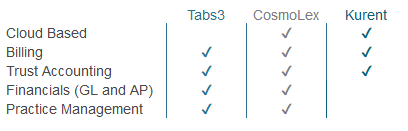
Want to learn more about what CosmoLex can do for you? Check out this CosmoLex overview video!
As a Tabs3 client this news does not affect you unless you are interested in a cloud product. If you are, please email sales@tabs3.com for more information about Kurent and CosmoLex. For more information on this exciting news, check out our CosmoLex Press Release.
Did you know that you can press Ctrl+Shift+F to open the Fee file and Ctrl+M to open the Matter Manager or Client Manager? Most people are aware of standard keystrokes, such as Ctrl+S to Save, Ctrl+C to Copy, Ctrl+V to Paste, etc. However, there are many more shortcuts to help save time in Tabs3 and PracticeMaster without your hands leaving the keyboard!
Tabs3 and PracticeMaster provide two lists of keyboard shortcuts and keystrokes to help speed up your data entry. These can each be found via Help in any of our software by pressing F1 and then entering “keyboard shortcuts” and “keystrokes” on the Index tab. We recommend printing these lists out as a reference until you get used to the ones you need most.
Going between keyboard and mouse to access everyday tasks may not seem very time consuming, but the time it takes for those extra clicks can add up. Check out which keyboard shortcuts and keystrokes will save you time today!
Are you familiar with how the Tabs3 and PracticeMaster software integrates? One of the key features of Tabs3 and PracticeMaster software is how tightly our billing, practice management, general ledger, accounts payable, and trust accounting software all work together.
Knowledge Base Article R11143, “Integration Overview of Tabs3 and PracticeMaster Software,” provides an overview of how the Tabs3 and PracticeMaster software integrates. Brief information and notes on how each piece integrates are provided for the following:
Tabs3 Billing Software
- TAS to Tabs3
- APS to Tabs3
- PracticeMaster to/from Tabs3
- Tabs3 Remote to Tabs3
- Cost Recovery to Tabs3
- Tabs3 to Taskbill
Tabs3 General Ledger Software (GLS)
- Tabs3 to GLS
- TAS to GLS
- APS to GLS
- Payroll to GLS
- Third Party Software Journal Entries to GLS
Tabs3 Trust Accounting Software (TAS)
- Tabs3 to TAS
- Third Party Software Trust Transactions to TAS
Tabs3 Accounts Payable Software (APS)
- TAS to APS
- Third Party Software Invoices to APS
Take a moment to review how our software integrates and see what will help your daily, weekly, and monthly process!
If you want more details on how integration between various software works, check out our comprehensive Integration Guide at Tabs3.com/docs.
Our Knowledge Base can be accessed 24 hours a day, 7 days a week, at support.Tabs3.com. You can also access our Knowledge Base while in the software by selecting Help | Internet Resources | Knowledge Base.
Did you know that you can see who is currently logged into the software? The Active User List shows you who’s in, and which programs they are currently accessing. This can be helpful when you want to get everyone out of the software for maintenance. By accessing the Active User List via View | Active User List, you can see who you need to have close the software.
When opening the Active User List, a window is displayed with all users who are in the currently open software (e.g., if you open the Active User List from PracticeMaster, users in PracticeMaster will be displayed). Additionally, you can see which computer they are logged into, and which file they are accessing in the software. Manager users will also have an All Systems check box and a Reset button. When the All Systems check box is selected, all users in all programs will be listed. The Reset button allows managers to reset a user, which closes the software on that user’s computer. (Note: Resetting users is not recommended in most situations, and should only be used when the user in question is not in the software.)
Manager users can always access the Active User List, but other users can be given access rights, or have access rights removed for this feature.
To add or remove rights to the Active User List
- From the System Configuration File menu, point to Open and select Access Profile.
- From the System Activity tab, select the desired Access ID.
- In the System Options section, select the Display Active User List check box.
- Press Ctrl+S.
The next time you want to see who is currently in the software, check out the Active User List!
We are pleased to announce that we have selected ProCirrus as our Preferred National Cloud Hosting Partner. Hosting providers like ProCirrus can make managing your technology much easier. Instead of installing and maintaining programs like Tabs3 on your server, you login to the programs from a secure website that ProCirrus maintains. ProCirrus is a full-service cloud hosting company that specializes in providing hosting services for the legal industry. You can find more information about ProCirrus on their website at:
- ProCirrus – www.procirrus.com
“We are very excited to become the Preferred National Cloud Hosting Partner for Tabs3 Software and combine their feature-rich applications with our full-service cloud,” said Dan LeBaron, Chief Technology Officer. “With over a decade of successful Tabs3 hosting, our partnership represents a better overall solution and support for both our current and future mutual clients.”
You can learn more about the various cloud options available in the following resources:
- Knowledge Base article R11722 – Tabs3 in the Cloud
- Our Tabs3 in the Cloud white paper
If you are thinking about switching to a hosted provider, be sure to include ProCirrus on your list of potential service providers.
Do you have a question about the software? Any questions that you want to ask have likely been asked by others as well. Because of this, we have created several targeted Frequently Asked Questions (FAQs) articles, and made it easy to access them all in one place.
Knowledge Base Article R11567, “Frequently Asked Questions for All Products,” provides a list of articles answering FAQs. Articles are grouped by general, software features, and version specific questions.
- General FAQs include year-end and software specific articles, such as Platinum, Tabs3 Billing, PracticeMaster, and more.
- FAQs for software features include articles on printing, credit card processing, Tabs3 Connect, and more.
- Version specific FAQs include articles geared toward questions about new features in each version.
Our Knowledge Base can be accessed 24 hours a day, 7 days a week, at support.Tabs3.com. You can also access our Knowledge Base while in the software by selecting Help | Internet Resources | Knowledge Base.
Effective immediately, we have reduced the monthly subscription plan rates for our Platinum SQL levels of Tabs3 and PracticeMaster software by 20%. Tabs3 Billing and PracticeMaster software are now each $32/month per user and Tabs3 Financial Software is $8/month per user.
“We are excited about this reduced pricing for clients choosing to pay for our Platinum SQL level of our software on a monthly per user subscription basis,” said Dan Berlin, President and CEO of Tabs3 Software. “This makes it even more affordable to have the ability to enter fees and costs from your mobile device via Tabs3 Connect, take better advantage of the speed of your firm’s computer, and more.”
The subscription pricing model features a low monthly cost that includes all the benefits of being on maintenance, including free technical support and free updates, plus access to the most award-winning software in the industry.
If you are interested in upgrading to Platinum SQL via monthly subscription, contact either your local consultant or our sales team at (402) 419-2200.
You have a special font you downloaded for your firm to use for statements and reports. Although you print some statements and reports, you also e-mail PDFs of statements and reports to certain clients and third parties. However, did you know that if the e-mail recipient doesn’t have that font installed, the font will be replaced by a different one? When a designated font in a PDF file is not installed on the reader’s computer, the closest substitution font is found and used, but sometimes this can make the PDF more difficult to read.
The solution? You can specify that the font be embedded into the PDF, so that it reaches your recipients as expected.
To embed fonts in PDF files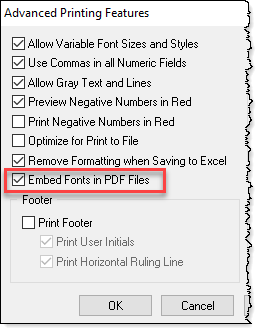
- From the File menu, select Print Setup.
- Select the Printer you use to print statements.
- Click the Advanced Printing Features button.
- Select the Embed Fonts in PDF Files check box.
- Click OK on the Advanced Printing Features window.
- Click OK on the Printer Setup window.
Note: PDF files with embedded fonts have a larger file size, which may lengthen the processing time when e-mailing statements. Additionally, some fonts cannot be embedded due to copyright laws.
You don’t need to skip the specialty font for your firm; embed the font so that others can view the file as intended!
Did you know that we release enhancements to the software on a regular basis? Enhancements can range from fixing issues we have found to adding new functionality that helps make the software work better. Although we don’t typically announce these changes, you can quickly and easily check to see if there are any new updates available from within the software.
When checking for updates (Help | Check for Updates), you can see if the software is up to date, an update is available, or a new version is available. Additionally, if we make a change to the software that fixes an issue that may have caused any inaccuracy in your data, we will release a Critical Update. A Critical Update will be displayed when you start the software so that you know it is available right away and can download the update.
For more information on update notifications, visit Knowledge Base Article R11539, “Tabs3 and PracticeMaster Update Notification.” This article provides information on the various notifications, downloading an update, configuring access profiles for rights to check for updates, troubleshooting, and frequently asked questions.
Keeping the software up to date is important. Make checking for updates part of your regular task list.
Our Knowledge Base can be accessed 24 hours a day, 7 days a week, at support.Tabs3.com. You can also access our Knowledge Base while in the software by selecting Help | Internet Resources | Knowledge Base.
Did you know that you can print a check directly from the Invoice/Manual Check window in Accounts Payable Software (APS) and the Trust Transactions window in Trust Accounting Software (TAS)?
You don’t have to use the Print Checks program to print a single check. Instead, you can use the quick print option in either program.
To quick print a single check in APS
- From the File menu, point to Open and select Invoice/Manual Checks.
- Select the desired Vendor.
- Select the desired invoice or create a new one.
- Click the
 icon or press Ctrl+Shift+P.
To quick print a single check in TAS
- From the File menu, point to Open and select Transaction.
- Select the Trust ID.
- Select the desired transaction or create a new one.
- Click the
 icon or press Ctrl+Shift+P.
The quick print feature in APS and TAS is a quick and easy way to print a check that you need now. Try it out the next time you don’t need or want to run an entire batch of checks.
System Configuration isn’t a program you work in everyday like Tabs3 Billing, but is geared toward setting up certain features of the software. So what settings are controlled in System Configuration, and how do you access it?
Many settings in the software can be set up once and you’re done, but others may need to be updated such as when employees come and go, your server equipment changes, or your firm changes and grows. Although each individual program (Tabs3 Billing, PracticeMaster, etc.) has program-specific customization settings, many System Configuration settings affect more than just a single program.
Note: Manager Access Rights are required to access many of the settings in System Configuration.
System Configuration is used to set up the following features:
- Users and Groups, including Calendar Rights and Tabs3 Connect settings
- Access Rights
- Firm Info
- Outgoing E-mail Configuration
- Microsoft Exchange Integration
- Platinum settings
- …and more!
How to access System Configuration
You can open System Configuration via your desktop shortcut, if present, or via the ![]() Application Toolbar from any of the Tabs3 software. The Application Toolbar is typically located on the right-hand side of the main window and includes buttons for all Tabs3 software for which you have access rights. For more information about accessing System Configuration, press F1 while in the Tabs3 software and enter “System Configuration” on the Index tab.
Application Toolbar from any of the Tabs3 software. The Application Toolbar is typically located on the right-hand side of the main window and includes buttons for all Tabs3 software for which you have access rights. For more information about accessing System Configuration, press F1 while in the Tabs3 software and enter “System Configuration” on the Index tab.
The Data File Integrity Check (DFIC) and Archive File Integrity Check (AFIC) are important tools used to test data files for valid information and structure. The DFIC can be run from any Tabs3 and PracticeMaster program via Utilities | Data File Integrity Check, whereas the AFIC is run from Tabs3 Billing via Utilities | Archive Integrity Check.
If errors are found when the DFIC or AFIC is run, a report is available to preview or print out. The report provides information on the error(s), including the Error Code and where the error is located in the system (e.g., field, file, client, etc.). DFIC Error Codes can be found in Knowledge Base Article R11653, “Data File Integrity Check Errors,” and AFIC Error Codes can be found in Knowledge Base Article R10771, “Archive File Integrity Check Errors.” These articles provide links to information on what the error means, potential causes of the error, and how to resolve the error.
But when and how often should you run the DFIC and AFIC? We recommend running these checks at the following times:
- Before backups.
- During month-end procedures.
- When moving the data to a new server.
- When updating the software to a new version.
- If anything unusual occurs in the software, such as loss of network connectivity or loss of power, or when a fatal error occurs and after it is corrected.
It is very important that errors are taken care of right away. Ignoring errors in the data can compound into larger issues, making the original error more difficult to correct and in some cases not possible. Since some errors require restoring the data, ignoring these errors for long periods of time can lead to data loss, or the need to have your data repaired.
When was the last time you ran the DFIC or AFIC? You can easily see when each of these utilities has been run via the Support Log.
To use the Support Log to determine when a DFIC and/or AFIC have been run
- From the View menu, point to Log Files and select Support Log.
- Next to Features, select Specific.
- In the Select Features window, select Data File Integrity Check and/or Archive File Integrity Check (Tabs3 Billing only).
- Click OK.
- Click Print.
The DFIC and AFIC can be set up to run when opening the program or at a specific time using a startup option of “/DFIC” or “/AFIC”. Using a startup option in conjunction with a batch file can automate your DFIC and AFIC to run at any time, including after regular business hours. More information on startup options is available in the program’s Help using “startup options” for the Index keywords. Information on automating tasks can be found in Knowledge Base Article R11034, “Automating Tabs3 and PracticeMaster Maintenance Tasks.” Take the time now to verify how often your firm is running the Data and Archive File Integrity Checks so that you can implement any necessary procedural changes.
Help keep your data error free by running the DFIC and AFIC regularly.
Do you want a way to streamline trust payments to Tabs3 Billing? Trust Accounting Software (TAS) provides the ability to automatically draw funds from a trust account when final statements are generated in Tabs3.
You will no longer need to enter payments to Firm from TAS; simply enter your transactions in Tabs3, and then bill like normal. As final statements are generated in Tabs3, the software will automatically create trust transactions and Tabs3 payment records based on the client’s due amounts. This feature can be enabled or disabled on a global level, at the bank account level, and at the trust account level. You can specify whether to pay work-in-process, accounts receivable, or both; whether to pay fees, expenses, or advances from these amounts; and whether to create check or EFT transactions in TAS for these amounts.
Note: We recommend consulting your local Bar Association before enabling Automatic Trust Transactions to ensure that you are complying with local trust regulations.
To implement Automatic Trust Payments, you will need to enable TAS Integration in Tabs3 and then configure TAS Customization, the desired TAS Bank account(s), and the desired Trust Account(s). For complete step-by-step instructions on setting up Automatic Trust Payments, refer to the Integration Guide or the Automatic Trust Payments Overview topic in the TAS Help.
It’s after hours and you’ve run into some trouble printing. Something doesn’t look right, it’s printing off the page, or you need to make just a few tweaks to finish your project. However, you’re not sure what to do. What do you do? Check out the Knowledge Base, of course!
Knowledge Base Article R10469, “Frequently Asked Questions About Printing,” provides frequently asked questions regarding the following subjects:
- Printing Statements – Using letterhead for statements, centering statements on the page, reference numbers not printing on draft statements, and what the Compress Address check box in Statement Setup does.
- Printing Reports – What to do when the font is too small, and how to print landscape reports.
- Printing Checks – Printing, printing a second copy of checks, printing a duplicate stub, and printing trust information on checks.
- General Printing Questions – Stopping a print job, specifying different margins, adjusting the Preview window, changing the Offset Adjustment, fixed pitch fonts vs. proportional fonts, and configuring an additional printer.
Our Knowledge Base can be accessed 24 hours a day, 7 days a week, at support.Tabs3.com. You can also access our Knowledge Base while in the software by selecting Help | Internet Resources | Knowledge Base.
Tabs3 version 18 has been released, and update notifications have been sent to all eligible users! There are many great new features in Version 18! The following features are only some of the enhancements we made for this version:
Tabs3 Billing
- Date-Based Reports – All productivity reports are now date-based and no longer rely on advancing the current reporting month. Use the Set Current Reporting Month feature to see productivity figures from prior years.
- Print Receipts – Print a receipt for all forms of payment from the Payment window, or print a receipt for deposits from the Client Funds window.
- and more…
PracticeMaster
- Fee and Cost Entry – The Rate, Rate Code, and Sales Tax fields can now be shown. When changes are made to the Timekeeper, Date, Tcode, Activity Code, or Expense ID, the Amount can be recalculated.
- Fee Recap – A new Fee Recap button has been added to the PracticeMaster toolbar. This button lets you review fees for a timekeeper and date.
- OL Synchronization Settings Report – You can now run an Outlook Synchronization Settings Report to view synchronization settings for yourself or for all users.
- Graphical Calendar Agenda – Selecting Agenda when printing a Graphical Calendar Report will print items in a list format.
- ScanSnap™ Integration – Integration with Fujitsu® ScanSnap scanners imports documents to PracticeMaster’s Document Management program once the scan has completed. Selecting the Optical Character Recognition (OCR) option in the ScanSnap Manager makes text searchable in PracticeMaster.
- Form Designer – Align fields using the new Magnetic Snaps, or show the familiar grid and use Snap to Grid. Magnetic Snaps help align fields with other fields, whereas Snap to Grid helps position fields based on grid dots. Use keyboard shortcuts to Copy (Ctrl+C), Paste (Ctrl+V), Cut (Ctrl+X), and Undo (Ctrl+Z).
- and more…
General Ledger Software (GLS)
- Account Information Report – Print from the Balances, Budgets, or Journal Entries tab of the Account Information program to view a report with that tab’s information.
- Reports – Many changes were made to GLS reports. You can now select a Date Range for any report, making it easy to select a preset period or specify a custom range; pick multiple ranges of accounts or departments; and sort accounts in Chart of Accounts order or Account Number order. New Include options are provided for the Balance Sheet and Income Statement reports, and more.
- Bank Account Manager – View a summary of all bank and credit card accounts from one window. Optionally open a Reconciliation for the selected account, or select to Import Bank Transactions.
- Import Bank Transactions – Import Bank Transactions from an OFX, QFX, or QBO file provided by your bank or credit card company. Match imported bank and credit card transactions with General Ledger journal entries.
- Reconciliation – Optionally enter interest and service charge in the Reconciliation Settings window. View a Reconciliation Discrepancy Report if the Beginning Balance entered does not match the calculated Beginning Balance. The Reconciliation window has been updated to show side-by-side sections for transactions going out and coming in. Additionally, you can now password protect reconciliation PDFs generated by GLS and undo reconciliations finalized in Version 18.
- and more…
Accounts Payable Software (APS)
- Vendor Information – Moved the MTD, YTD, and TD Paid and Discount figures to the Vendor Activity window. These figures are all calculated automatically based on the system date.
- Vendor Analysis Report – The Vendor Analysis Report is now transaction based. Figures are based on the report date.
- and more…
Trust Accounting Software (TAS)
- Auto Trust Payments from Tabs3 – Tabs3 can now be set up to automatically create a Payment to Firm trust transaction when generating final statements, thereby paying current work, accounts receivable, or both.
- Combine Trust Transactions – Optionally combine deposits, EFTs, or checks into one combined transaction, making reconciliation easier.
- Bank Account Manager – View a summary of all bank and credit card accounts from one window. Optionally open a Reconciliation for the selected account or select to Import Bank Transactions.
- Import Bank Transactions – Import Bank Transactions from an OFX, QFX, or QBO file provided by your bank or credit card company. Match imported bank and credit card transactions with Trust Transactions.
- Reconciliation – Optionally enter interest and service charge in the Reconciliation Settings window. View a Reconciliation Discrepancy Report if the Beginning Balance entered does not match the calculated Beginning Balance. The Reconciliation window has been updated to show side-by-side sections for transactions going out and coming in. Additionally, you can now password protect reconciliation PDFs generated by TAS and undo reconciliations finalized in Version 18.
- Three-Way Reconciliation Report – A new Three-Way Reconciliation Report is available that compares the Client Trust Ledger, Reconciliation, and Check Register balances.
- Print Receipts – You can now print a receipt for deposits in addition to credit card deposits.
- and more…
For in-depth information on all of the new Version 18 features, including screenshots, see the What’s New List or Knowledge Base Article R11647, “Version 18 Introduction to New Features.” A list of all Version 18 information can be found in R11646, “Version 18 Information and Resources.”
To download Version 18, visit Tabs3.com/support/update/v18upd.html.
If you have any questions about the update, please contact your reseller and consultant, or contact Technical Support at (402) 419-2210.
When you need to refund or reverse credit card payments, you want to be able to do it with the least amount of hassle. Tabs3 Billing and Trust Accounting Software (TAS) are designed to automatically issue a ProPay refund or reversal when appropriate.
Knowledge Base Article R11708, “Credit Card Refund Best Practices,” provides information on how ProPay handles credit card reversals and provides processes for reversing, refunding, or deleting credit card payments or transactions in Tabs3 Billing and TAS.
Be sure to check out this article so that you are using the recommended methods to refund or reverse ProPay credit card payments.
Our Knowledge Base can be accessed 24 hours a day, 7 days a week, at support.Tabs3.com. You can also access our Knowledge Base while in the software by selecting Help | Internet Resources | Knowledge Base.
Did you know that you can change your Tabs3 and PracticeMaster workspace by specifying whether toolbars are shown or not, and where they are positioned if they are shown? These options can increase the available workspace horizontally, vertically, or both.
Showing or hiding toolbars
From the View menu, a ![]() indicates that the Status Bar, Application Toolbar, and in PracticeMaster, the PracticeMaster Task Bar is shown. To change which toolbars are shown or hidden, simply click the menu option to change the status of the toolbar.
indicates that the Status Bar, Application Toolbar, and in PracticeMaster, the PracticeMaster Task Bar is shown. To change which toolbars are shown or hidden, simply click the menu option to change the status of the toolbar.
Changing the toolbar position![]()
The Menu toolbar, Application Toolbar, and in PracticeMaster, the PracticeMaster Task Bar, can all be moved to  the top, bottom, right, or left of the Tabs3 or PracticeMaster program window. Simply click the toolbar gripper, and drag it to the desired location.
Alternatively, you can drag a toolbar away from any 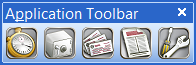 side of the program to make it a floating toolbar. When the toolbar is floating, you can optionally move it outside of the Tabs3 or PracticeMaster program window. This allows for maximum workspace, while still having access to all of the available tools.
Did you know that you can drag files other than those generated via Tabs3 and PracticeMaster software into the DropBox? This can really come in handy when you are e-mailing multiple files of mixed origins to clients, co-workers, or other third parties; when you want to save related items together in a mutual location; and more.
Once all of the desired files are in DropBox, simply select the files and choose the desired option. If you want to e-mail a group of files in the DropBox, click the e-mail icon to attach all of the files to a new e-mail message. Alternatively, you can drag the icons into the new e-mail message. If you want to save all of the files to a mutual location, click the save icon; you will be prompted to save each file individually.
Note: Files that have been dragged into DropBox are not removed from their original location.
The end of the year can be a busy time for any firm. One of the areas that firms will need to address in the coming months is the filing of IRS 1099-MISC forms. Tabs3 Accounts Payable Software (APS) and Trust Accounting Software (TAS) are designed to help ease the burden of year-end by making it easy to assemble the 1099 reporting information you need. APS and TAS allow you to view 1099 information on reports, print out 1099-MISC forms for filing, or create a 1099 Disk File which can be used to electronically file with the IRS. Using both APS and TAS together allows you to create a combined file by merging your TAS data into APS to run one set of 1099 forms or create a single electronic file.
Continuous 1099 forms can be ordered directly from the IRS. However, for laser printer forms, we recommend ordering 1099 forms from Nelco®. These forms are guaranteed 100% compatible with the APS and TAS software. Likewise, you can order W-2 Wage and Tax Statement laser forms from Nelco. Nelco is a leading expert on W-2 and 1099 reporting compliance rules and regulations. So when you work with Nelco, you won’t have to worry about keeping up to date with all the yearly reporting changes.
Contact Nelco if you have any questions regarding your W-2 and 1099 filing, or to order your forms.
Web: nelcosolutions.com/Tabs3
E-mail: Nelco@NelcoSolutions.com
Phone: (800) 266-4669
For more information about using the 1099 features of APS and TAS, refer to the “1099” Help topics for each program, which include checklists for generating 1099 information.
Backing up your firm’s data is the most important form of maintenance you can do, but many firms overlook this task. Backup prompts from within the software are skipped, and external backups are not regularly tested to verify they are working as expected. Often, this is simply due to not understanding the process.
You may have quite a few questions about backups:
- What is the difference between the built-in backup and external backup?
- How do backups work?
- What’s included in the backup?
- How is a backup restored if needed?
- How can I make sure that my strategy for backing up data is working right?
- Where do I start?
All of these topics and more can be found in Knowledge Base Article R11524, “Backup/ Restore Information Resources.” This article provides a complete list of links to articles with information and processes for backing up and restoring your data.
Don’t overlook how your firm is backing up data until it’s too late and you have to restore. Make sure you are on top of maintaining your data.
Our Knowledge Base can be accessed 24 hours a day, 7 days a week, at support.Tabs3. com. You can also access our Knowledge Base while in the software by selecting Help | Internet Resources | Knowledge Base.
Do you know how to restore from an incremental backup? Make sure you are familiar with the process of restoring before you need to do it. Incremental backups work by backing up the full dataset, and then only backing up those files that have changed from then on. This means that if you need to restore, you cannot just restore to yesterday’s incremental backup because that is only one piece of the picture. The files in Tabs3 and PracticeMaster are all connected. If only some of the files are restored, then information is missing from other files and errors can occur in the software. Instead, if a restore is necessary, you must first restore the last full backup and then restore every incremental backup in order. For more information on how your backup system works, and if it is the right system for you, talk to your IT professional.
Did you know that you can import data into all of the Tabs3 and PracticeMaster software? Knowledge Base Article R11506, “Resources for Importing Data into Tabs3 and PracticeMaster Software,” provides a list of resources with information regarding programs that can be used to import data in Tabs3 and PracticeMaster software including the following:
Tabs3 Billing – Importing costs from photocopiers, telephone systems, fax machines, and more.
PracticeMaster – Importing data from third-party programs, documents into document management, Platinum Exchange Connector, Outlook, and more.
General Ledger Software (GLS) – Integration with PenSoft Payroll and importing data into GLS using an ASCII data file.
Trust Accounting Software (TAS) – Importing data into TAS using an ASCII data file.
Accounts Payable Software (APS) – Importing data into APS using an ASCII data file.
Our Knowledge Base can be accessed 24 hours a day, 7 days a week, at support.Tabs3.com. You can also access our Knowledge Base while in the software by selecting Help | Internet Resources | Knowledge Base.